Zucchini Crostini with Pomegranate Goat Cheese Spread

Putting the words “zucchini” and “crostini” together made for a lot of fun as they rolled off my tongue…

So I decided to create something to go along with those words that would be just as fun to eat. 

And here you have it! You can have fun saying—and eating!—your Zucchini Crostini! 

Zucchini Crostini with Pomegranate Goat Cheese Spread

servings: 15 Crostini

Ingredients:

  • 4 ounces cream cheese, at room temperature
  • 2 ounces soft goat cheese, at room temperature
  • 2 teaspoons minced fresh thyme leaves
  • Zest of half a lemon
  • ½ teaspoon kosher salt
  • ¼ cup dried cranberries
  • 1 large zucchini, cut diagonally into fifteen ¼-inch-thick slices
  • ¼ cup pomegranate seeds

Directions:

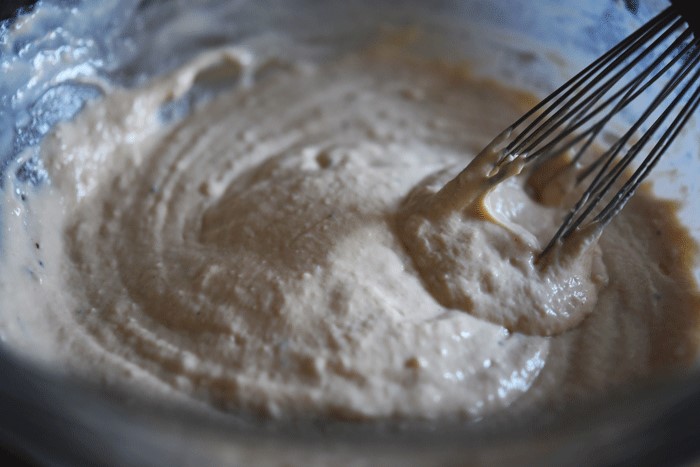
  1. Blend the cream cheese, goat cheese, thyme, lemon zest, and ¼ teaspoon of the salt in a medium bowl. Stir in the cranberries, distributing evenly.
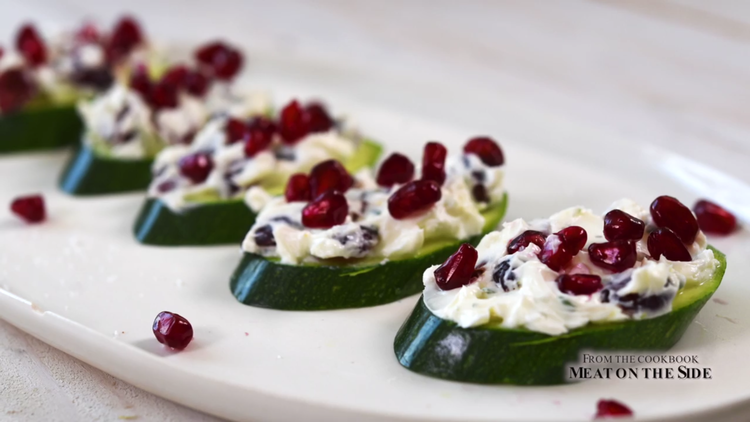
  2. Sprinkle the remaining ¼ teaspoon salt over both sides of the zucchini slices and arrange the slices on a serving platter. Divide the cheese mixture smoothly over the slices and top each with a generous sprinkling of the pomegranate seeds.

Notes:

  • KEEP IT SIMPLE - This pomegranate goat cheese combo is one of my all-time favorite spreads and it works great on classic crackers or bread, too. Just be sure to fold the pomegranate seeds into the spread if you use it this way.
  • While I’m crazy for the goat cheese, these zucchini crostini are super versatile and can be topped with anything from hummus to crab.
  • All you can find are small zucchinis? Not a problem. Just cut the zucchini on more of a diagonal for a larger slice.
: @NikkiDinki

: @NikkiDinkiCooking
 

Find more recipes like this in MORE VEGGIES PLEASE!


You might also like these recipes:

Brown Butter Garlic Carrots

If you have read my vegetable-focused cookbook, Meat on the Side, it was probably shocking to learn on page 108 that...I don’t like carrots.

Because as much as I’m a huge veggie fan, I have to say that not all veggies are created equal.

In my mind, carrots just fall low on the list.

But that doesn’t mean I don't eat them.

I know that the more I eat them, the more I’ll get used to them and develop a taste for them.

In other words, I'll actually learn to like them.

So when thinking about a carrot side dish, I knew I wanted it to be delicious to carrot-lovers, carrot-likers, and carrot-tolerators alike. 

And I figured the best way to do this was to invite some of my favorite things like brown butter and garlic to party.

In the end I seriously LOVED these carrots—like shockingly LOVED these carrots.

YOU MUST MAKE THEM!

Brown Butter Garlic Carrots

servings: 2

Ingredients:

  • One 8-ounce bunch carrots, with tops
  • 1 tablespoon olive oil
  • ½ teaspoon kosher salt
  • ¼ teaspoon ground black pepper
  • 4 tablespoons unsalted butter
  • 2 garlic cloves, finely minced
  • 1 cup panko bread crumbs
  • 1 tablespoon finely chopped chives

Directions:

  1. Preheat the oven to 425°F. Place the carrots in a single layer on a baking sheet and toss them with the olive oil, salt, and pepper. Roast in the oven until they are tender and browned in spots—about 30 minutes (If your carrots are thicker, they will take a little longer to cook).
  2. Meanwhile, add the butter to a small saucepan over medium heat, stirring until the butter stops foaming and bubbling and there are brown specks on the bottom of the pan—about 5 minutes.
  3. Remove the pan with the butter from the heat and stir in the garlic, then transfer this mixture to a small bowl and reserve; leaving 1 tablespoon in the pan.
  4. Add the breadcrumbs to the pan with the 1 tablespoon of butter-garlic mixture, stirring to combine, then cook until the breadcrumbs are toasted—2 to 3 minutes.
  5. When the carrots are done cooking, drizzle them with the reserved browned butter and garlic and toss to combine.
  6. Arrange the carrots on a serving plate and top with the breadcrumbs and chives!
: @NikkiDinki

: @NikkiDinkiCooking
 

Find more recipes like this in Meat on the Side!


You might also like these recipes:

Mushroom + Beef Sloppy Joes

Check out my OUTRAGEOUSLY good sloppy joes...

These Mushroom + Beef Sloppy Joes are from my book Meat On The Side.

If you're looking for amazing comfort food that's also good for you, you owe it to yourself to give them a shot.

The secret is that the sandwich filling is half meat, half veggies! No need to feel guilty--you can eat up and enjoy!

Mushroom + Beef Sloppy Joes

servings: 4 Sandwiches

Ingredients:

  • 1 tablespoon olive oil, plus more if needed
  • 8 ounces ground sirloin
  • 1 pound portobello mushrooms, stems discarded, caps finely chopped
  • 1 small green bell pepper, cored, seeded, and finely chopped
  • 1 small yellow onion, finely chopped
  • 1½ teaspoons kosher salt
  • ¼ teaspoon ground black pepper
  • One 8-ounce can tomato sauce
  • 3 tablespoons Worcestershire sauce
  • 2 tablespoons molasses
  • 2 tablespoons white wine vinegar
  • 1 tablespoon sriracha or other hot sauce
  • 3 tablespoons tomato paste
  • 1 teaspoon minced fresh thyme leaves
  • 4 hamburger buns
  • Finely chopped dill pickles, for serving
  • Sliced pickled banana peppers, for serving

Directions:

  1. Heat the oil in a large deep skillet over medium-high heat. Add the sirloin, breaking up with a spoon or spatula, and cook until it has browned, about 5 minutes. Then, if the skillet is too dry for sautéing the mushrooms, add a bit more oil. Stir in the mushrooms and cook until they are brown and tender, about 5 minutes.
  2. Reduce the heat to medium. Add the bell peppers, onion, ½ teaspoon of the salt, and the black pepper to the skillet and stir to combine. Cook until all the veggies are tender, 5 to 7 minutes. Meanwhile, whisk together the tomato sauce, Worcestershire sauce, molasses, vinegar, sriracha, and the remaining1 teaspoon salt in a small bowl.
  3. Add the tomato paste and thyme to the mixture in the skillet and stir to combine. Cook for 2 minutes. Then stir in the tomato sauce mixture and cook until the sauce thickens and coats the veggies and meat and all the flavors come together, 5 to 7 minutes more.
  4. To serve, spoon the sloppy Joe mixture onto the bottom half of each hamburger bun, dividing it equally, and dot with some pickles and banana peppers before adding the bun tops.
: @NikkiDinki

: @NikkiDinkiCooking
 

Find more recipes like this in Meat on the Side!


You might also like these recipes:

Buffalo Cauliflower Wings

In my book, Meat On The Side, I have a Cauliflower Wing recipe...

Cauliflower 2.jpg

I roast cauliflower and toss it with my famous (and famously simple!) Buffalo sauce.

Then I douse it with blue cheese and shaved celery, for a “salad” worthy of an Oscar (Or whatever type of award is appropriate for a salad. Probably not an Oscar, huh?).

It’s an easy and light way to get your Buffalo fix.

However, I've been playing with the whole cauliflower + Buffalo sauce thing for awhile now, and I've recently come up with a new version.

This one has just a few more calories and takes just a little more time, but in the end you are left with something that will really, truly satisfy your craving for wings.

The batter is simple—a combination of flour and milk...

You whisk it up, add some cauliflower, and suddenly start to see the magical way a piece of cauliflower can become a wing.

Once baked, you simply toss these "wings" with Buffalo sauce and, most importantly, prepare yourself to eat them all!

It’s a plate of wings that are baked—not fried! And it's cauliflower—not chicken!

Really, what more could you ask for?!

No need to send a thank you gift, just remember you owe me. ;)

Buffalo Cauliflower Wings

servings: Makes 40-50 cauliflower “wings”

Ingredients:

  • 1½ cups all-purpose flour
  • 1¼ cups whole milk
  • ¾ cup + 2 tablespoons Frank’s RedHot Original Cayenne Pepper Sauce
  • 4 teaspoons Worcestershire sauce
  • 2 teaspoons kosher salt
  • 1 teaspoon garlic powder
  • ¼ teaspoon ground black pepper
  • 1 medium head cauliflower, broken or cut into bite-size florets
  • 8 tablespoons unsalted butter (1 stick)
  • 2 tablespoon distilled white vinegar
  • 2 tablespoon light brown sugar

Directions:

  1. Preheat the oven to 475°F. Line two rimmed baking sheets with foil. Spray the foil generously with nonstick cooking spray.
  2. In a large bowl, whisk together the flour, milk, 2 tablespoons of the hot sauce, 3 teaspoons of the Worcestershire sauce, the salt, garlic powder, and black pepper.
  3. Toss the cauliflower in the batter, then spread it on the baking sheets. Bake the cauliflower until it is slightly browned in spots—about 20 minutes.
  4. While the cauliflower bakes, in a small pot, whisk together the remaining ¾ cup hot sauce, the butter, vinegar, brown sugar, and remaining 1 teaspoon Worcestershire sauce.
  5. Once the cauliflower is browned, remove it from the oven and toss it well in the Buffalo sauce. Turn on the broiler, to high if you have that option. Then return the cauliflower to the baking sheets and cook it under the broiler until it is crispy and browned in spots—2-3 minutes more. Remove the cauliflower from the oven and toss or brush it with the remaining sauce. Enjoy by serving with blue cheese.

Notes:

  • Freezing Instructions: To enjoy later, freeze the completed Buffalo Cauliflower Wings in a single layer (not touching) on a baking sheet lined with foil. Once they are frozen, remove the wings from the baking sheet, place them in a food storage bag, and put them back in the freezer until you are ready to eat them. To reheat, begin by preheating the oven to 375°F and lightly spraying a baking sheet with cooking spray. Cook the wings until they are warmed through, 10-15 minutes, depending on their size.
: @NikkiDinki

: @NikkiDinkiCooking
 

Find more recipes like this in Meat on the Side!


You might also like these recipes:

Wendy William Apperance 10-17-16

Check out Nikki Dinki on Wendy Williams!! She's cooking up Zucchini Noodle Bowls, a Pumpkin Quesadilla + Veggie Chips with Beet Hummus all from her book Meat On The Side.


Find more recipes like this in Meat on the Side!


You might also like these recipes:

Wendy Williams Apperance 2-9-16

Check out Nikki Dinki on Wendy Williams! She is cooking up some of her favorite Meat On The Side recipes and talking about the new season of Junk Food Flip!!


Find more recipes like this in Meat on the Side!


You might also like these recipes: