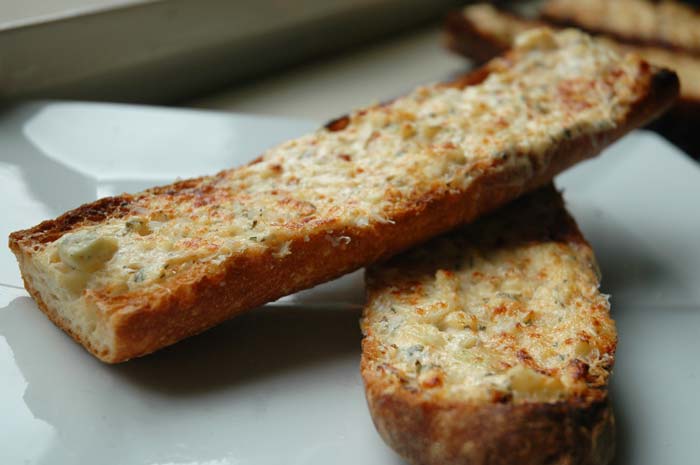
Charred Tomato Garlic Bread

I love bread.
And by that, I mean:
I. LOVE. BREAD.

And if you have a fresh loaf of bread, according to me (or you!), of course it’s good all on it’s own.
But let me tell you how it gets even better...

It's so simple to char the bread in a grill pan with a little olive oil—on high heat.
It will get mouth-wateringly crusty on the outside, while still remaining soft and chewy on the inside.

And when it’s crisp and browned, take it off of the grill pan and rub it with cut garlic and tomato.
This infuses those flavors ever-so-delicately—and just so incredibly perfectly!—into the bread.

Sprinkle this amazing bread with salt and another drizzle of olive oil, and you have definitely transported that fresh loaf of bread to a whole new level.

Charred Tomato Garlic Bread
servings: 4 to 6


Ingredients:
- One 8 X 5-inch loaf ciabatta bread (or other crusty bread)
- 2 tablespoons olive oil, more for drizzling
- 1 garlic clove, halved
- 1 medium tomato, halved
- ¼ teaspoon kosher salt
Directions:
- Heat a grill pan over high heat. Cut the loaf of bread in half length-wise and drizzle all sides of it with the olive oil. Place the bread crust side-down on the pan, and cook until grill marks appear and the bread is crusty—2 to 3 minutes. Flip the bread over, then press it down to ensure good contact with the pan; continue to cook until grill marks appear and the bread is charred in spots—2 to 3 minutes more.
- Remove the bread from the heat and and rub the cut side with the cut side of the garlic, going over the bread a few times. Then rub the bread with the cut side of the tomato, squeezing the juice out of the tomato and onto the bread as you do so.
- Sprinkle the cut side of the bread with the salt and a little extra olive oil. Serve hot and enjoy!