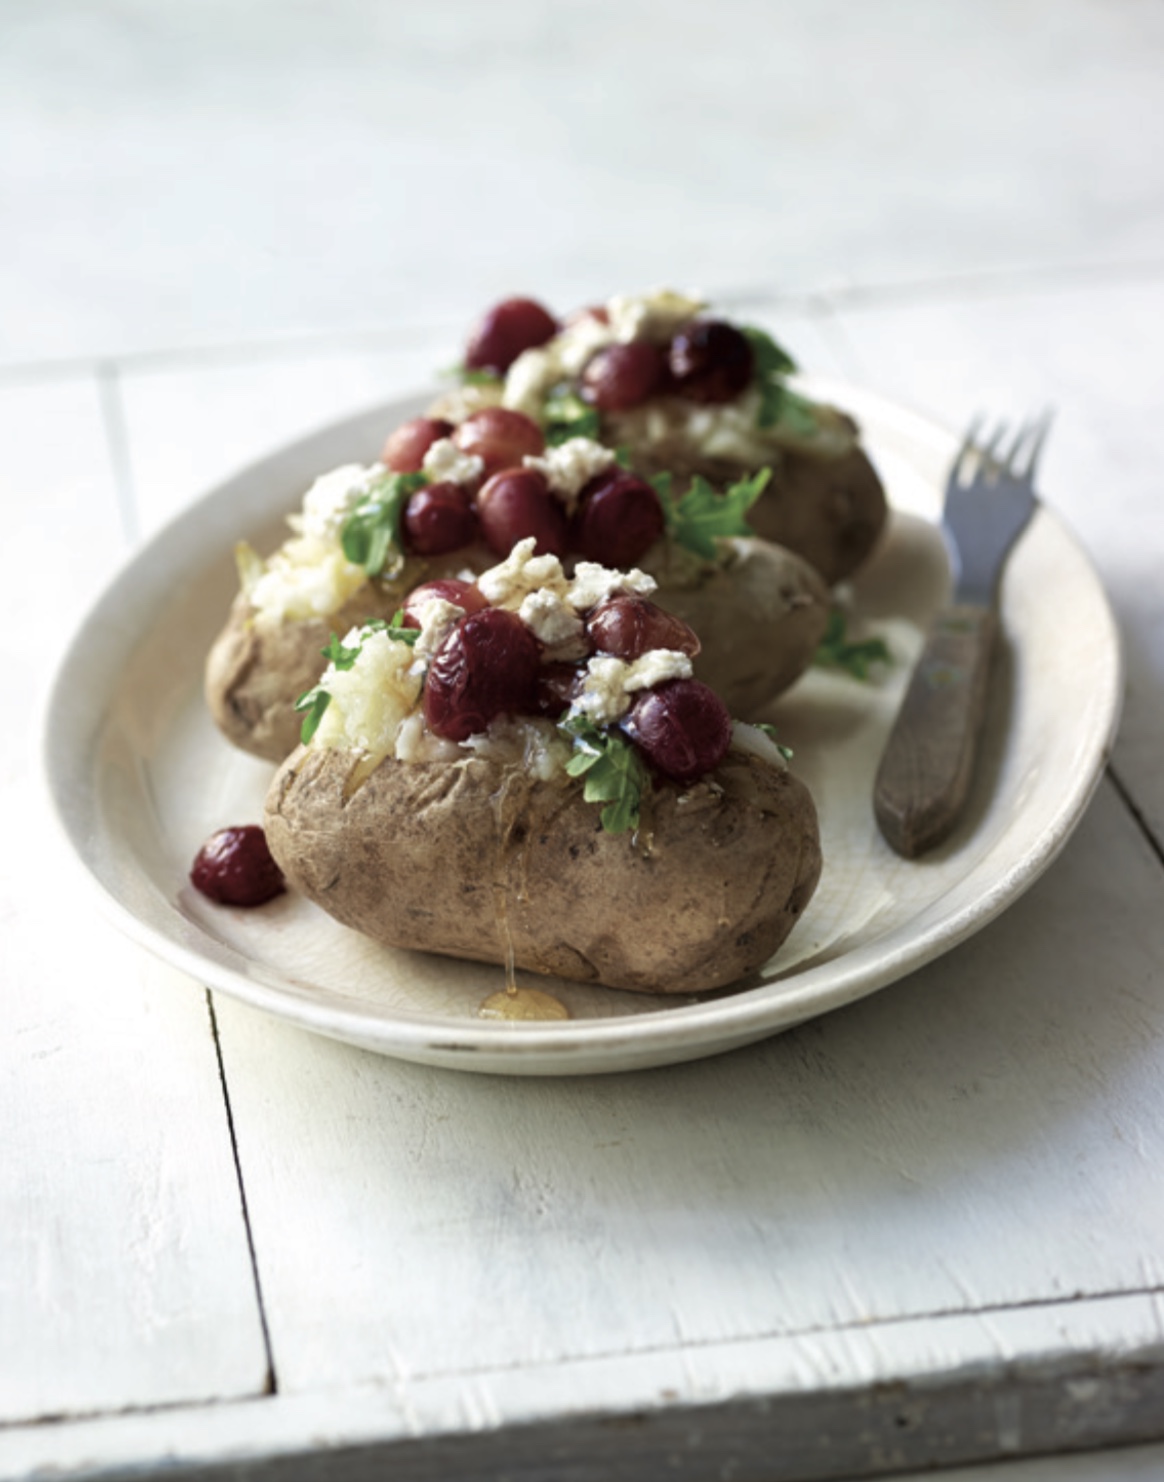
Roasted Grape, Arugula + Goat Cheese Baked Potatoes

Soft and well-seasoned potato with peppery arugula and roasted grapes that are insanely good, especially when mixed with honey and goat cheese.
It’s one of the simplest meals you can make and guaranteed to be one of your absolute favorites.
Roasted Grape, Arugula + Goat Cheese Baked Potatoes
makes: 4 baked potatoes

Ingredients:
- 4 Idaho potatoes, scrubbed + dried
- 2 tablespoons olive oil
- 1½ teaspoons kosher salt
- 2 cups red grapes
- ¼ teaspoon ground black pepper
- 2 cups lightly packed, coarsely chopped arugula
- 4 ounces soft garlic + herb goat cheese log, crumbled
- ¼ cup honey
Directions:
- Preheat the oven to 400°F. Prick each potato with a fork 5 to 10 times. Rub 1 tablespoon of the oil over the potatoes and sprinkle them with ¼ teaspoon of the salt. Place them in the heated oven, directly on the rack, and bake until they are soft when squeezed—45 to 60 minutes.
- Meanwhile, toss the grapes with the remaining 1 tablespoon oil, ¼ teaspoon of the salt, and the pepper on a rimmed baking sheet or in a medium baking dish. When the potatoes have about 20 minutes baking time left, place the grapes in the oven; when the potatoes are done the grapes should be slightly shriveled and starting to burst open.
- Slice each potato lengthwise, cutting about three-quarters of the way down. Push the ends of each toward the middle to open up a crevice. Divide ½ teaspoon of the salt over the 4 crevices and then fluff each with a fork. Add one-quarter of the arugula to each potato and divide the remaining ½ teaspoon salt over all 4; fluff again to mix the potato flesh and the arugula (you want to try and salt the entire inside of the potato).
- To serve, place each potato on a plate. Divide the cheese and grapes among them, filling the crevices, and then drizzle 1 tablespoon honey over each. Eat right away!