Broccoli Tater Tots

Broccoli Tots_BIG.jpg

Does anyone really want to eat their broccoli steamed?

Sitting there, waterlogged and sad on the side of the plate?

Broccoli Tots 1.jpg

I don’t know about you, but broccoli tater tots seem like a MUCH more exciting way to eat this green veggie!

Broccoli Tots 2.jpg

Sure, these tots take a minute or so longer than steaming up some florets, but I’ve streamlined the process for you.

And they're the perfect food to store in the freezer, so yes, you can have tots ANYTIME!

Broccoli Tots 3.jpg

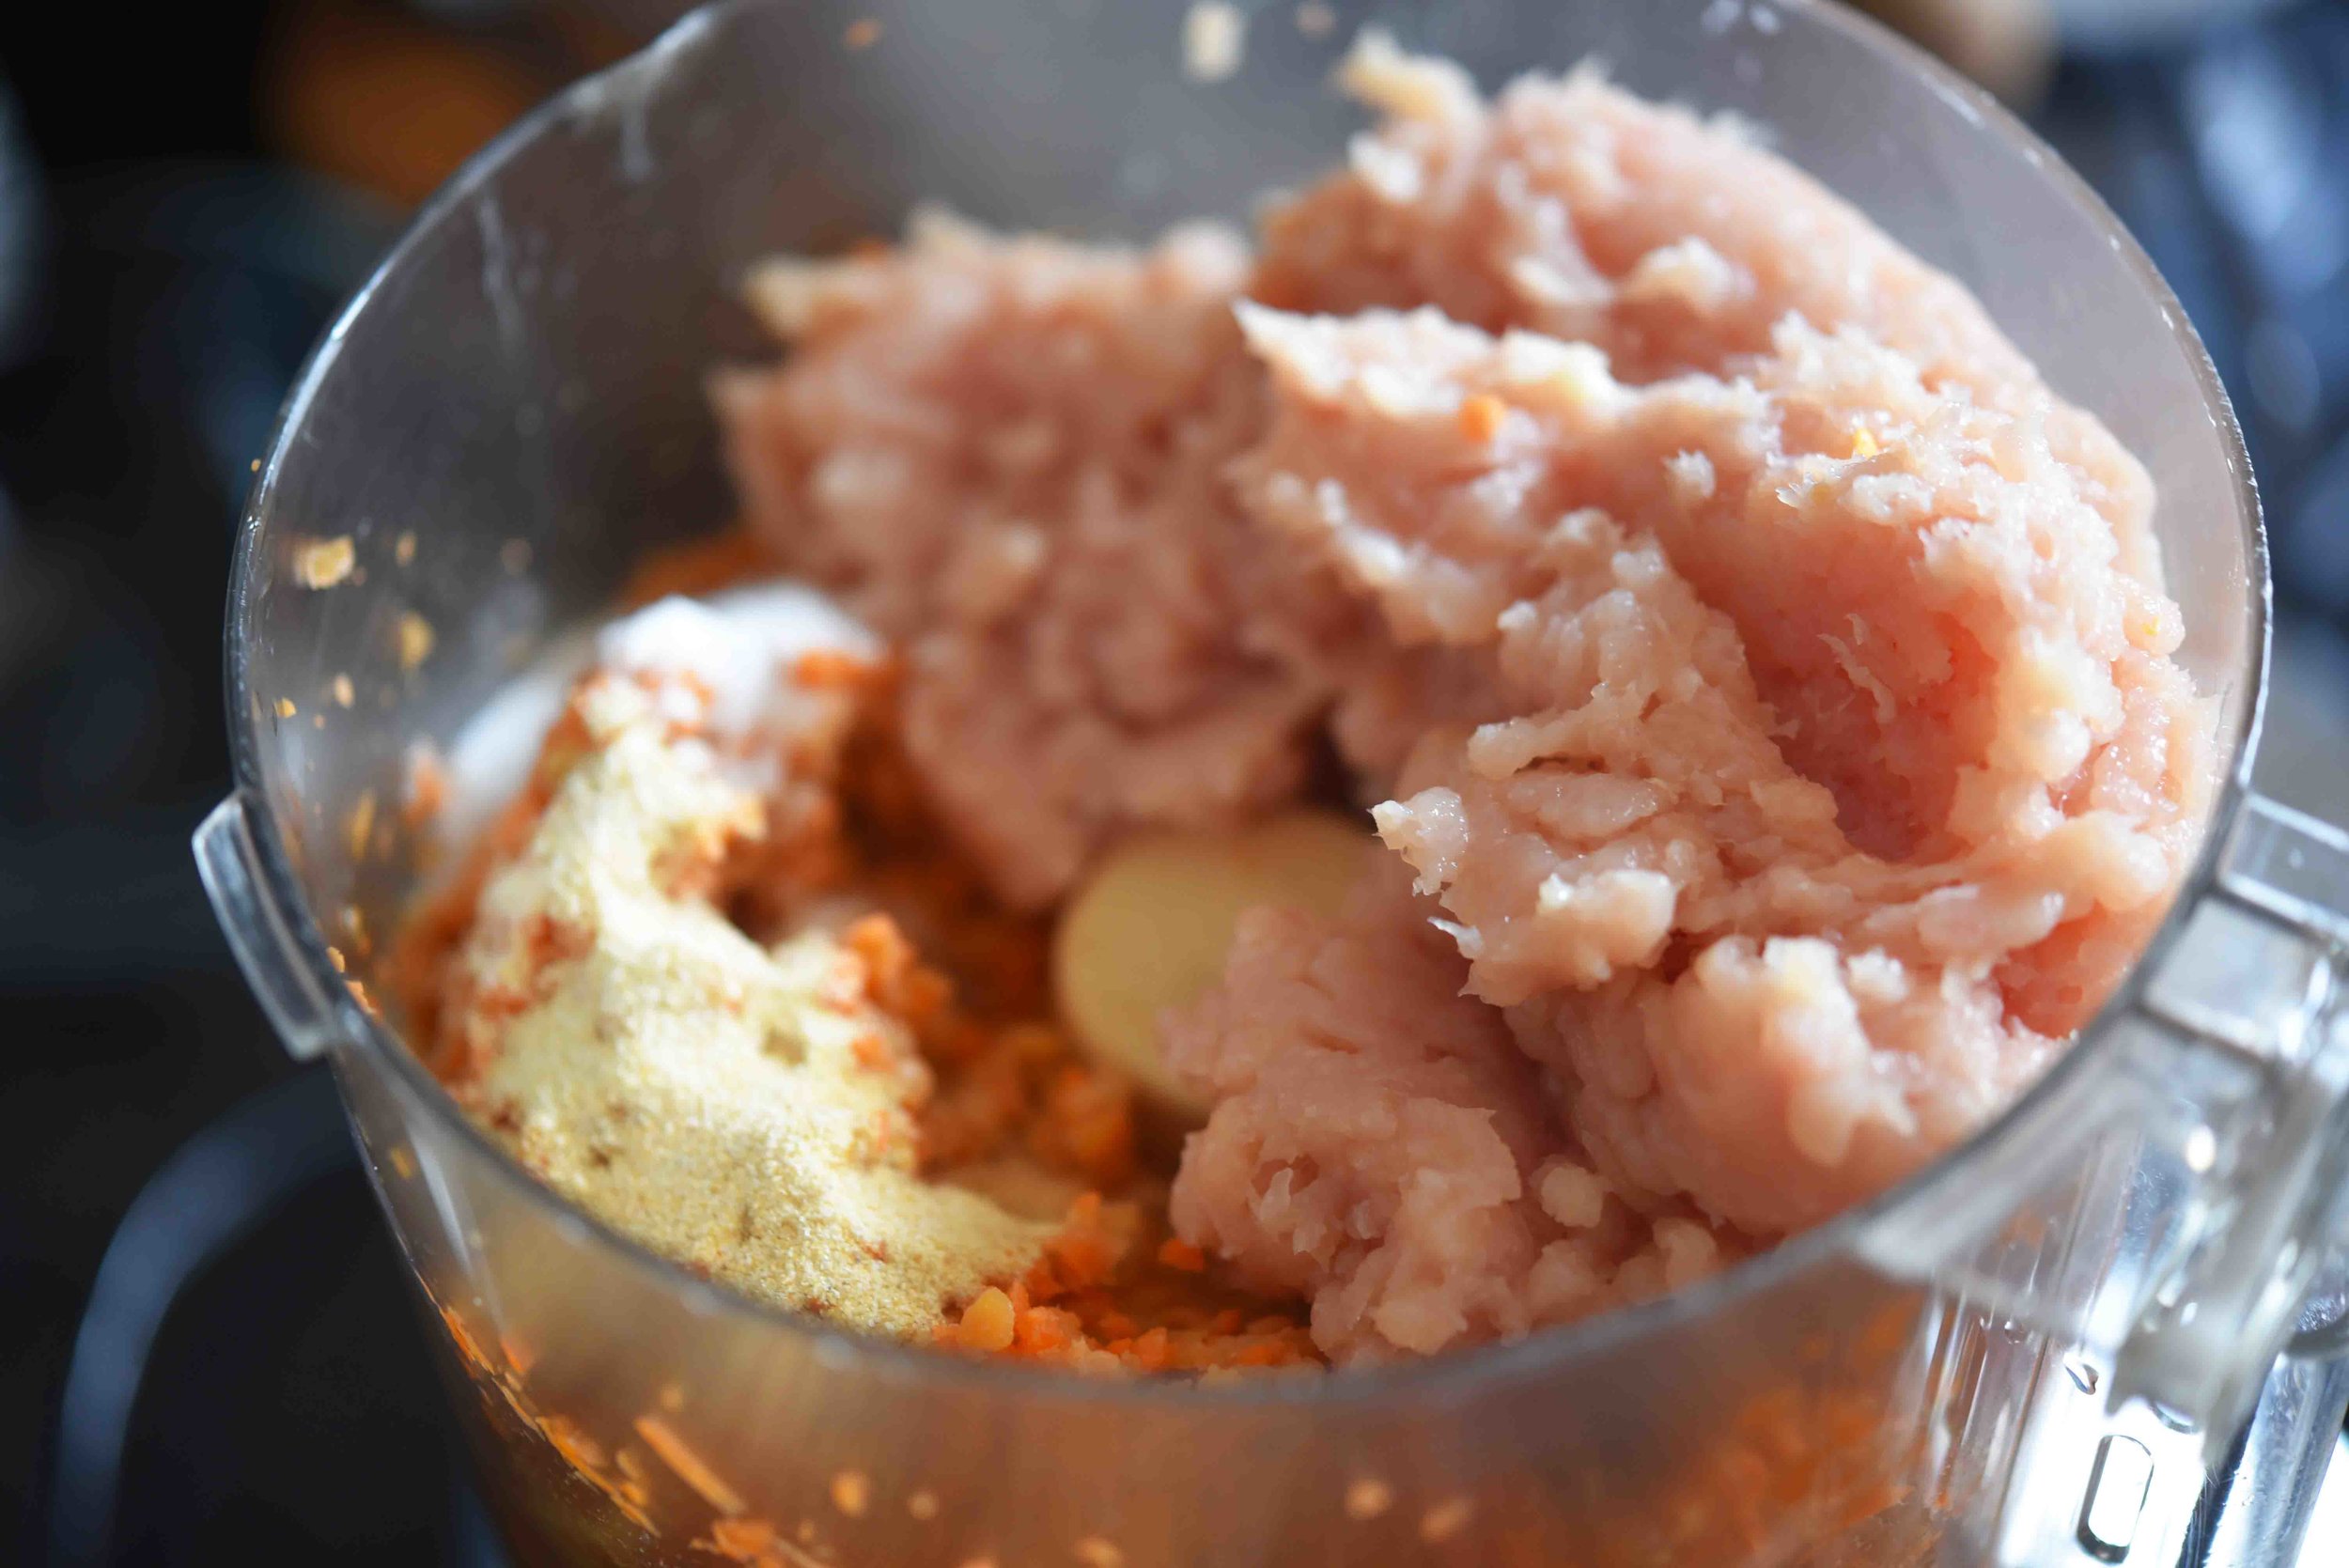
To make them, just mix together finely chopped broccoli (stems and all!), throw in some eggs, seasonings, a touch of cheese and flour...

Broccoli Tots 4.jpg

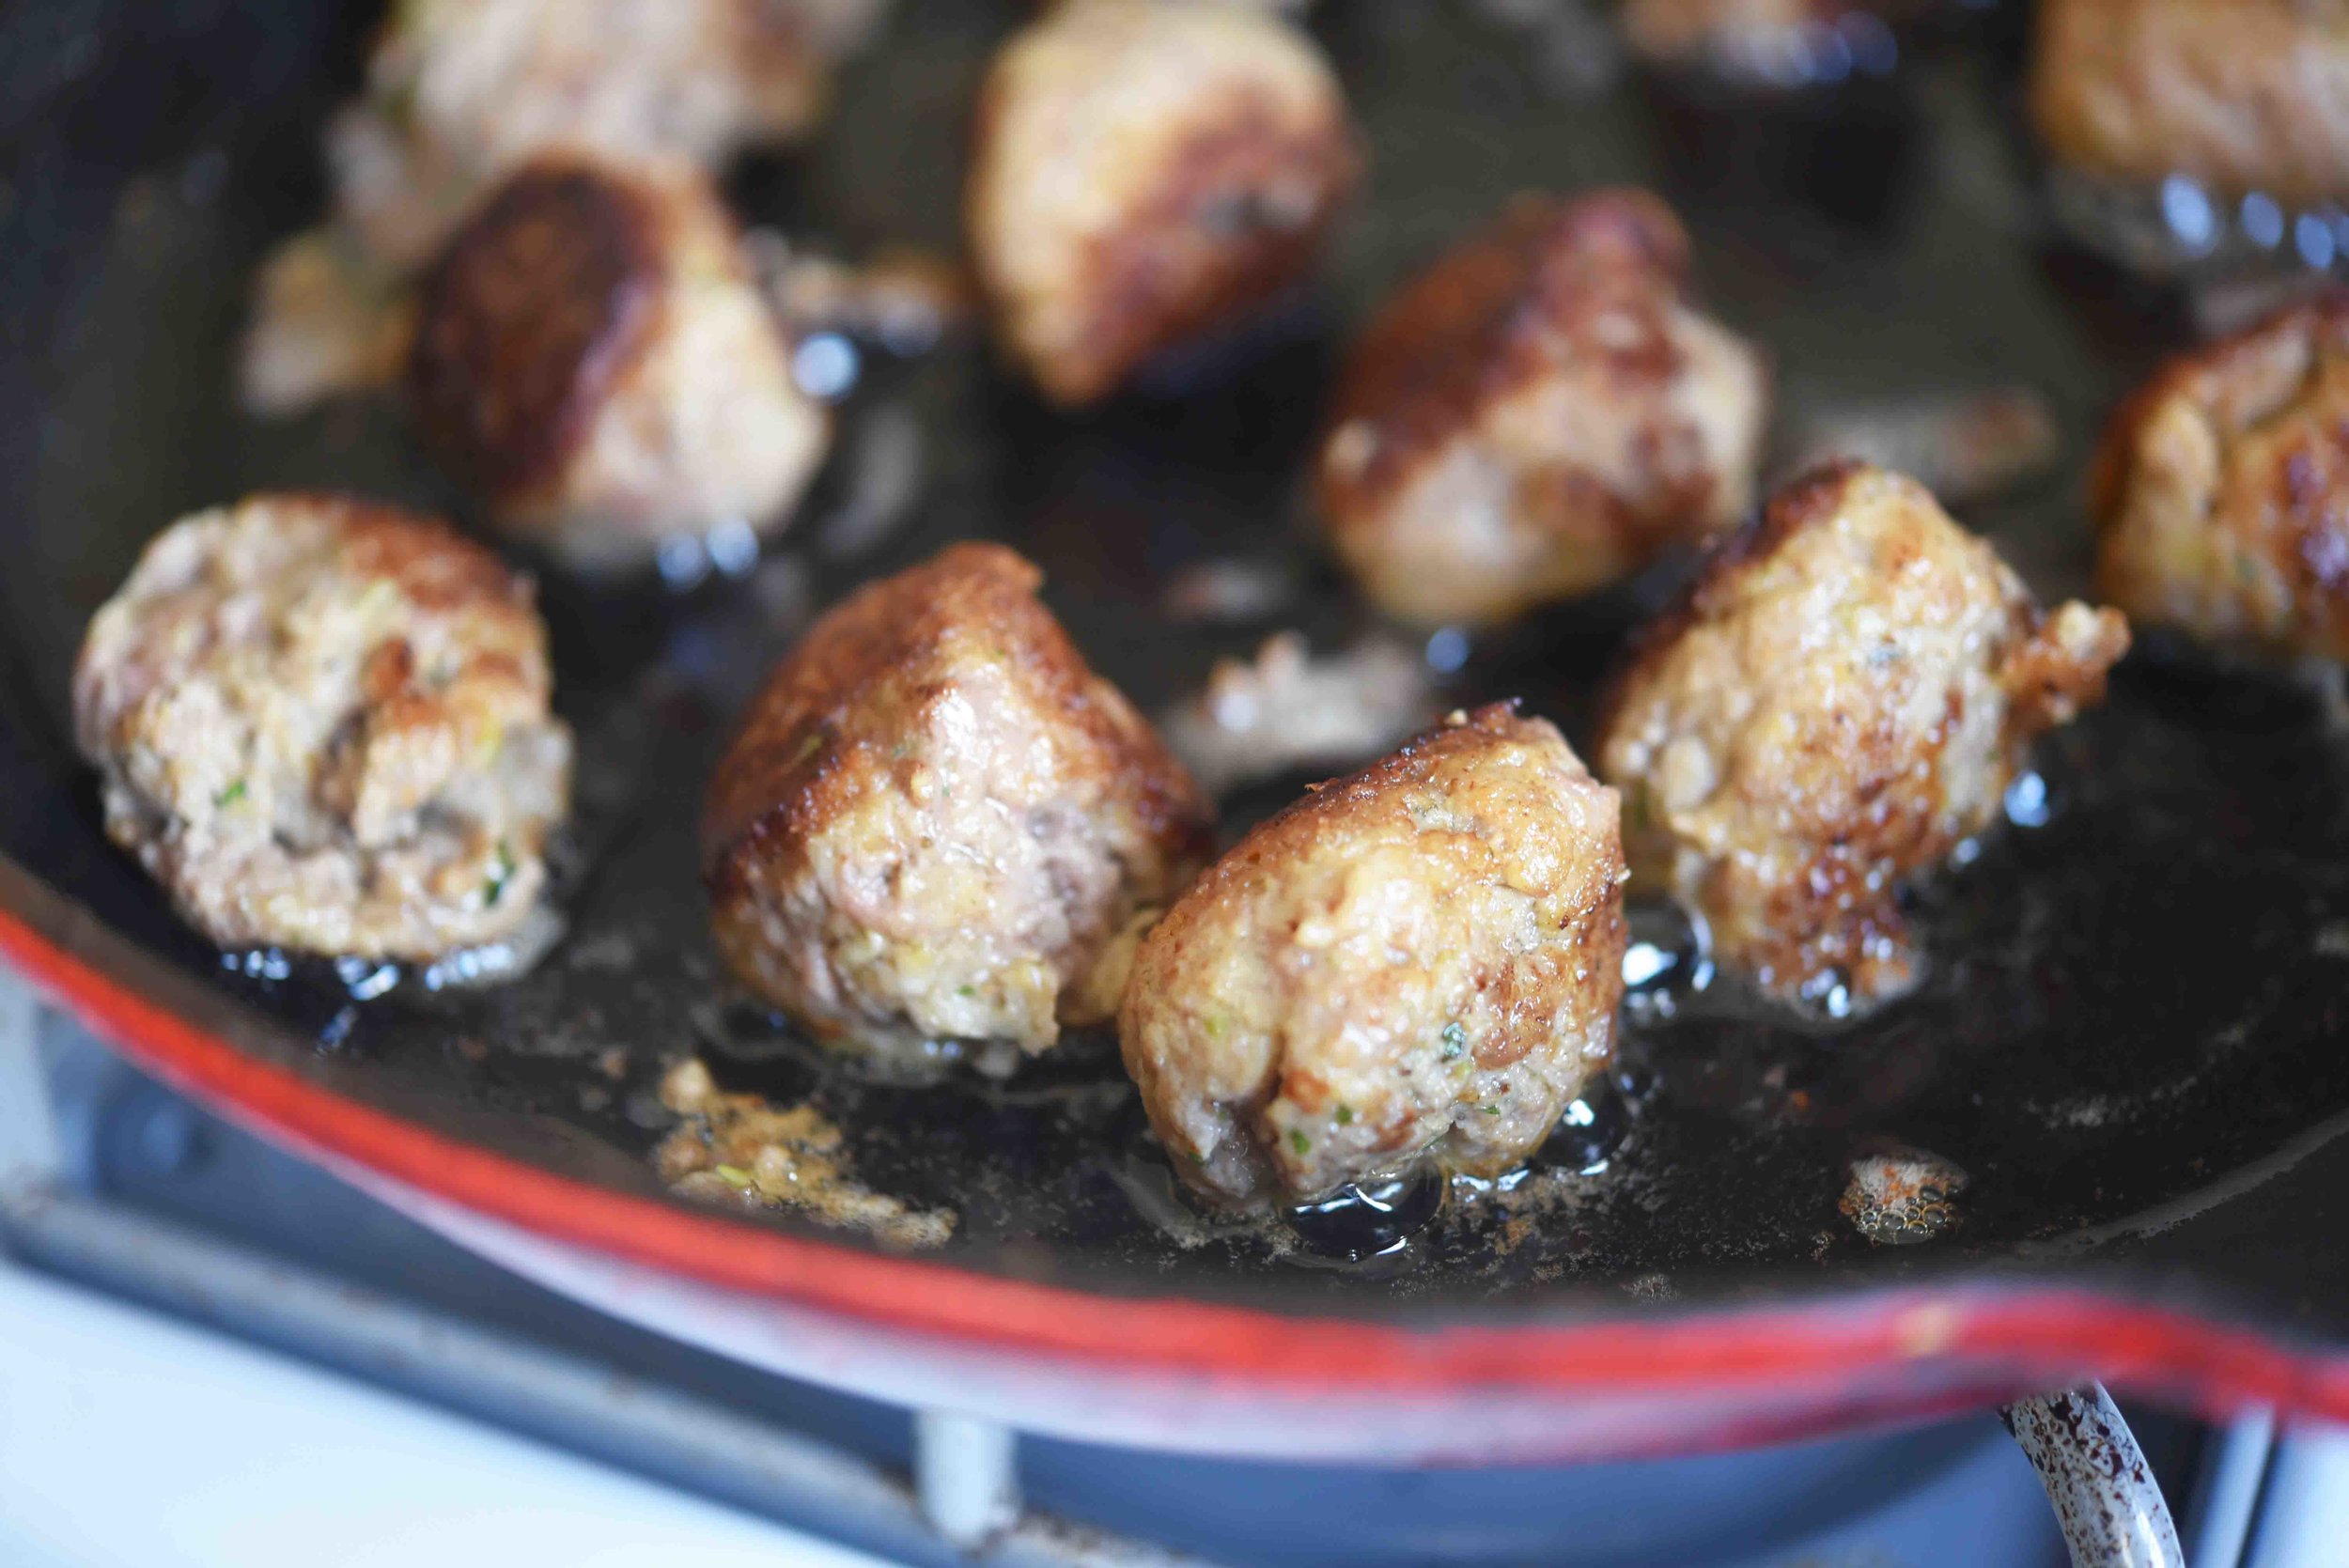
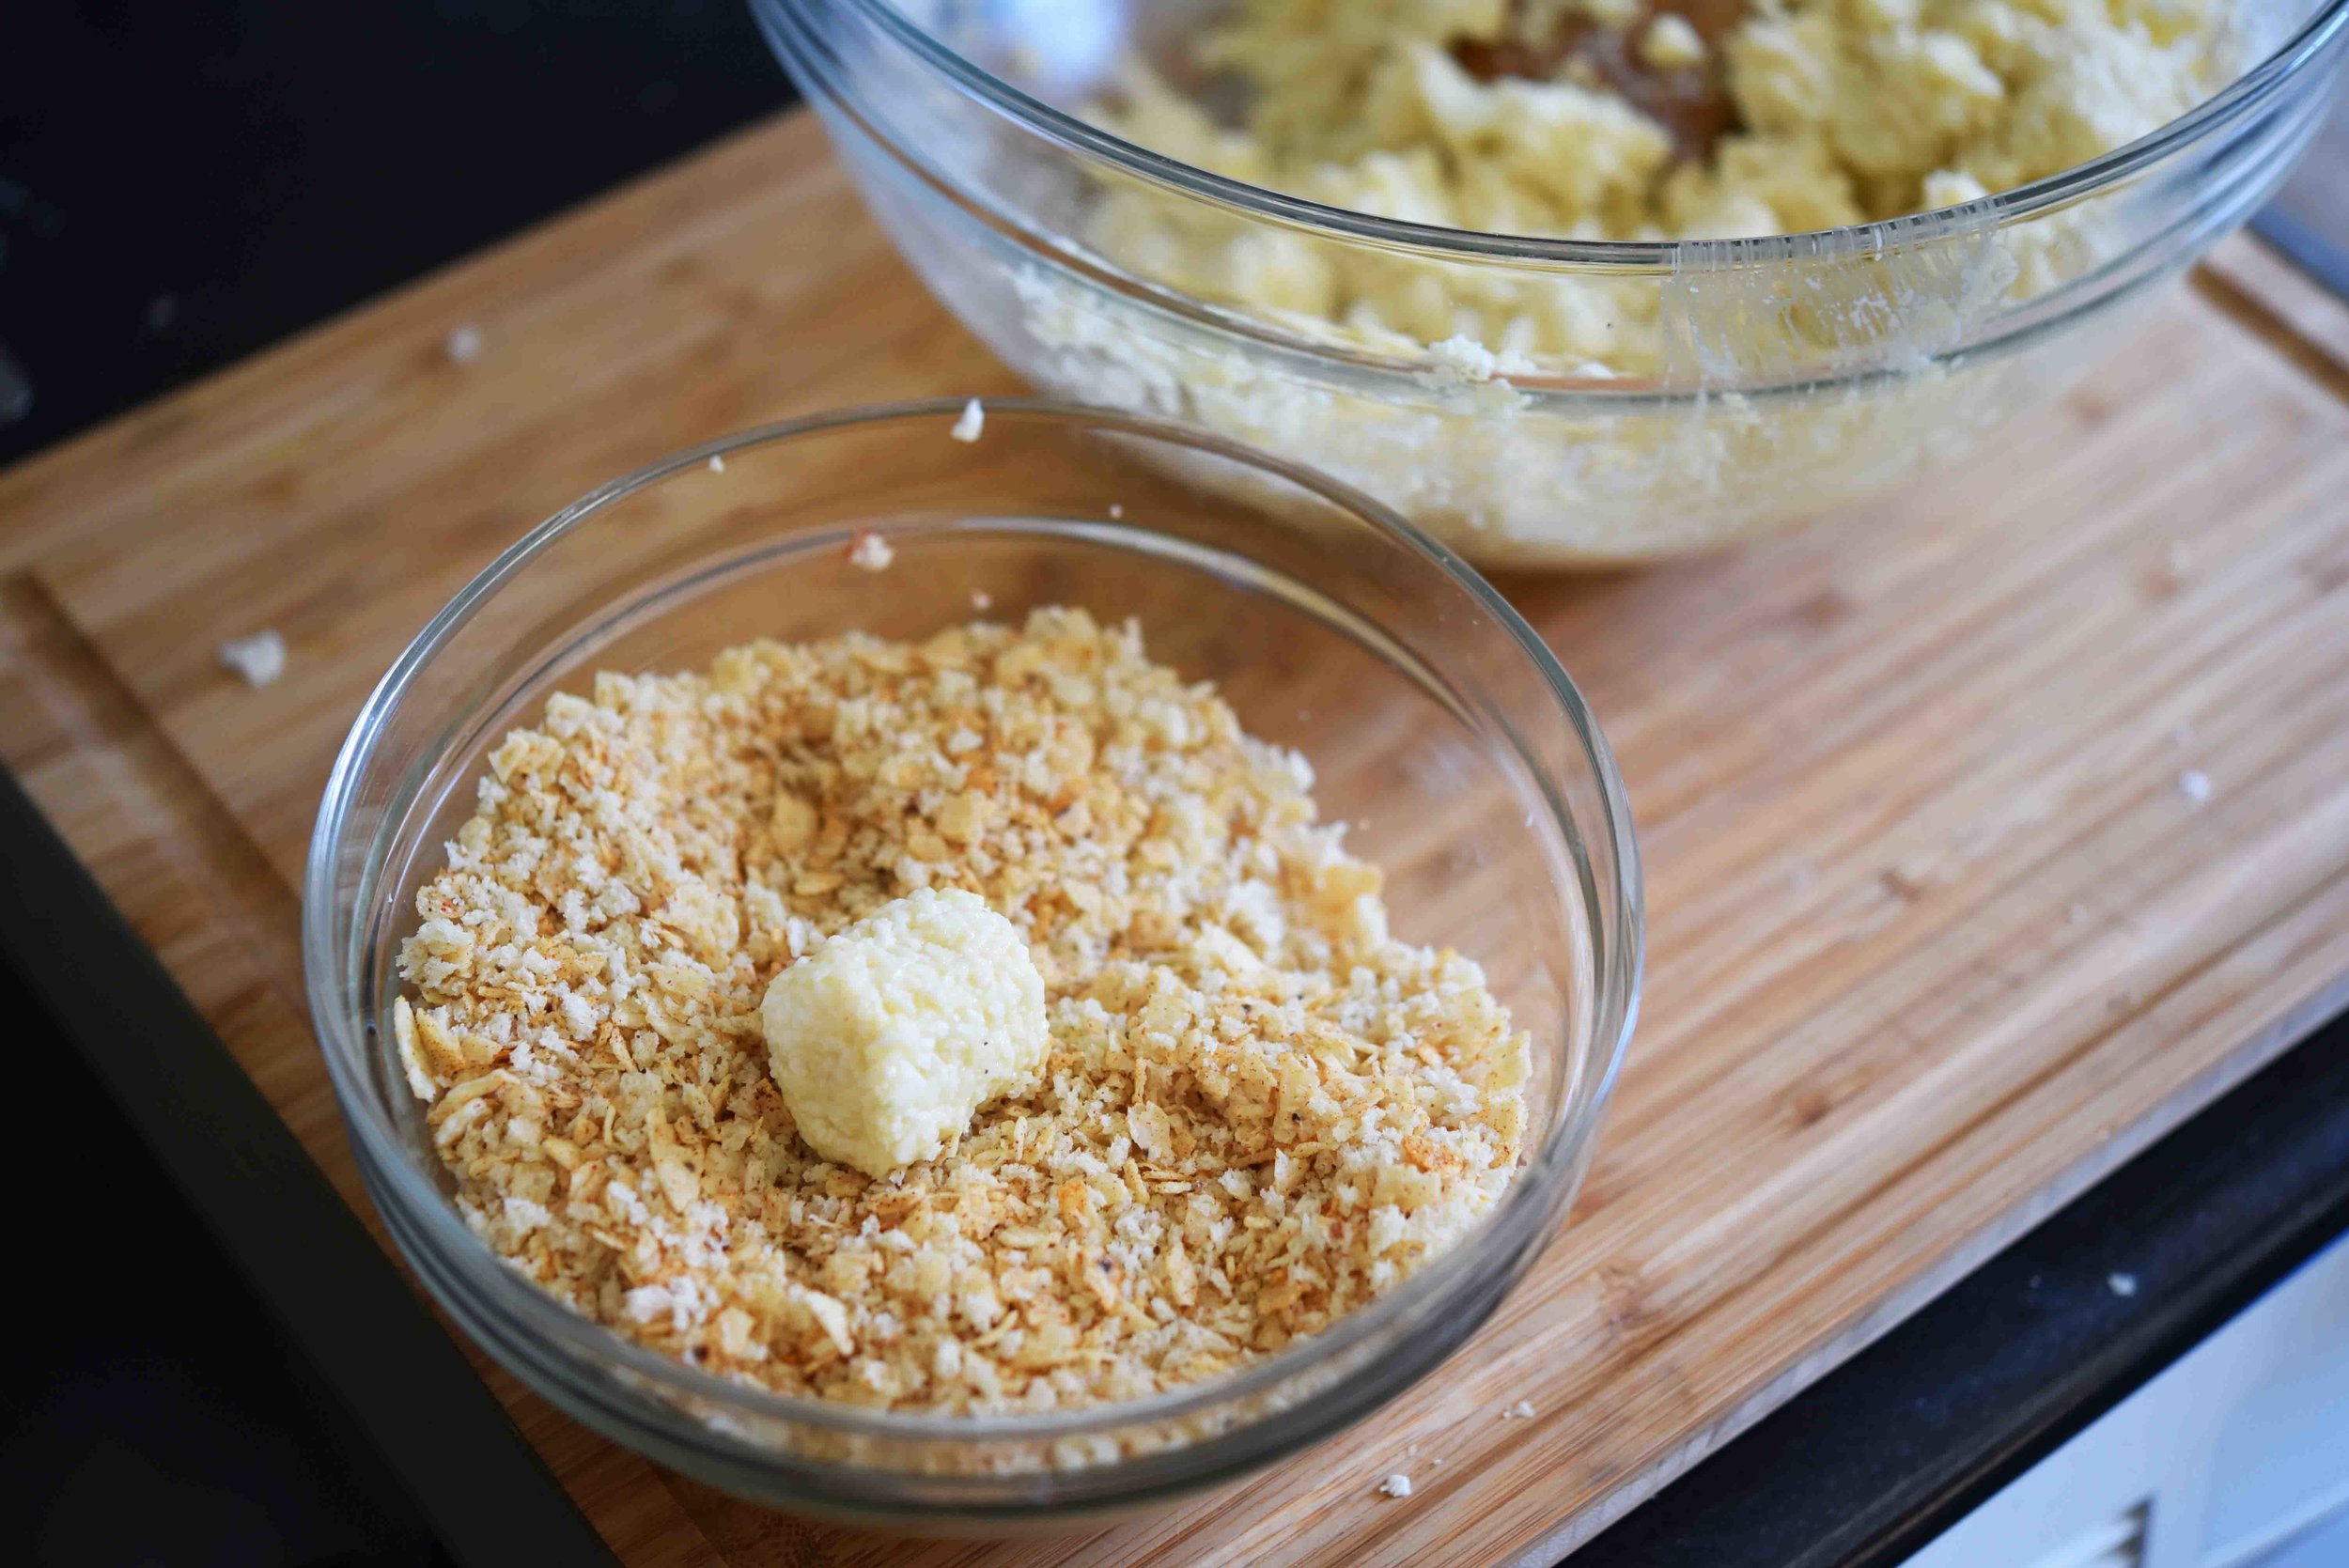
Form them into whatever shapes you like and let them roll around in a flurry of panko and crushed tortilla chips...

Broccoli Tots 5.jpg

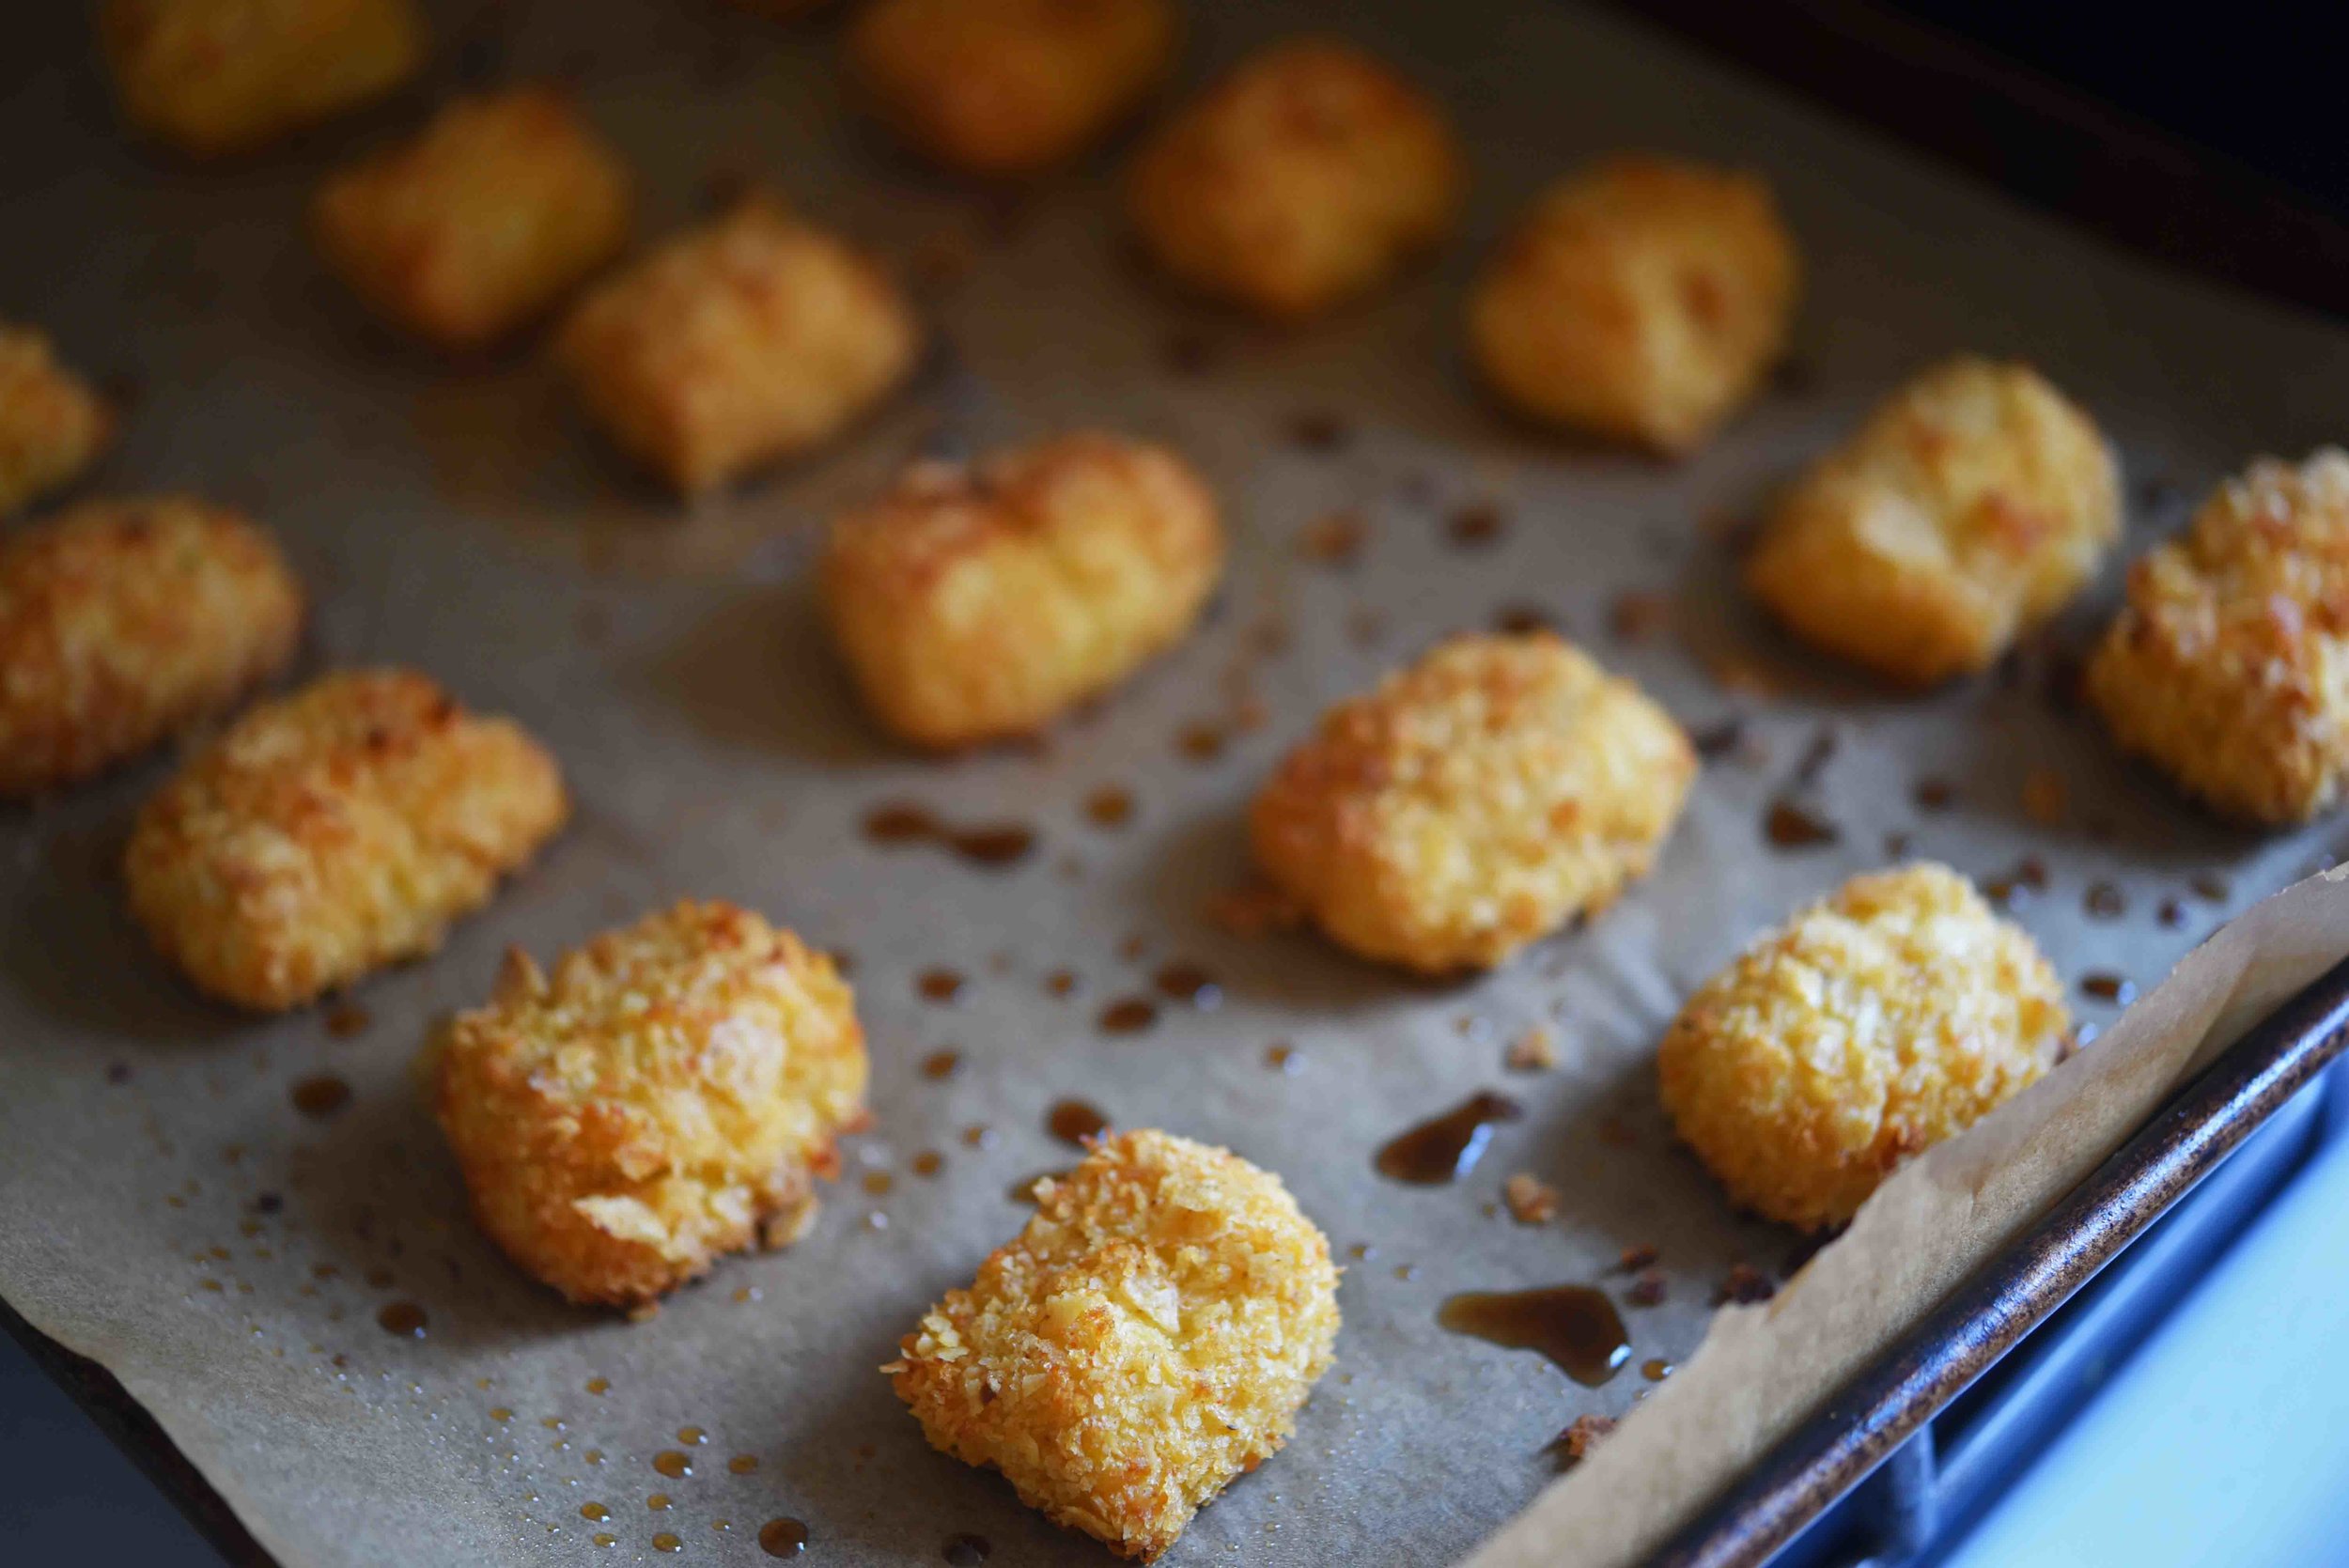
Then bake them up into crunchy perfection!

You'll never look at broccoli the same way!

Broccoli Tots 6.jpg

Broccoli Tater Tots

servings: 36 tater tots

Ingredients:

  • ¾ cup crushed yellow corn tortilla chips
  • ¾ cup plain panko bread crumbs
  • ½ teaspoon paprika
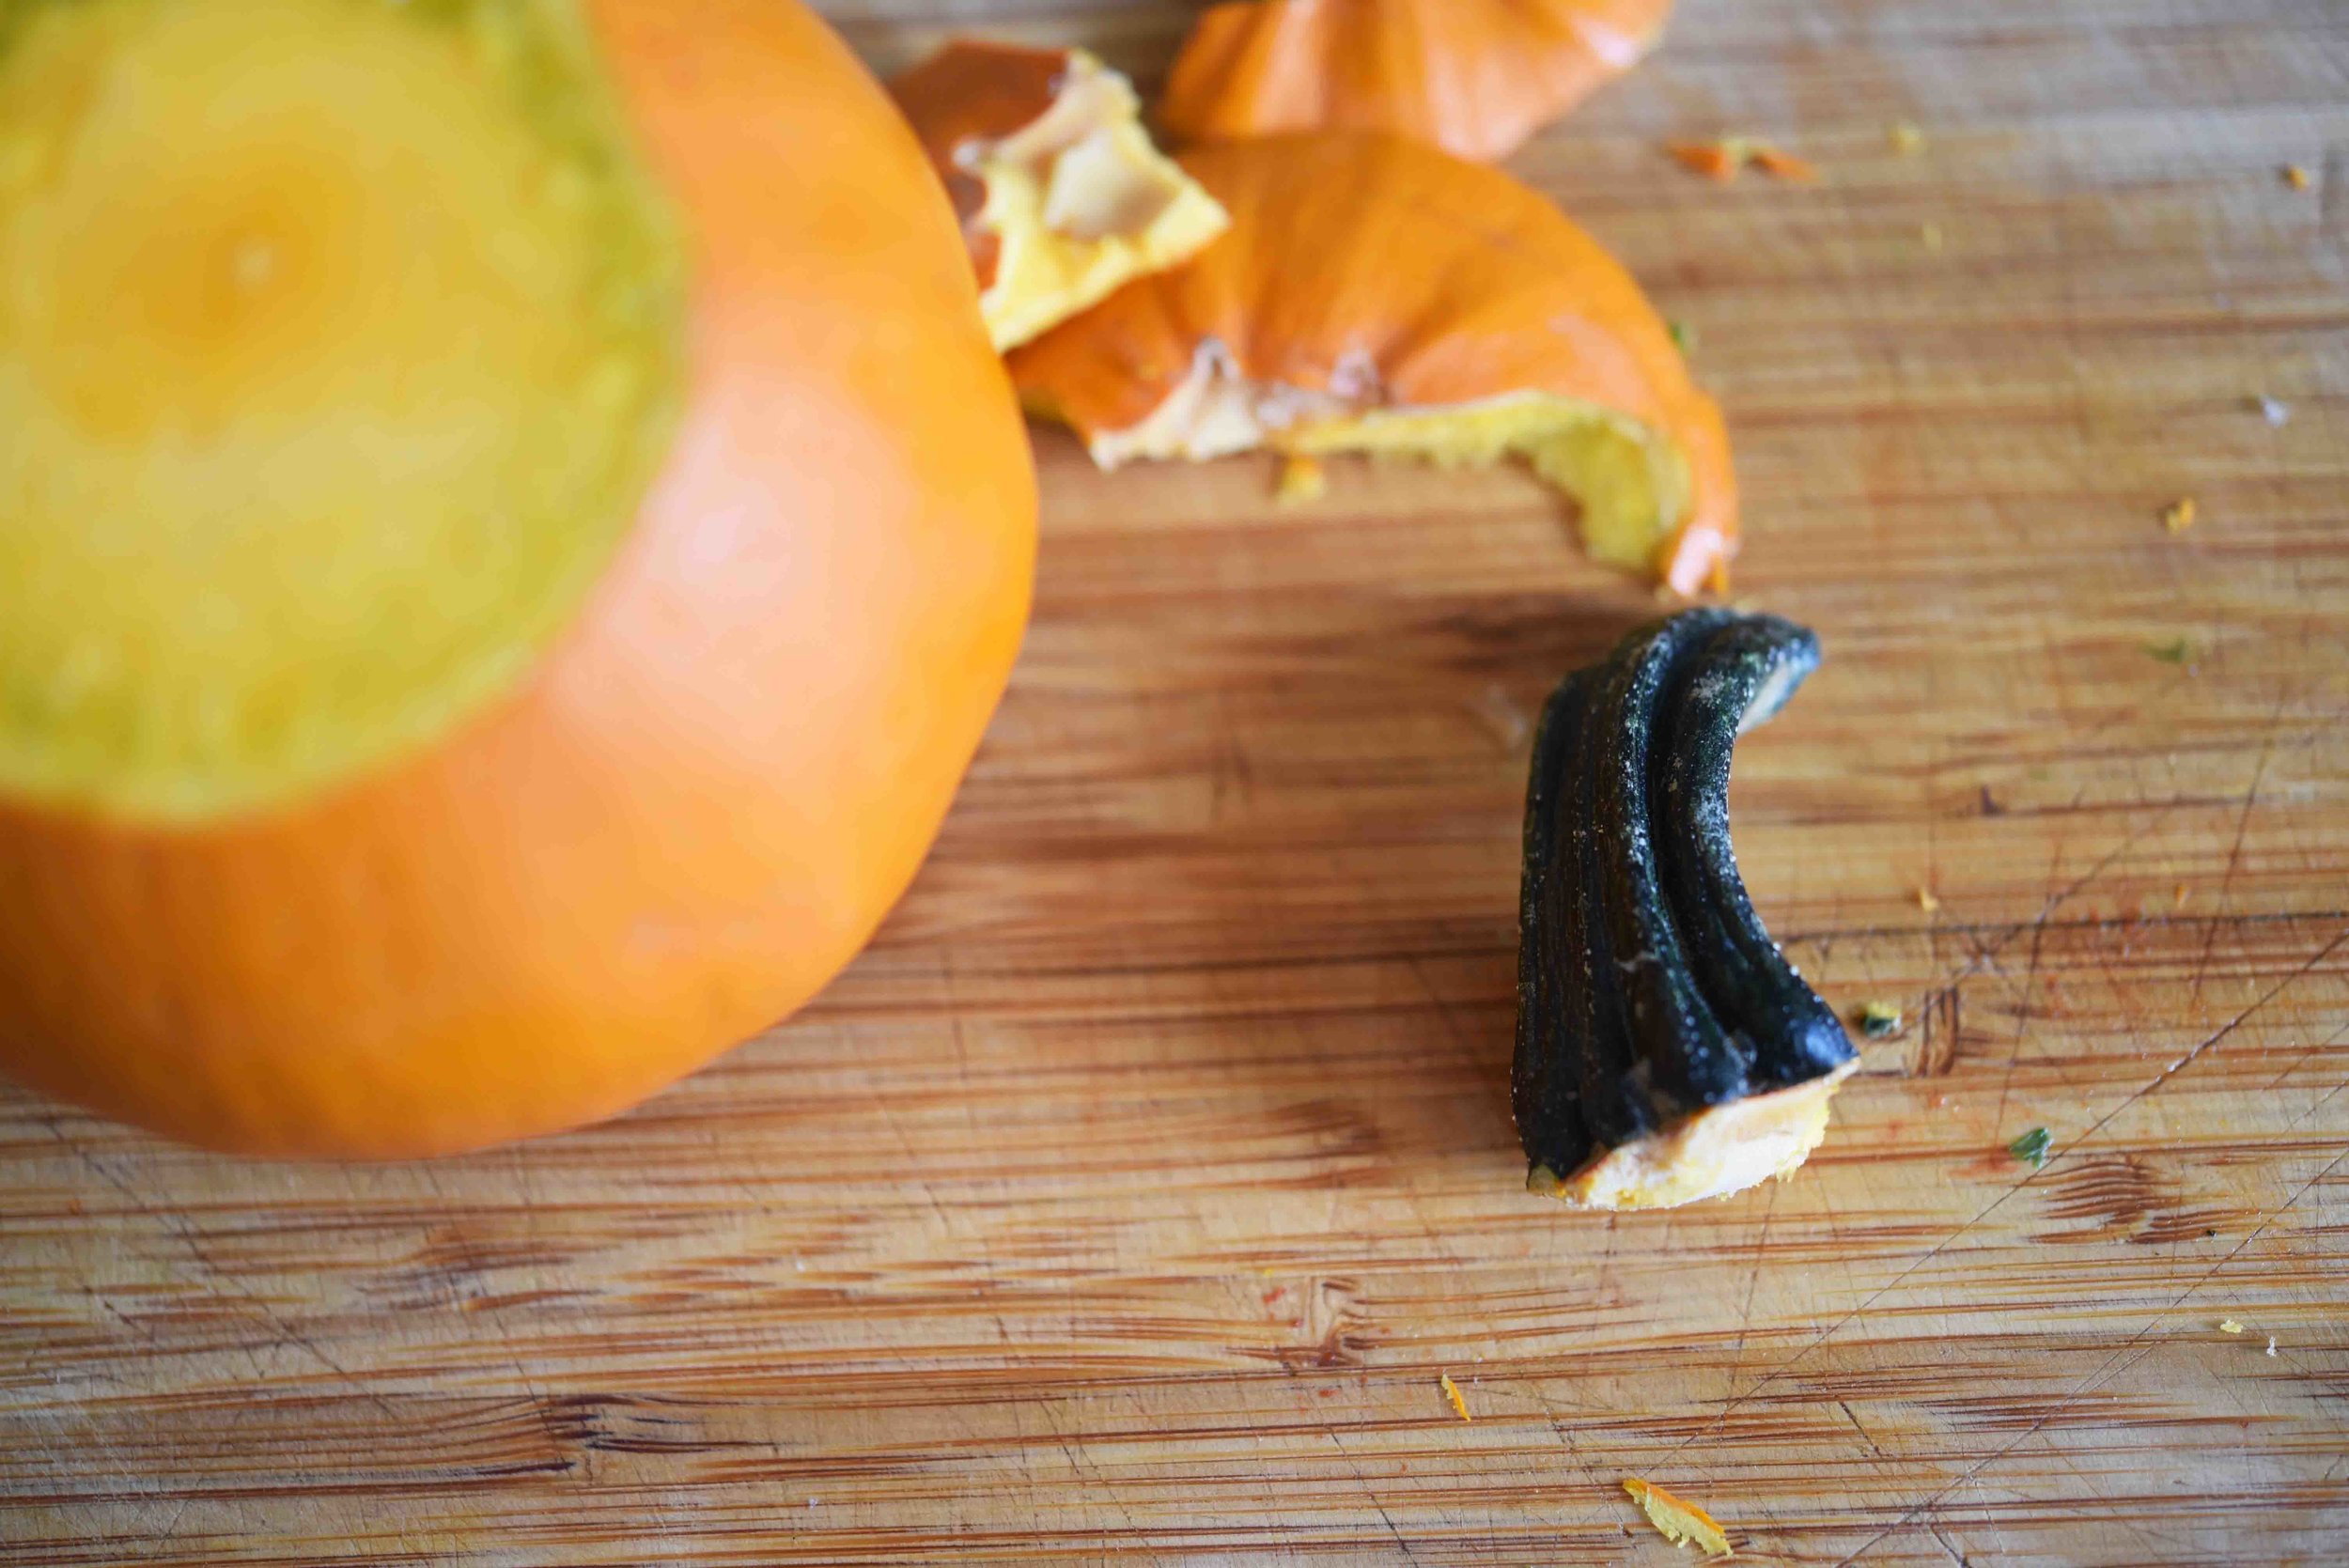
  • 1 large bunch broccoli (about 1½ pounds), entire stem + florets coarsely chopped + rinsed
  • ¾ cup grated parmesan cheese (about 3½ ounces)
  • ½ cup all-purpose flour
  • 3 large eggs
  • 2 teaspoons kosher salt
  • 1½ teaspoon garlic powder
  • Pinch of ground black pepper

Directions:

  1. Preheat the oven to 425°F. Add the corn chips to the food processor and pulse until the chip pieces are close to the size of panko breadcrumbs (this should make about 1 cup). If you don’t have a food processor you can also place the chips in a Ziploc bag and smash them with a pan or rolling pin. Then transfer the corn chip pieces to a medium-sized bowl along with the panko and paprika and mix these ingredients well.
  2. Clean the bowl of the food processor, then place the broccoli inside and pulse until it is coarse and grain-like in texture (you should have about 4 cups of this broccoli “rice”).
  3. Transfer the broccoli to a large bowl with the parmesan, flour, eggs, salt, garlic powder, and pepper and mix together to combine.
  4. Using your hands, roll the broccoli mixture and pack it tightly by the tablespoon into tater tot (or other desired) shapes approximately 1 inch wide and 2 inches long. Roll each tot in the corn chip breading mixture, reshaping afterwards if necessary.
  5. Place the formed broccoli tots on a nonstick baking pan or a pan lined with parchment paper. Spray the tots lightly with nonstick olive oil spray and bake them until browned—about 20 minutes.

Notes:

  • Freezer Instructions: Place cooked and cooled tots on a baking sheet or plate in a single layer. Let freeze completely; once frozen place them in a plastic food storage bag. To reheat, place in a 425°F oven on a baking sheet and cook for 10 minutes
: @NikkiDinki

: @NikkiDinkiCooking
 

FIND more recipes like this in MEAT ON THE SIDE!


You might also like these recipes:

Buffalo Cabbage Spring Rolls

Check out this recipe for my Buffalo Cabbage Spring Rolls—from my book Meat On The Side!

Buffalo Cabbage Spring Rolls

servings: 6 Spring Rolls + 1 Cup Dipping Sauce

Blue Cheese Dipping Sauce:

  • ½ cup blue cheese crumbles (2 ounces)
  • ¼ cup sour cream
  • 2 tablespoons buttermilk
  • 3 tablespoons finely chopped scallions, (green parts only)
  • ¼ teaspoon kosher salt

Buffalo Cabbage Spring Rolls:

  • 1 teaspoon olive oil
  • 1 boneless, skinless chicken breast half (6 ounces)
  • 1 teaspoon kosher salt
  • ½ teaspoon ground black pepper
  • 3 ounces cream cheese
  • ⅓ cup Frank’s RedHot Original Cayenne Pepper Sauce
  • 2½ cups lightly packed cabbage slaw mix (from the supermarket)
  • ¾ cup finely chopped celery
  • ¼ cup finely chopped scallions
  • ¼ cup coarsely chopped fresh cilantro
  • ½ teaspoon garlic powder
  • 6 flour egg roll wrappers
  • Canola oil, for frying

Blue Cheese Dipping Sauce:

  1. Put the blue cheese crumbles in a small bowl, breaking up the pieces if they are bigger larger than ¼ inch. Add the sour cream, buttermilk, scallions, and salt to the bowl and stir to combine. Set aside.

Buffalo Cabbage Spring Rolls:

  1. Heat the oil in a small skillet over medium heat. Sprinkle ½ teaspoon of the salt and ¼ teaspoon of the pepper evenly all over the chicken. Add the chicken to the skillet and cook until golden brown on both sides and cooked through—, about 6 minutes per side. Transfer the chicken to a cutting board to rest for 2 to 3 minutes; then chop it into ½-inch pieces.
  2. To make the filling, placePut the cream cheese and hot sauce in a large microwave-safe bowl; and microwave on high until the cheese is has slightly softened slightly—, 15 to 20 seconds—. and then wWhisk the mixture them tountil well gethercombined. . It (This mixture does not have to be perfectly smooth; it’s okay to have some lumps.) Add the chicken, slaw mix, celery, scallions, cilantro, garlic powder, and the remaining ½ teaspoon salt, and ¼ teaspoon pepper to the bowl and stir until well combined.
  3. Arrange the egg roll wrappers on a work surface, orienting each so one corner points toward you (making a diamond shape). Have ready a small bowl of water and a pastry brush. Make the rolls one at a time: Spoon about ½ cup of the filling onto the center and then brush a little water onto the margins. Fold up the bottom corner over the filling; then fold up each side corner. Then roll the filled wrapper over on itself toward the top corner.
  4. Pour oil into a small or medium heavy-bottomed saucepan to a depth of at least 2 inches (but not more than halfway up the sides). Place the pan over medium-high heat and bring the oil to 375°F; (use a candy thermometer to register the temperature). Working in small batches, fry the rolls until they are golden brown on all sides—. 4 to 6 minutes. Transfer each batch to a paper- towel– lined plate to drain.
  5. Serve the rolls hot with Blue Cheese Dipping Sauce.

Notes:

  • don’t always have buttermilk on hand, and although it adds a little extra tang to the dipping sauce, it can easily be replaced with any milk or cream you keep have in your fridge.
  • 50/50 - With all the flavor going on in these spring rolls, you will not miss the meat if you prefer a vegetarian appetizer—there are many times I choose to serve them meatless. To make half the recipe meatless, use only 3 ounces chicken, but add an extra ½ cup slaw mix; (don’t add the chicken to the filling until after you’ve made 3 vegetarian rolls. Or to go totally meat-free, and simply replace all the chicken with an extra cup of the slaw mix.
  • FF - Kids aren’t big fans of blue cheese? Leave it out for a scallion– sour cream dressing. Also to tone down the spicy taste, cut the amount of hot sauce to 3 tablespoons and use 5 ounces of cream cheese instead for a milder version.
: @NikkiDinki

: @NikkiDinkiCooking
 

Find more recipes like this in Meat on the Side!


You might also like these recipes:

Spicy Shrimp Tacos on Jicama Shells + Pineapple Avocado Salsa

shrimp taco on jicama shell small.jpg

There are a lot of cool things going on in this recipe.

First, the shrimp get tossed in cumin, paprika, and garlic powder, which gets them nice and spicy and gives them TONS of flavor.

shrimp taco on jicama shell 4.jpg

Next, you're making a spread of creamy sour cream, spicy chipotle, and cool lime.

Not to mention that you're also whipping up a pineapple avocado salsa—that you should just go ahead and make extra of, because you will want to put it on EVERYTHING.

shrimp taco on jicama shell 5.jpg

And last, all of this goodness goes on a piece of jicama that is sturdy yet flexible, and adds another layer of freshness and crunch to the dish.

shrimp taco on jicama shell 7.jpg

And because it’s really just a slice of jicama, it takes almost no extra time.

shrimp taco on jicama shell 8.jpg

You could use these components separately in lots of dishes this summer, or you could combine them all and make the most outrageous tacos—that are actually crazy healthy for you.

shrimp taco on jicama shell 3.jpg

Whatever you do, you are eating good tonight!

shrimp taco on jicama shell 6.jpg

Spicy Shrimp Tacos on Jicama Shells + Pineapple Avocado Salsa

servings: 4; makes 8 small tacos

Pineapple Avocado Salsa:

  • 1½ cup finely chopped pineapple
  • 1 avocado, finely chopped (about 1 cup)
  • 1 red pepper, finely chopped (about ½ cup)
  • Juice of half a lime
  • 2 teaspoons finely chopped cilantro
  • 1 teaspoon kosher salt

Shrimp Tacos with Jicama Taco Shells:

  • ½ cup sour cream
  • Zest of 1 lime
  • 1 tablespoon chipotle puree *see note
  • 2 teaspoons kosher salt
  • One-1½ pound jicama, about 4-5 inches wide
  • 3 tablespoons olive oil
  • ½ teaspoon cumin
  • ½ teaspoon paprika
  • ½ teaspoon garlic powder
  • 16-20 large/extra large shrimp (about ¾ to 1 pound)
  • Pineapple Avocado Salsa
  • Cilantro, for a garnish

Pineapple Avocado Salsa:

  1. In a large bowl, combine the pineapple, avocado, red pepper, lime juice, cilantro, and salt. Mix together and set aside.

Shrimp Tacos with Jicama Taco Shells:

  1. In a small bowl, combine the sour cream, lime zest, chipotle puree, and 1½ teaspoons of the salt. Mix together and set aside.
  2. Peel the jicama and cut it in half widthwise, creating two circular pieces. Place one of the halves on a mandolin cut-side down and set the mandolin for about 1/12 inch-thick slices (You should set the dial between ⅛ and 1/16, but closer to the 1/16 mark.). Your slices should be thin enough to bend without breaking, but thick enough to hold the filling. Also, if the jicama is too big for your mandoline, trim one of the sides until it fits. After slicing the jicama, you should have about 20 “taco shells” (the extras can be saved for up to a week in the fridge). Discard the ends or use for another purpose.
  3. Heat a large skillet over medium heat and add the oil, cumin, paprika, garlic powder, and the remaining ½ teaspoon of the salt. Cook the spices for 1 minute, then add the shrimp and cook it until it is pink and cooked through—about 2-3 minutes. Note: You can cut the shrimp in half prior to cooking if you prefer; the smaller the shrimp, the better they fit into the jicama taco shell, which also makes the taco a little easier to eat.
  4. Place the jicama shells on plates and sprinkle each with a touch of salt. Next top with the sour cream mixture, then the shrimp, and finally the Pineapple Avocado Salsa. Garnish with extra cilantro if desired.

Notes:

  • You’ll find chipotles in adobo in a small can next to your taco fixings in the supermarket. A whole chipotle pepper is generally too spicy for a recipe, so I take the whole can and puree it in the food processor or blender. Then you can measure out what you need. Store the remaining puree by placing in the bottom of a Ziploc bag and allowing it to freeze like that so you get a log shape. Then just slices off as much of the frozen puree as you need in the future.
: @NikkiDinki

: @NikkiDinkiCooking
shrimp taco on jicama shell 2 small.jpg
 

Find more recipes like this in Meat on the Side!


You might also like these recipes:

Lentil + Carrot Chicken Nuggets

Lentil Carrot Chicken Nuggets_SMALL(1).jpg

The classics are the classics for a reason—they're delicious!

Lentil Carrot Chicken Nuggets 1.jpg

Chicken nuggets are simple and simply tasty, and with so many options out there—from the grocery store to McDonalds—you may ask yourself, why make them myself?

Lentil Carrot Chicken Nuggets 2.jpg

Well, I'll tell you why!

These nuggets are worth making because they're unlike anything you can buy.

They're actually half lentils and carrots, and yet they taste like the good-old fashioned chicken nuggets you (and your kids!) are used to! 

Lentil Carrot Chicken Nuggets 3.jpg

The lentils get slightly pureed, which allows them to pretty much melt into the meat.

As for the carrots, you will see some small specks of them in the mix—so if your kids are super weary, you can always skip them.

Or if you’re feeling crazy, you could use parsnips instead!

Lentil Carrot Chicken Nuggets 4.jpg

Like many of my toddler recipes, these are the kinds of things that I make huge batches of and freeze.

Lentil Carrot Chicken Nuggets 6.jpg

And a freezer full of chicken nuggets is a happy freezer indeed!!

Lentil Carrot Chicken Nuggets 8.jpg

Lentil + Carrot Chicken Nuggets

makes: 50 nuggets

Ingredients:

  • 1¾ cups chicken stock
  • 1 cup dry split red lentils
  • 2 cubes chicken bouillon
  • 2 cups grated carrots (about 6 ounces)
  • 1 pound ground chicken
  • ½ cup grated parmesan cheese
  • 1 teaspoon garlic powder
  • 1 teaspoon onion powder
  • 1 teaspoon kosher salt
  • ½ cup Italian breadcrumbs
  • 1 tablespoon olive oil

Directions:

  1. Place the chicken stock, lentils and bouillon in a small saucepan. Bring the stock to a boil, then reduce it to a simmer and cook the lentils until the broth is fully absorbed and the lentils are very soft—about 15 minutes.
  2. Add the carrots to the bowl of a food processor and pulse until they are crumb-like in texture—ground, but not pureed. Then transfer the cooked lentils to the food processor with the carrots and pulse to combine the ingredients.
  3. Next add the chicken, parmesan, garlic powder, onion powder, and salt to the food processor and pulse again until all ingredients are just combined; avoid overmixing.
  4. Scoop the mixture by tablespoons and shape it by hand into nuggets (the easiest way to do this is to form the mixture into a ball, then smash it flat and add dents and curves by hand). Then coat each nugget well in the breadcrumbs.
  5. Heat the oil in a large skillet over medium-high heat; add 10 to 12 nuggets and cook them until all sides of the nuggets are golden brown—4 to 6 minutes per side. Repeat this process until all of the nuggets have been cooked.

Notes:

  • If you prefer to bake the nuggets rather than frying them, preheat the oven to 425°F. Place the prepared nuggets on a parchment-lined or nonstick baking sheet. Spray the nuggets with olive oil cooking spray and bake them until they are light golden and cooked through—about 15 to 20 minutes. Note that the nuggets will be paler in color—not as brown—than if you were to cook them as in Step 5. The air fryer is also a great option!
  • Freeze It: Once nuggets are totally cooked, throw them into a plastic storage bag, and freeze. From frozen reheat the nuggets in an oven preheated to 375°F for 8 to10minutes.
  • Hack It: Don’t think your kids are going to go for a handmade chicken nugget? Try to sneak some veggies in by dipping store-bought nuggets in my homemade BBQ sauce or Ketchup.
: @NikkiDinki

: @NikkiDinkiCooking
Lentil Carrot Chicken Nuggets 9.jpg
 

Find more recipes like this in Meat on the Side!


You might also like these recipes:

Citrus Honey Dressing with Fish Oil + Radicchio Salad

Grilled Salad with Fish Oil Dressing.jpg

Citrus Honey Dressing with Fish Oil + Radicchio Salad

servings: 4; makes about 1 cup dressing

Citrus Honey Dressing with Fish Oil:

  • ¾ cup whole milk Greek yogurt
  • ¼ cup orange juice
  • 1 to 2 tablespoons lemon flavored fish oil
  • 1 tablespoon honey
  • 2 teaspoons white wine vinegar
  • ¾ teaspoon kosher salt
  • ¼ teaspoon ground black pepper
  • 2 teaspoons finely chopped fresh chives

Romaine + Radicchio Salad:

  • 2 romaine lettuce hearts, cut lengthwise into 8 wedges
  • 1 radicchio, cut lengthwise into 4 wedges
  • 1 red onion, cut lengthwise into 8 wedges
  • 2 tablespoons olive oil
  • 1 teaspoon kosher salt
  • 1½ cups halved red grapes

Citrus Honey Dressing with Fish Oil:

  1. Add the yogurt, orange juice, fish oil, honey, vinegar, salt, and pepper to a medium bowl. Whisk together until well blended; then whisk in the chives.

Romaine + Radicchio Salad:

  1. Preheat a gas or charcoal grill (or preheat a grill pan). Brush the oil over all surfaces of the romaine, radicchio, and onion wedges, then sprinkle evenly with the salt. Arrange the romaine, radicchio, and onion wedges on the hot grill or grill pan. Cook until all pieces are slightly wilted and charred on all cut sides (leave the uncut sides raw), 1 to 2 minutes per side for the romaine and radicchio; 2 to 4 minutes per side for the onions.
  2. To serve, divide the romaine, radicchio, and onion wedges among four plates. Ladle one-quarter of the dressing over each serving. Divide the grapes equally and scatter over the tops.
: @NikkiDinki

: @NikkiDinkiCooking
 

Find more recipes like this in Meat on the Side!


You might also like these recipes:

Creamy + Spicy Corn Dip

>


I didn't just get the nickname “Picky Nikki” for no reason at all, no, I gave my mother so many reasons to call me “Picky” that I'm almost surprised that she ever called me anything else.


When I talk about my childhood I sometimes generalize and say that I ate no vegetables.


Read More

Ramen Tacos


At 10 years old my mom had had enough of my shenanigans.


I was the pickiest of picky eaters and this picky eater never went down without a fight.


So she gave up, and I was allowed to make my own dinners, whatever my little heart desired.


Well, both my heart and stomach were ramen noodle addicts.


Read More

Eggplant Zucchini Meatballs

Eggplant Zucchini Meatballs_SMALL.jpg

My stash of freezer foods for my daughter, Ivy, is one of my greatest sources of pride.

Forget a big bank account—if I have a freezer full of Banana Carrot Oat Muffins, Acorn Squash Pancakes, Cauliflower Tater Tots, and Broccoli Tater Tots, I am truly a rich woman.

Eggplant Zucchini Meatballs 1.jpg

My daughter eats like me—she’s definitely a "Meat On The Side" kiddo.

And she wears her bib proudly.

Eggplant Zucchini Meatballs 2.jpg

She eats every veggie under the sun (even if she doesn’t always know it!), which is incredible!

But I do want to get a little meat into her diet.

And since I know meatballs freeze really well, I went to work perfecting one for the whole family.

Eggplant Zucchini Meatballs 3.jpg

And even though the goal is to add meat here, let's be real—I knew right away I wanted to bring veggies to the party.

I also wanted to make a meatball that was a little on the moist side, so it would be perfect for new eaters who don't have all their teeth yet.  

Eggplant Zucchini Meatballs 4.jpg

Pureed roasted eggplant and zucchini add moisture and a depth of flavor that don't just make these meatballs more nutritious—they elevate them to a ridiculously flavorful level.

Eggplant Zucchini Meatballs 5.jpg

The not-so-secret secret?

You're using vegetable puree instead of milk or any other wet element you might normally add to your favorite meatballs.

Eggplant Zucchini Meatballs 6.jpg

And you end up with an awesome meatball.

Or maybe we should call it a vegemeatball.

Or a meateggieball.

Or maybe not 😉 .

Eggplant Zucchini Meatballs 7.jpg

Eggplant Zucchini Meatballs

servings: 30 to 34 meatballs

Ingredients:

  • 1 small eggplant (about ¾ pound)
  • 1 teaspoon olive oil
  • 1 teaspoon kosher salt
  • ½ teaspoon ground black pepper
  • 1 large zucchini (about ¾ pound)
  • 8 ounces ground beef
  • 1 cup Italian breadcrumbs
  • ½ cup grated parmesan (about 2 ounces)
  • 1 large egg
  • 1 teaspoon finely chopped fresh rosemary leaves
  • ½ teaspoon onion powder
  • ½ teaspoon garlic powder

Directions:

  1. Preheat the oven to 400°F. Cut the eggplant in half lengthwise and place the halves cut-side-up on a rimmed baking sheet. Drizzle them lightly with ½ teaspoon of the oil and then sprinkle ¼ teaspoon of the salt and ¼ teaspoon of the pepper over them. Bake the eggplants until they are very soft—about 15 minutes.
  2. While the eggplant is baking, cut the zucchinis in half lengthwise and drizzle them lightly with the remaining ½ teaspoon of oil and then sprinkle them with ¼ teaspoon of the salt and ¼ teaspoon of the pepper.
  3. Remove the eggplant from the oven and add the zucchini cut-side-up to the same baking sheet. Continue to cook the eggplant and zucchini until the zucchini can be easily pierced with a fork and the eggplant is very soft—25 to 30 minutes more. Then remove the baking sheet from the oven, but leave the oven on.
  4. When the vegetables are cool enough to handle, use a spoon to scrape the flesh of the eggplant into a food processor or blender; discard the skin. Then place the entire zucchini (including the skin) into the food processor as well. Process until pureed; this should give you about 1¾ cups of puree.
  5. Transfer the puree to a large bowl, then add the beef, breadcrumbs, parmesan, egg, rosemary, onion powder, garlic powder, and the remaining ½ teaspoon of salt. Mix to combine well and then form the mixture into tablespoon-sized balls by hand and space them evenly on a prepared baking sheet. Bake the meatballs until they are golden brown—about 30 minutes.

Notes:

  • If you wish, you can sauté the meatballs instead of baking them (if your meatballs are on the moist side, this may be a little harder to do). After forming the mixture into balls, heat 1 tablespoon of olive oil in a large pan over medium heat and cook the meatballs, turning occasionally, until they are golden brown on all sides—8 to 10 minutes.
  • To reheat the meatballs, bake them in an oven preheated to 400°F for 10 to 12 minutes.
: @NikkiDinki

: @NikkiDinkiCooking
Eggplant Zucchini Meatballs 8.jpg
 

Find more recipes like this in Meat on the Side!


You might also like these recipes:

Silent Recipe!: Creamed Spinach Garlic Bread


Sure, you could have regular old garlic bread.


Yes, it is warm, garlicky, and of course, buttery.


But why not throw some creamed spinach into the mix, creating a garlic bread with a creamy, spicy base that also gives you a Popeye’s dose of spinach?!


Read More

Veggie Queso + Homemade Doritos


Queso with Squash + Cauliflower

Makes 2 cups of queso


½ tablespoon extra-virgin olive oil

½ large yellow onion, coarsely chopped (about ¾ cups)

2 garlic cloves, sliced

¼ medium head cauliflower, cut into large chunks, (about ½ pound or 1½ cups)

⅛ small butternut squash, peeled and cut into 1-inch chunks (about ½ pound or 1¼ cups)

1 cup chicken stock

½ teaspoon kosher salt, more to taste

6 ounces sharp cheddar cheese, shredded (about 1½ cups)

4 ounces Monterey Jack cheese, shredded (about 1 cup)

½ cup jarred salsa

Chips, for dipping


1. Heat the oil in a large saucepan set over medium heat. Add the onion and garlic and sauté until tender, 5 to 7 minutes. Stir in the cauliflower, squash, chicken stock, and the ½ teaspoon salt. Bring this mixture to a boil, and then reduce the heat to a simmer. Cook covered, stirring occasionally, until the vegetables are tender—about 20 minutes. This should give you about ¼ cup liquid along with the veggies.


2. Place the mixture in a blender and process it until it is completely smooth. Add more stock or water if there is not enough liquid to blend easily.


3. Transfer the mixture back to the saucepan over low heat. Add the cheddar and Monterey Jack and stir until the cheese melts. Add the salsa and stir to combine. Taste the queso; add more salt if necessary and more stock if your mixture is too thick. Serve with tortilla chips and enjoy hot!


Homemade Doritos

Makes 56 chips

Read More

Buffalo Cauliflower Wings

In my book, Meat On The Side, I have a Cauliflower Wing recipe...

Cauliflower 2.jpg

I roast cauliflower and toss it with my famous (and famously simple!) Buffalo sauce.

Then I douse it with blue cheese and shaved celery, for a “salad” worthy of an Oscar (Or whatever type of award is appropriate for a salad. Probably not an Oscar, huh?).

It’s an easy and light way to get your Buffalo fix.

However, I've been playing with the whole cauliflower + Buffalo sauce thing for awhile now, and I've recently come up with a new version.

This one has just a few more calories and takes just a little more time, but in the end you are left with something that will really, truly satisfy your craving for wings.

The batter is simple—a combination of flour and milk...

You whisk it up, add some cauliflower, and suddenly start to see the magical way a piece of cauliflower can become a wing.

Once baked, you simply toss these "wings" with Buffalo sauce and, most importantly, prepare yourself to eat them all!

It’s a plate of wings that are baked—not fried! And it's cauliflower—not chicken!

Really, what more could you ask for?!

No need to send a thank you gift, just remember you owe me. ;)

Buffalo Cauliflower Wings

servings: Makes 40-50 cauliflower “wings”

Ingredients:

  • 1½ cups all-purpose flour
  • 1¼ cups whole milk
  • ¾ cup + 2 tablespoons Frank’s RedHot Original Cayenne Pepper Sauce
  • 4 teaspoons Worcestershire sauce
  • 2 teaspoons kosher salt
  • 1 teaspoon garlic powder
  • ¼ teaspoon ground black pepper
  • 1 medium head cauliflower, broken or cut into bite-size florets
  • 8 tablespoons unsalted butter (1 stick)
  • 2 tablespoon distilled white vinegar
  • 2 tablespoon light brown sugar

Directions:

  1. Preheat the oven to 475°F. Line two rimmed baking sheets with foil. Spray the foil generously with nonstick cooking spray.
  2. In a large bowl, whisk together the flour, milk, 2 tablespoons of the hot sauce, 3 teaspoons of the Worcestershire sauce, the salt, garlic powder, and black pepper.
  3. Toss the cauliflower in the batter, then spread it on the baking sheets. Bake the cauliflower until it is slightly browned in spots—about 20 minutes.
  4. While the cauliflower bakes, in a small pot, whisk together the remaining ¾ cup hot sauce, the butter, vinegar, brown sugar, and remaining 1 teaspoon Worcestershire sauce.
  5. Once the cauliflower is browned, remove it from the oven and toss it well in the Buffalo sauce. Turn on the broiler, to high if you have that option. Then return the cauliflower to the baking sheets and cook it under the broiler until it is crispy and browned in spots—2-3 minutes more. Remove the cauliflower from the oven and toss or brush it with the remaining sauce. Enjoy by serving with blue cheese.

Notes:

  • Freezing Instructions: To enjoy later, freeze the completed Buffalo Cauliflower Wings in a single layer (not touching) on a baking sheet lined with foil. Once they are frozen, remove the wings from the baking sheet, place them in a food storage bag, and put them back in the freezer until you are ready to eat them. To reheat, begin by preheating the oven to 375°F and lightly spraying a baking sheet with cooking spray. Cook the wings until they are warmed through, 10-15 minutes, depending on their size.
: @NikkiDinki

: @NikkiDinkiCooking
 

Find more recipes like this in Meat on the Side!


You might also like these recipes:

Balsamic Roasted Onions

Balsamic Roasted Onions 1(1).jpg

I love taking underrated vegetables, shining them up, and showing people just how much delicious-potential they have!

Balsamic Roasted Onions 2(1).jpg

Onions don’t generally get their own place on your dinner table...

Instead, they usually play the supporting role in dishes.

Balsamic Roasted Onions 3(1).jpg

The tick to getting them to take center stage is infusing them with flavor—in this case, balsamic, Dijon, and rosemary.

Balsamic Roasted Onions 4(1).jpg

Then add some sweetness to the mix, and let them roast up to sticky perfection in the oven.

Balsamic Roasted Onions 5(1).jpg

When you treat them right, they become a show-stopping side dish that will be gone before the main meal!

Balsamic Roasted Onions 6(1).jpg

Okay, Mr. Onion, it’s your time to shine!

Balsamic Roasted Onions 7(1).jpg

Balsamic Roasted Onions

servings: 6 to 8

Ingredients:

  • 4 medium Vidalia onions, cut into ½-inch slices (skins left on)
  • ½ cup balsamic vinegar
  • ¼ cup olive oil
  • 3 tablespoons honey, more for drizzling
  • 3 tablespoons Dijon mustard
  • 1 tablespoon finely chopped fresh rosemary leaves
  • 1 teaspoon kosher salt, more for sprinkling
  • 1 teaspoon ground black pepper
  • 1 teaspoon red pepper flakes

Directions:

  1. Place the onions in a large plastic food storage bag or shallow dish. In a small bowl, combine the balsamic, olive oil, honey, mustard, rosemary, salt, pepper, and pepper flakes. Pour this mixture over the onion slices and close the bag or cover the dish. Marinate the onions in the refrigerator for at least 4 hours, or overnight; be sure to occasionally shake the onions around in the bag or stir them in the dish ensure that the marinade gets into all parts of the onions.
  2. Preheat the oven to 400°F. Lay the onion slices in a single layer on a baking sheet, then bake them until the onions are very tender and dark in color—about 55 to 60 minutes, removing them from the oven to lightly baste the tops with more of the vinegar mixture every 15 minutes.
  3. After removing them from the oven, drizzle each of the onions with about ¼ teaspoon of honey and sprinkle each with a pinch of salt.
: @NikkiDinki

: @NikkiDinkiCooking
Balsamic Roasted Onions_SMALL(2).jpg
 

Find more recipes like this in Meat on the Side!


You might also like these recipes:

Creamy Roasted Butternut Squash Soup

When I knew I was bringing soups to The Wendy Williams Show, butternut squash soup was obviously at the top of the list.

Butternut Squash Soup medium(1).jpg

But knowing Wendy is vegan, I really had to rethink the classic recipe. 

Butternut Squash Soup 3.jpg

Without using chicken stock or cream—both of which can add so much flavor to soups!—I had to extract as much flavor as possible from my ingredients, while finding other ways to give the soup a creamy texture.

Butternut Squash Soup 1.jpg

I discovered roasting the squash was vital, as it really intensified the sweet taste of the squash.

And pairing the roasted squash with apple made it even better.

Butternut Squash Soup 2.jpg

A handful of cashews later, and my soup was even creamier and more velvety in texture than it would have been if I had added a cup of cream!

Butternut Squash Soup 5.jpg

In the end what I’ve really created is just a better soup—that also just happens to be vegan.

Creamy Roasted Butternut Squash Soup

servings: 6; makes about 16 cups of soup

Creamy Butternut Squash Soup:

  • 1 large butternut squash (3 pounds)
  • 4 tablespoons olive oil
  • 3 teaspoons kosher salt
  • ½ teaspoon ground black pepper
  • 1 yellow onion, finely diced
  • 3 gloves garlic, minced
  • 8 cups vegetable stock
  • 3 red apples (about 1 pound), peeled + coarsely chopped, some reserved for a garnish
  • 1 cup raw cashews
  • ¼ teaspoon ground ginger
  • ¼ teaspoon ground nutmeg

Topping:

  • 3 cups one-inch cubes sourdough bread (about 4 ounces)
  • 1 cup whole pecans (about 4 ounces)
  • 3 tablespoons extra virgin olive oil
  • 12 leaves fresh sage
  • 2 tablespoons loosely packed + finely chopped fresh parsley
  • ½ teaspoon kosher salt
  • 2 tablespoons pomegranate seeds

Creamy Butternut Squash Soup:

  1. Preheat the oven to 425°F. Peel the squash and cut it in half lengthwise. Use a soupspoon to scoop out the seeds and discard them. Cut the squash into ½-inch-thick slices and then into ½-inch chunks. Place them in a medium bowl and add 2 tablespoons of the oil, 1 teaspoon of the salt, and ¼ teaspoon of the pepper. Toss to coat; then spread on a rimmed baking sheet and bake until tender—about 50 minutes.
  2. Meanwhile, heat the remaining 2 tablespoons of olive oil in a large pot over medium-high heat. Add the onion and cook until it is tender and browned in spots—about 6 minutes. Add the garlic and cook for one minute more.
  3. Add the stock, apple, cashews, and 1 teaspoon of the salt to the pot and cook for 50 minutes. When the squash has finished cooking, remove it from the oven, add it to the pot with the stock, and cook the soup for 10-20 minutes more until the cashews are very soft.
  4. Transfer the soup to a blender and add the remaining 1 teaspoon of salt, the ginger, nutmeg, and the remaining ¼ teaspoon pepper. Blend until combined and then transfer the soup to serving bowls. Top with breadcrumbs, diced apple, and enjoy!

Topping:

  1. Preheat the oven to 400°F. Place the bread cubes on a (parchment-lined? No, nothing) baking sheet and cook them in the oven until they are dried out and toasty—about 5 minutes. Then transfer them to the bowl of a food processor and pulse until small bread crumbs form. Add the pecans and continue pulsing until the bread crumbs are fine and the pecan pieces are about the size of a pea.
  2. Meanwhile, in a medium skillet, heat the olive oil over medium-high heat. Once shimmering, add the sage leaves and fry them until they are crisp—about one minute. Then transfer them to a paper towel-lined plate to drain, reserving the oil in the skillet.
  3. Next, add the bread crumb mixture to the hot oil and toss until it is light brown and toasty—2-3 minutes. Remove the skillet from the heat and stir in the parsley and salt.
  4. Top the Creamy Butternut Squash Soup with the bread crumbs, fried sage, and pomegranate seeds.
: @NikkiDinki

: @NikkiDinkiCooking
Butternut Squash Soup 4.jpg
 

Find more recipes like this in Meat on the Side!


You might also like these recipes:

Cabbage Nachos with Tomatillo Salsa

IMG_2490.jpg

Now that football season’s over, I find myself missing it a little. My husband and I are used to watching football every Sunday…and sometimes Thursday, Saturday, and Monday, too.

I like football, but when I think about it, what I really miss is football food.

A football game is a good excuse to whip up snacks, open some beers—or maybe some sparkling rosé—and watch TV all day.

But I guess I don’t really need an excuse. ;)

I think it’s time to get back to Sunday tailgate snacks all day! And to start, how about some Cabbage Nachos?!

Mild, crunchy cabbage adds texture and acts as a delicious glue to hold a showstopping tomatillo salsa and crispy chip together.

Since I’ve solved the problem of missing my football snacks, it’s time to settle back onto the couch. The only question now is, what to watch?!

Cabbage Nachos with Tomatillo Salsa

makes: 1 large plate of nachos

Ingredients:

  • ¾ pound tomatillos (5 to 7), husks removed
  • 1 fresh jalapeno or serrano chile
  • Half a yellow onion, peeled and cut into 4 wedges
  • 2 tablespoons olive oil
  • 3 teaspoons kosher salt
  • ½ cup loosely packed fresh cilantro leaves
  • 5 cups lightly packed shredded green cabbage (about half a head)
  • 30 large tortilla chips
  • 2 cups shredded pepper Jack cheese (8 ounces)
  • ¼ cup pickled sliced jalapeno chiles

Directions:

  1. Turn on the broiler, to high if you have that option. Place the tomatillos, fresh jalapeno, and onions on a rimmed baking sheet; drizzle with 1 tablespoon of the oil and then stir to coat the vegetables. Broil until the vegetables are tender and slightly charred—7 to 10 minutes. (You may have to remove the tomatillos and jalapenos and let the onions cook for an extra minute or so.) Leave the broiler on while you do the next steps.
  2. To make the salsa, transfer the charred vegetables to a food processor or blender; add 2 teaspoons of the salt and the cilantro. Process until almost smooth.
  3. Heat the remaining 1 tablespoon oil in a medium skillet over medium heat. Stir in the cabbage and remaining 1 teaspoon salt; cook until the cabbage is tender but not mushy—about 5 minutes. Remove the skillet from the heat and stir in about half the salsa until combined. You want the cabbage to be coated, but not dripping wet, so then stir in as much of the rest of the salsa as you need to get to that point.
  4. Arrange the tortilla chips in a single layer on a large oven-safe serving dish. Spread the cabbage mixture over the chips and then sprinkle the cheese evenly over the top. Broil the nachos until the cheese is melted and bubbly. Scatter the pickled jalapenos over the top and serve right away.

Keep It Simple:

  • Tomatillos look like green tomatoes with papery skins around them, and taste like a tart apple. If you’re having trouble finding them at your store, you can use tomatoes instead—the taste will be different but similarly delicious.
  • To make this dish in less than 10 minutes, try these shortcuts: simply buy a jar of your favorite red or green salsa instead of making the tomatillo salsa. And save major time by purchasing shredded cabbage or coleslaw mix as well as shredded cheese at your market; no need to do it yourself!

Make It Meaty:

  • These nachos are currently meatless, but you can add your favorite nacho topping, including ground beef, over the whole plate—or just over half for a 50/50 appetizer.

Family Friendly:

  • Your family will never know there is a pound of cabbage sitting in these nachos. The sautéed cabbage has a really mild flavor and its job is to help the tomatillo salsa stay on the nachos to give you a flavorful hit with every bite.
: @NikkiDinki

: @NikkiDinkiCooking
 

Find more recipes like this in Meat on the Side!


You might also like these recipes:

Cauliflower Tater Tots

Who doesn’t love a tater tot?

Crunchy on the outside, pillowy soft on the inside...

Simple and yet simply satisfying.

So if they're already so good, why would I mess with them and make a different version?

Because cauliflower tater tots are also delicious--that's why!

This recipe isn’t about making a healthy version of something you already love.

It’s about celebrating the tater tot with a new and equally yummy recipe.

And just so you understand how yummy, let me tell you that I have some of these stored in my freezer and the goal is to avoid consuming any more than 12 each day.

It's so hard to do!

Cauliflower Tater Tots

servings: 2 dozen tater tots

Ingredients:

  • 1 small head cauliflower (about 1½ pounds), stemmed, coarsely chopped + rinsed
  • 2 large eggs
  • ½ cup all-purpose flour
  • ½ cup grated parmesan cheese (about 2½ ounces)
  • 1½ teaspoon kosher salt
  • 1 teaspoon garlic powder
  • Pinch of ground black pepper
  • ¾ cup crushed yellow corn tortilla chips
  • ¾ cup plain panko bread crumbs
  • ½ teaspoon paprika

Directions:

  1. Preheat the oven to 425°F. Place the cauliflower into the bowl of a food processor and pulse until it is coarse and grain-like in texture (you should have about 2 cups of this cauliflower “rice”).
  2. Then transfer the cauliflower to a large bowl with the eggs and mix together to combine. Mix in the flour, parmesan, salt, garlic powder, and pepper.
  3. Add the corn chips to the food processor and pulse until the chip pieces are close to the size of panko breadcrumbs (this should make about 1 cup). If you don’t have a food processor you can also place the chips in a food storage bag and smash them with a pan or rolling pin. Then transfer the corn chip pieces to a medium-sized bowl along with the panko and paprika and mix these ingredients well.
  4. Using your hands, roll the cauliflower mixture and pack it tightly by the tablespoon into tater tot (or other desired) shapes approximately 1 inch wide and 2 inches long. Roll each tater tot in the corn chip breading mixture, reshaping afterwards if necessary.
  5. Place the formed tater tots on a nonstick baking pan or a pan lined with parchment paper. Spray the tater tots lightly with nonstick spray and bake them until browned—about 20 minutes. Serve with ketchup if desired.

Notes:

  • Freezer Instructions: Place cooked and cooled tots on a baking sheet or plate in a single layer. Let them freeze completely; once frozen place them in a plastic food storage bag. To re-heat, place in a 425°F oven on a baking sheet and cook for 10 minutes.
: @NikkiDinki

: @NikkiDinkiCooking
 

Find more recipes like this in Meat on the Side!


YOu might also like these recipes:

Holiday Brie + Honey Crostini with Pistachio + Pink Peppercorns

Holiday Brie Honey Crostini with Pistachio + Pink Peppercorn_SMALL(1).jpg

I love easy appetizers!

Holiday Brie Crostini 2.jpg

And even better than just being easy, I love appetizers that are easy and ridiculously tasty.

You know the type—they're made with just a couple of ingredients but still get oohs and aahs from your guests.

Holiday Brie Crostini 3.jpg

Well, look no further for your next appetizer that fits this bill!

This one's really just about assembly...

Holiday Brie Crostini 4.jpg

Bread, brie, honey.

Bake!

Peppercorns, pistachios, more honey...

Then serve to your adoring audience!

Holiday Brie Crostini 5.jpg

The pinch of sharpness from the pink peppercorns cut through the sweet honey and creamy brie—for a perfectly gooey bite.

A bite that also happens to look like a Christmas ornament decorated in red and green!

Holiday Brie Crostini 6.jpg

Holiday Brie + Honey Crostini with Pistachios + Pink Peppercorns

servings: 8 crostini

Ingredients:

  • 8 baguette slices
  • 4 ounces Brie cheese, cut into eight ½-ounce slices
  • ⅓ cup honey
  • 1 tablespoon roughly chopped pink peppercorns
  • 1 tablespoon roughly chopped pistachios

Directions:

  1. Turn on the broiler, to high if you have that option. Arrange the baguette slices on a rimmed baking sheet. Top each of the slices with 1 piece of the brie and 1 teaspoon of the honey.
  2. Broil until the cheese is melted and brown—2 to 5 minutes.
  3. Remove the crostini from the oven and top each with another teaspoon of the honey, and a heavy sprinkle of both the peppercorns and pistachios.
  4. Serve immediately with a knife and fork, or simply pick up and enjoy!
: @NikkiDinki

: @NikkiDinkiCooking
Holiday Brie Crostini 7.jpg
 

Find more recipes like this in Meat on the Side!


You might also like these recipes:

Everything Spice Pumpkin Cheese Ball

Everything Spice Pumpkin Cheeseball_SMALL(1).jpg

After eating my 124,562nd Everything Bagel with cream cheese, I had an epiphany.

Everything Spice Pumpkin Cheeseball 1.jpg

“I should make this into a cheese ball!”

“Better yet, a PUMPKIN cheese ball!!”

Everything Spice Pumpkin Cheeseball 2.jpg

And thus the Pumpkin Cheese Ball was born.

Everything Spice Pumpkin Cheeseball 3.jpg

I had seen different versions of pumpkin cheese balls on Pinterest.

But most of them involved hours of wait time and a series of rubber bands, which all seemed far above my pay grade (or attention span!).

Everything Spice Pumpkin Cheeseball 4.jpg

There had to be a better way.

And guess what?! I found it!

Everything Spice Pumpkin Cheeseball 5.jpg

Don't worry, I'll share my secret...

Basically you create a mouthwatering cheese ball made of goat cheese, cream cheese, sundried tomatoes, and scallions.

Cover it in Everything Bagel seasoning, then shape it with a chopstick or spoon.

And for the cutest final effect, top it with a pumpkin stem.

Everything Spice Pumpkin Cheeseball 6.jpg

It’s seriously that easy, and it’s done in 20 minutes.

And once you set it on the table, it will last about the same amount of time!

Everything Spice Pumpkin Cheeseball 7.jpg

Everything Spice Pumpkin Cheese Ball

servings: 10 to 12

Ingredients:

  • 8 ounces cream cheese
  • 5 ounces herbed goat cheese (such as Boursin)
  • ¼ cup finely chopped chives
  • ¼ cup finely chopped sundried tomatoes
  • ¼ cup everything bagel spice mix
  • 1 stem from small pumpkin or bell pepper

Directions:

  1. Place the cream cheese, goat cheese, chives, and sundried tomatoes in the bowl of a food processor or mixer, then process to combine until the mixture is smooth.
  2. Transfer the cheese mixture to a piece of plastic wrap. Use the plastic along with your hands to form the mixture into a short, squat ball, then place the plastic-wrapped ball in the refrigerator.
  3. Remove the stem from the bell pepper or pumpkin; if you use a pumpkin, it’s easiest to cut off the whole top of the pumpkin straight across, then cut around the base of the stem (rather than trying to break the stem off).
  4. Remove the cheese ball from the plastic and transfer it to a small plate. Pour/sprinkle the spice mix all over the cheese ball, pressing it in so that it sticks and coats the entire ball.
  5. Use a chopstick or spoon handle to press indented lines into the ball that resemble the creases on a pumpkin, then use your hands to smooth and reshape the ball.
  6. Insert the stem into the center of the top of the ball. Serve with your favorite crackers, and enjoy!

Notes:

  • If you’re having difficulty with Steps 4 or 5, try putting your cheese ball back in the refrigerator or freezer to chill longer. It will firm up and may be easier to work with.
  • If you don’t have a pumpkin or bell pepper, you can also use a 2-inch piece of broccoli stem; this also looks great!
: @NikkiDinki

: @NikkiDinkiCooking
Everything Spice Pumpkin Cheeseball 8.jpg
 

Find more recipes like this in Meat on the Side!


You might also like these recipes:

Eggplant Parm Meatballs

Eggplant Parm Meatballs.jpg
 

I love it when I get to be on The Wendy Williams Show!

Today I showed everyone how to make one of my favorites—Eggplant Parm Meatballs!

They're an amazing add to your favorite pasta dish, but also pretty delicious all on their own!


Eggplant Parm Meatballs

servings: Thirty 1½-inch meatballs

Ingredients:

  • 1 medium eggplant (about 1 pound)
  • 3 teaspoons olive oil
  • 1 teaspoon kosher salt
  • ¼ teaspoon ground black pepper
  • 16 ounces ground beef
  • 1 cup Italian breadcrumbs*
  • ½ cup grated parmesan (about 2 ounces)
  • ½ cup marinara sauce + more for serving
  • 1 large egg
  • ½ teaspoon onion powder
  • ½ teaspoon garlic powder
  • Mozzarella cheese, grated

Directions:

  1. Preheat the oven to 425°F. Cut the eggplant in half lengthwise and place the halves cut-side-up on a rimmed baking sheet. Drizzle them lightly with 1 teaspoon of the oil and then sprinkle ½ teaspoon of the salt and the pepper over them. Bake the eggplants until they are very soft—about 30 minutes.
  2. When the eggplant is cool enough to handle, use a spoon to scrape the flesh of the eggplant into a food processor or blender; discard the skin. Process until everything is completely pureed; this should give you about ¾ cups of eggplant puree. Note: If your marinara sauce is very chunky, puree it with the eggplant.
  3. Transfer the puree to a large bowl, then add the beef, breadcrumbs, parmesan, marinara sauce, egg, onion powder, garlic powder, and the remaining ½ teaspoon of salt. Mix to combine well and then form the mixture into tablespoon-sized balls by hand.
  4. Heat a large skillet over medium heat and add the remaining 2 teaspoons of oil. Place the meatballs in the pan and brown on all sides, working in batches if necessary, cooking until the center is no longer pink—5-7 minutes.
  5. Preheat the broiler to high. Place the meatballs in a serving dish and cover with marinara sauce and mozzarella cheese, then place under the broiler until the cheese is melted. Serve and enjoy!

Notes:

  • If you wish, you can bake the meatballs at 400°F for about 30 minutes.
  • *Depending on the amount of moisture in your eggplant and sauce you may need more breadcrumbs to ensure your meatballs hold together nicely.
: @NikkiDinki

: @NikkiDinkiCooking
 

Find more recipes like this in Meat on the Side!


YOu might also like these recipes:

Coconut Bacon


On my show Junk Food Flip, Bobby Deen and I go around and transform comfort food into delicious dishes that you can actually eat every day.


Read More