Cucumber Sub


Gluten-free is definitely trending--and for good reason.


Of course there are some people who simply can’t have gluten, but there are also many who are realizing that eating less gluten and carbs helps them feel and look their best.


Read More

Brussels Sprout Poppers


Super Bowl Sunday is just around the corner and this means you're about to be eating all the Super Bowl snacks your little heart could desire.


It's a day to sit around, watch TV, crack open a beer, and forget about those New Year's resolutions--while enjoying all the cheesy, fried, Buffalo-flavored things you can imagine.


Read More

Turnip No-Potato Salad

Summer is officially here!

So, of course, I’ve got summer barbecues on my mind!

And obviously that means I’ve got summer barbecue staples on my mind—potato salad, to be exact!

I think we can all agree that potatoes are great, but there are other root veggies out there that are primed for side dish glory.

Take turnips, for instance.

Turnips are a little sweeter than potatoes and make for the most amazing substitute in a “potato” salad.

Combine them with some crunchy celery, a hit of bacon, and a simple dressing made of mayo and Greek yogurt.

Voila!

You’ve got a potato—I mean a turnip—salad to die for!

Turnip No-Potato Salad

servings: 3 cups of salad, serves 4

Ingredients:

  • 5 small to medium turnips (about 1½ pounds), cut into ¾-inch cubes (about 5 cups)
  • 1½ tablespoons balsamic vinegar
  • 1 tablespoon olive oil
  • 1½ teaspoon kosher salt
  • ½ teaspoon ground black pepper
  • 2 slices thick-cut bacon
  • ¼ cup mayonnaise
  • ¼ cup Greek yogurt
  • 1 tablespoon pickle juice
  • 1 teaspoon whole-grain mustard
  • ½ teaspoon paprika, more for a garnish
  • 2 stalks celery, thinly sliced into half-moons (about ¾ cup)
  • 3 scallions, thinly sliced (about ¼ cup), more for a garnish

Directions:

  1. Preheat the oven to 425°F. On a rimmed baking sheet, toss the turnips with the balsamic vinegar, oil, 1 teaspoon of the salt, and ¼ teaspoon of the pepper. Bake the turnips until they are tender and lightly colored—20-25 minutes.
  2. While the turnips bake, heat a large skillet over medium heat. Add the bacon and cook it until it is crispy—6-7 minutes. Transfer the bacon to a paper towel to drain, then coarsely chop it and set it aside.
  3. In a large bowl, whisk together the mayonnaise, Greek yogurt, pickle juice, mustard, and paprika. Add the turnips, celery, scallions, and three-quarters of the bacon. Toss this mixture to combine, and season it with the remaining ½ teaspoon salt and ¼ teaspoon pepper.
  4. Garnish the salad with the remaining bacon, along with more scallions and paprika.
: @NikkiDinki

: @NikkiDinkiCooking
 

Find more recipes like this in MORE VEGGIES PLEASE!


You might also like these recipes:

Buffalo Cauliflower Burger


Some people think that because I grew up in Buffalo that I am used to the snow and cold, and that it shouldn’t bother me.


When in actuality my patience for such things ran out by the time I was 8, and by 18 I knew that though I had the most wonderful family Buffalo just wasn’t for me.


Read More

Zucchini Chicken Wraps with Balsamic Vinaigrette + Provolone


When I was younger I used to go out of my way to eat at a place called Mighty Taco, famous in the Buffalo area.


At that point I didn’t eat meat or beans, so I thought of myself as innovative for putting iceberg lettuce in my taco.


I ended up with a taco containing lettuce and cheese--and only lettuce and cheese.


Read More

Mushroom + Beef Sloppy Joes

Check out my OUTRAGEOUSLY good sloppy joes...

These Mushroom + Beef Sloppy Joes are from my book Meat On The Side.

If you're looking for amazing comfort food that's also good for you, you owe it to yourself to give them a shot.

The secret is that the sandwich filling is half meat, half veggies! No need to feel guilty--you can eat up and enjoy!

Mushroom + Beef Sloppy Joes

servings: 4 Sandwiches

Ingredients:

  • 1 tablespoon olive oil, plus more if needed
  • 8 ounces ground sirloin
  • 1 pound portobello mushrooms, stems discarded, caps finely chopped
  • 1 small green bell pepper, cored, seeded, and finely chopped
  • 1 small yellow onion, finely chopped
  • 1½ teaspoons kosher salt
  • ¼ teaspoon ground black pepper
  • One 8-ounce can tomato sauce
  • 3 tablespoons Worcestershire sauce
  • 2 tablespoons molasses
  • 2 tablespoons white wine vinegar
  • 1 tablespoon sriracha or other hot sauce
  • 3 tablespoons tomato paste
  • 1 teaspoon minced fresh thyme leaves
  • 4 hamburger buns
  • Finely chopped dill pickles, for serving
  • Sliced pickled banana peppers, for serving

Directions:

  1. Heat the oil in a large deep skillet over medium-high heat. Add the sirloin, breaking up with a spoon or spatula, and cook until it has browned, about 5 minutes. Then, if the skillet is too dry for sautéing the mushrooms, add a bit more oil. Stir in the mushrooms and cook until they are brown and tender, about 5 minutes.
  2. Reduce the heat to medium. Add the bell peppers, onion, ½ teaspoon of the salt, and the black pepper to the skillet and stir to combine. Cook until all the veggies are tender, 5 to 7 minutes. Meanwhile, whisk together the tomato sauce, Worcestershire sauce, molasses, vinegar, sriracha, and the remaining1 teaspoon salt in a small bowl.
  3. Add the tomato paste and thyme to the mixture in the skillet and stir to combine. Cook for 2 minutes. Then stir in the tomato sauce mixture and cook until the sauce thickens and coats the veggies and meat and all the flavors come together, 5 to 7 minutes more.
  4. To serve, spoon the sloppy Joe mixture onto the bottom half of each hamburger bun, dividing it equally, and dot with some pickles and banana peppers before adding the bun tops.
: @NikkiDinki

: @NikkiDinkiCooking
 

Find more recipes like this in Meat on the Side!


You might also like these recipes:

Broccoli Tater Tots

Broccoli Tots_BIG.jpg

Does anyone really want to eat their broccoli steamed?

Sitting there, waterlogged and sad on the side of the plate?

Broccoli Tots 1.jpg

I don’t know about you, but broccoli tater tots seem like a MUCH more exciting way to eat this green veggie!

Broccoli Tots 2.jpg

Sure, these tots take a minute or so longer than steaming up some florets, but I’ve streamlined the process for you.

And they're the perfect food to store in the freezer, so yes, you can have tots ANYTIME!

Broccoli Tots 3.jpg

To make them, just mix together finely chopped broccoli (stems and all!), throw in some eggs, seasonings, a touch of cheese and flour...

Broccoli Tots 4.jpg

Form them into whatever shapes you like and let them roll around in a flurry of panko and crushed tortilla chips...

Broccoli Tots 5.jpg

Then bake them up into crunchy perfection!

You'll never look at broccoli the same way!

Broccoli Tots 6.jpg

Broccoli Tater Tots

servings: 36 tater tots

Ingredients:

  • ¾ cup crushed yellow corn tortilla chips
  • ¾ cup plain panko bread crumbs
  • ½ teaspoon paprika
  • 1 large bunch broccoli (about 1½ pounds), entire stem + florets coarsely chopped + rinsed
  • ¾ cup grated parmesan cheese (about 3½ ounces)
  • ½ cup all-purpose flour
  • 3 large eggs
  • 2 teaspoons kosher salt
  • 1½ teaspoon garlic powder
  • Pinch of ground black pepper

Directions:

  1. Preheat the oven to 425°F. Add the corn chips to the food processor and pulse until the chip pieces are close to the size of panko breadcrumbs (this should make about 1 cup). If you don’t have a food processor you can also place the chips in a Ziploc bag and smash them with a pan or rolling pin. Then transfer the corn chip pieces to a medium-sized bowl along with the panko and paprika and mix these ingredients well.
  2. Clean the bowl of the food processor, then place the broccoli inside and pulse until it is coarse and grain-like in texture (you should have about 4 cups of this broccoli “rice”).
  3. Transfer the broccoli to a large bowl with the parmesan, flour, eggs, salt, garlic powder, and pepper and mix together to combine.
  4. Using your hands, roll the broccoli mixture and pack it tightly by the tablespoon into tater tot (or other desired) shapes approximately 1 inch wide and 2 inches long. Roll each tot in the corn chip breading mixture, reshaping afterwards if necessary.
  5. Place the formed broccoli tots on a nonstick baking pan or a pan lined with parchment paper. Spray the tots lightly with nonstick olive oil spray and bake them until browned—about 20 minutes.

Notes:

  • Freezer Instructions: Place cooked and cooled tots on a baking sheet or plate in a single layer. Let freeze completely; once frozen place them in a plastic food storage bag. To reheat, place in a 425°F oven on a baking sheet and cook for 10 minutes
: @NikkiDinki

: @NikkiDinkiCooking
 

FIND more recipes like this in MEAT ON THE SIDE!


You might also like these recipes:

Spaghetti Squash Crust Pizza


Cauliflower is definitely having its moment in the sun.


One of the reasons it’s so popular is that everyone is churning out cauliflower crust pizzas--and loving how tasty an all-veggie crust can be!


Read More

Lentil + Carrot Chicken Nuggets

Lentil Carrot Chicken Nuggets_SMALL(1).jpg

The classics are the classics for a reason—they're delicious!

Lentil Carrot Chicken Nuggets 1.jpg

Chicken nuggets are simple and simply tasty, and with so many options out there—from the grocery store to McDonalds—you may ask yourself, why make them myself?

Lentil Carrot Chicken Nuggets 2.jpg

Well, I'll tell you why!

These nuggets are worth making because they're unlike anything you can buy.

They're actually half lentils and carrots, and yet they taste like the good-old fashioned chicken nuggets you (and your kids!) are used to! 

Lentil Carrot Chicken Nuggets 3.jpg

The lentils get slightly pureed, which allows them to pretty much melt into the meat.

As for the carrots, you will see some small specks of them in the mix—so if your kids are super weary, you can always skip them.

Or if you’re feeling crazy, you could use parsnips instead!

Lentil Carrot Chicken Nuggets 4.jpg

Like many of my toddler recipes, these are the kinds of things that I make huge batches of and freeze.

Lentil Carrot Chicken Nuggets 6.jpg

And a freezer full of chicken nuggets is a happy freezer indeed!!

Lentil Carrot Chicken Nuggets 8.jpg

Lentil + Carrot Chicken Nuggets

makes: 50 nuggets

Ingredients:

  • 1¾ cups chicken stock
  • 1 cup dry split red lentils
  • 2 cubes chicken bouillon
  • 2 cups grated carrots (about 6 ounces)
  • 1 pound ground chicken
  • ½ cup grated parmesan cheese
  • 1 teaspoon garlic powder
  • 1 teaspoon onion powder
  • 1 teaspoon kosher salt
  • ½ cup Italian breadcrumbs
  • 1 tablespoon olive oil

Directions:

  1. Place the chicken stock, lentils and bouillon in a small saucepan. Bring the stock to a boil, then reduce it to a simmer and cook the lentils until the broth is fully absorbed and the lentils are very soft—about 15 minutes.
  2. Add the carrots to the bowl of a food processor and pulse until they are crumb-like in texture—ground, but not pureed. Then transfer the cooked lentils to the food processor with the carrots and pulse to combine the ingredients.
  3. Next add the chicken, parmesan, garlic powder, onion powder, and salt to the food processor and pulse again until all ingredients are just combined; avoid overmixing.
  4. Scoop the mixture by tablespoons and shape it by hand into nuggets (the easiest way to do this is to form the mixture into a ball, then smash it flat and add dents and curves by hand). Then coat each nugget well in the breadcrumbs.
  5. Heat the oil in a large skillet over medium-high heat; add 10 to 12 nuggets and cook them until all sides of the nuggets are golden brown—4 to 6 minutes per side. Repeat this process until all of the nuggets have been cooked.

Notes:

  • If you prefer to bake the nuggets rather than frying them, preheat the oven to 425°F. Place the prepared nuggets on a parchment-lined or nonstick baking sheet. Spray the nuggets with olive oil cooking spray and bake them until they are light golden and cooked through—about 15 to 20 minutes. Note that the nuggets will be paler in color—not as brown—than if you were to cook them as in Step 5. The air fryer is also a great option!
  • Freeze It: Once nuggets are totally cooked, throw them into a plastic storage bag, and freeze. From frozen reheat the nuggets in an oven preheated to 375°F for 8 to10minutes.
  • Hack It: Don’t think your kids are going to go for a handmade chicken nugget? Try to sneak some veggies in by dipping store-bought nuggets in my homemade BBQ sauce or Ketchup.
: @NikkiDinki

: @NikkiDinkiCooking
Lentil Carrot Chicken Nuggets 9.jpg
 

Find more recipes like this in Meat on the Side!


You might also like these recipes:

Kraft-Style Mac + Cheese with Cauliflower + Sweet Potato

As a kid--and still, as an adult--I was (am!) obsessed with mac and cheese.

But my kid-self wanted nothing to do with any kind of homemade mac and cheese sporting a bubbling crust.

Gross!

No, if it didn’t come out of a box, I wouldn’t go near it.

It’s been a couple of years, but there are still a lot of kids out there just like me (and maybe some adults, too).

So how do you get your kids to eat a homemade mac and cheese that’s also packed with veggies?

You make it look and taste as much like the original as possible!

The base of this sauce is pureed veggies.

There's no butter and no milk.

But there are so many hidden veggies inside, it will make your head spin.

It’s time to lose the box (...at least, sometimes)!

Kraft-Style Mac + Cheese with Cauliflower + Sweet Potato

servings: 6

Ingredients:

  • ½ tablespoon extra-virgin olive oil
  • 1 small yellow onion, coarsely chopped (about ¾ cups)
  • 2 garlic cloves, sliced
  • ½ medium head cauliflower, cut into large chunks, (about 1 pound or 3 cups)
  • 1 large sweet potato, peeled + cut into 1-inch chunks (about ½ pound or 1¼ cups)
  • 1 cup vegetable stock
  • 1¼ + ½ teaspoon kosher salt, more to taste
  • 8 ounces shredded cheddar cheese (about 2 cups)
  • 8 ounces American cheese (12 slices)
  • 1½ pounds macaroni pasta

Directions:

  1. Place a large pot of salted water over high heat for cooking the macaroni. Heat the oil in a large saucepan set over medium heat. Add the onion and garlic, and sauté until tender—5 to 7 minutes. Stir in the cauliflower, sweet potato, vegetable stock, and the 1¼ teaspoon salt. Bring this mixture to a boil, and then reduce the heat to a simmer. Cook covered, stirring occasionally, until the vegetables are tender—about 20 minutes. This should give you about ¼ cup liquid along with the veggies.
  2. Place the veggie mixture in a blender and process it until it is completely smooth. Add more stock or water if there is not enough liquid to blend easily.
  3. Then transfer the mixture back to the saucepan over low heat. Add the cheddar cheese, American cheese, and remaining ½ teaspoon salt; stir until the cheese melts (depending on the saltiness of your stock and cheese you may not need this extra ½ teaspoon of salt). Add more stock if your mixture is too thick or if it thickens over time.
  4. When the water boils, add the macaroni and cook according to the package directions. When done, drain and transfer the macaroni to the saucepan with the veggie and cheese mixture. Toss to combine and serve.

Notes:

  • You can use any combination of cheese that you like—cheddar, parmesan, fontina or provolone— though I do like to include a little American or Velveeta in my mix, as it gives the cheese sauce the right consistency.
  • This version is on the simple side; for a flavor that makes a bigger impact, I suggest stirring in some salsa or adding sautéed peppers to the mix.
: @NikkiDinki

: @NikkiDinkiCooking
 

Find more recipes like this in Meat on the Side!


You might also like these recipes:

Silent Recipe!: Veggie Burgers

Burger Time—VEGGIE Burger Time!

I may not be Bobby Flay, but hey, that’s okay, because I’ve got THE secret to making the perfect veggie burgers…

It's been my goal for awhile now to make a bang-up version of a veggie burger.

But every time I really thought about it, I was super intimidated.

I mean, all of those weird ingredients, lots of chopping, and then the fear that after the first bite, the whole thing might just fall apart.

So instead of tackling this daunting task head-on, I've avoided it like the plague.

I just told myself that someday I'd make a better—no, a perfect—veggie burger.

More perfect than any other one out there.

And so when the time came for me to face my fear, I came up with something that makes me wonder what I was so afraid of in the first place.

My Ultimate Veggie Burgers have no weird ingredients, are super dense (for that BIG bite experience!), and look better than some of the best beef patties you've ever laid eyes on!

And my big secret?! Well, watch the Silent Recipe video, and you’ll see…

This Veggie Burger is a game changer.

Ultimate Veggie Burgers

servings: 4 large or 6 small patties

Ingredients:

  • One 15-ounce can brown lentils, rinsed + drained (1½ cup cooked lentils)
  • 8 ounces baby bella mushrooms, sliced (about 3 cups)
  • 1½ cups cooked brown rice
  • ½ cup walnuts halves + pieces
  • ¼ cup all-purpose flour
  • 2 tablespoons barbeque sauce
  • 1 large egg
  • 1¼ teaspoon kosher salt
  • 1 teaspoon garlic powder
  • 1 teaspoon finely chopped fresh rosemary leaves
  • ¼ teaspoon smoked paprika
  • 1 tablespoon olive oil

Directions:

  1. Preheat the oven to 400°F. Spread the lentils and mushrooms on a parchment-lined or lightly sprayed baking sheet and roast them until the lentils are dry and crisp on the outside and the mushrooms are dry and shrunken to half their original size—25 minutes.
  2. Use a wooden spoon to move the mushrooms to the side, then spread the cooked rice in the open space. Return the pan to the oven and cook until the rice is lightly toasted in places and the lentils are very dry—15 minutes.
  3. While the beans, mushrooms, and rice are cooking, place the walnuts in the bowl of a food processor and pulse them until they are coarsely ground. When the lentils, mushrooms, and rice have finished roasting, add them to the food processor and pulse until well-combined, but not completely smooth. Then add the flour, barbeque sauce, egg, salt, garlic powder, rosemary, and paprika and pulse just until all ingredients are combined.
  4. Next, form the mixture by hand into either 4 large patties or 6 small ones. Then heat the oil in a large skillet over medium-high heat. Add the patties and cook them until they are well-browned and crisp—about 3 to 4 minutes per side.

Notes:

  • ¾ cup dried lentils should yield the 1½ cups cooked lentils you need in this recipe. Also, ½ cup uncooked brown rice should yield the 1½ cups cooked rice needed.
  • If you prefer to bake the patties rather than sautéing them, place them on a lightly-sprayed unlined tray and bake them at 400°F until they are golden brown and crispy on the outside, flipping halfway through—about 20 minutes.
  • You can omit the flour for a gluten-free patty. The patties will be slightly less stable, but still very good.
  • To prepare from frozen, bake patties at 400°F for 13 to15 minutes.
: @NikkiDinki

: @NikkiDinkiCooking
 

Find more recipes like this in Meat on the Side!


You might also like these recipes:

Veggie Queso + Homemade Doritos


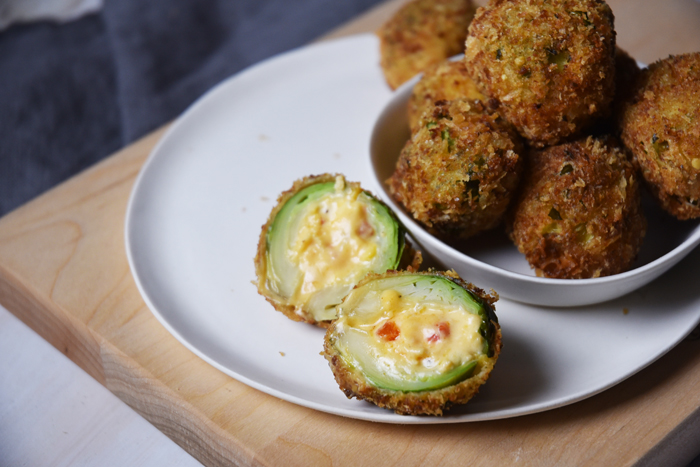
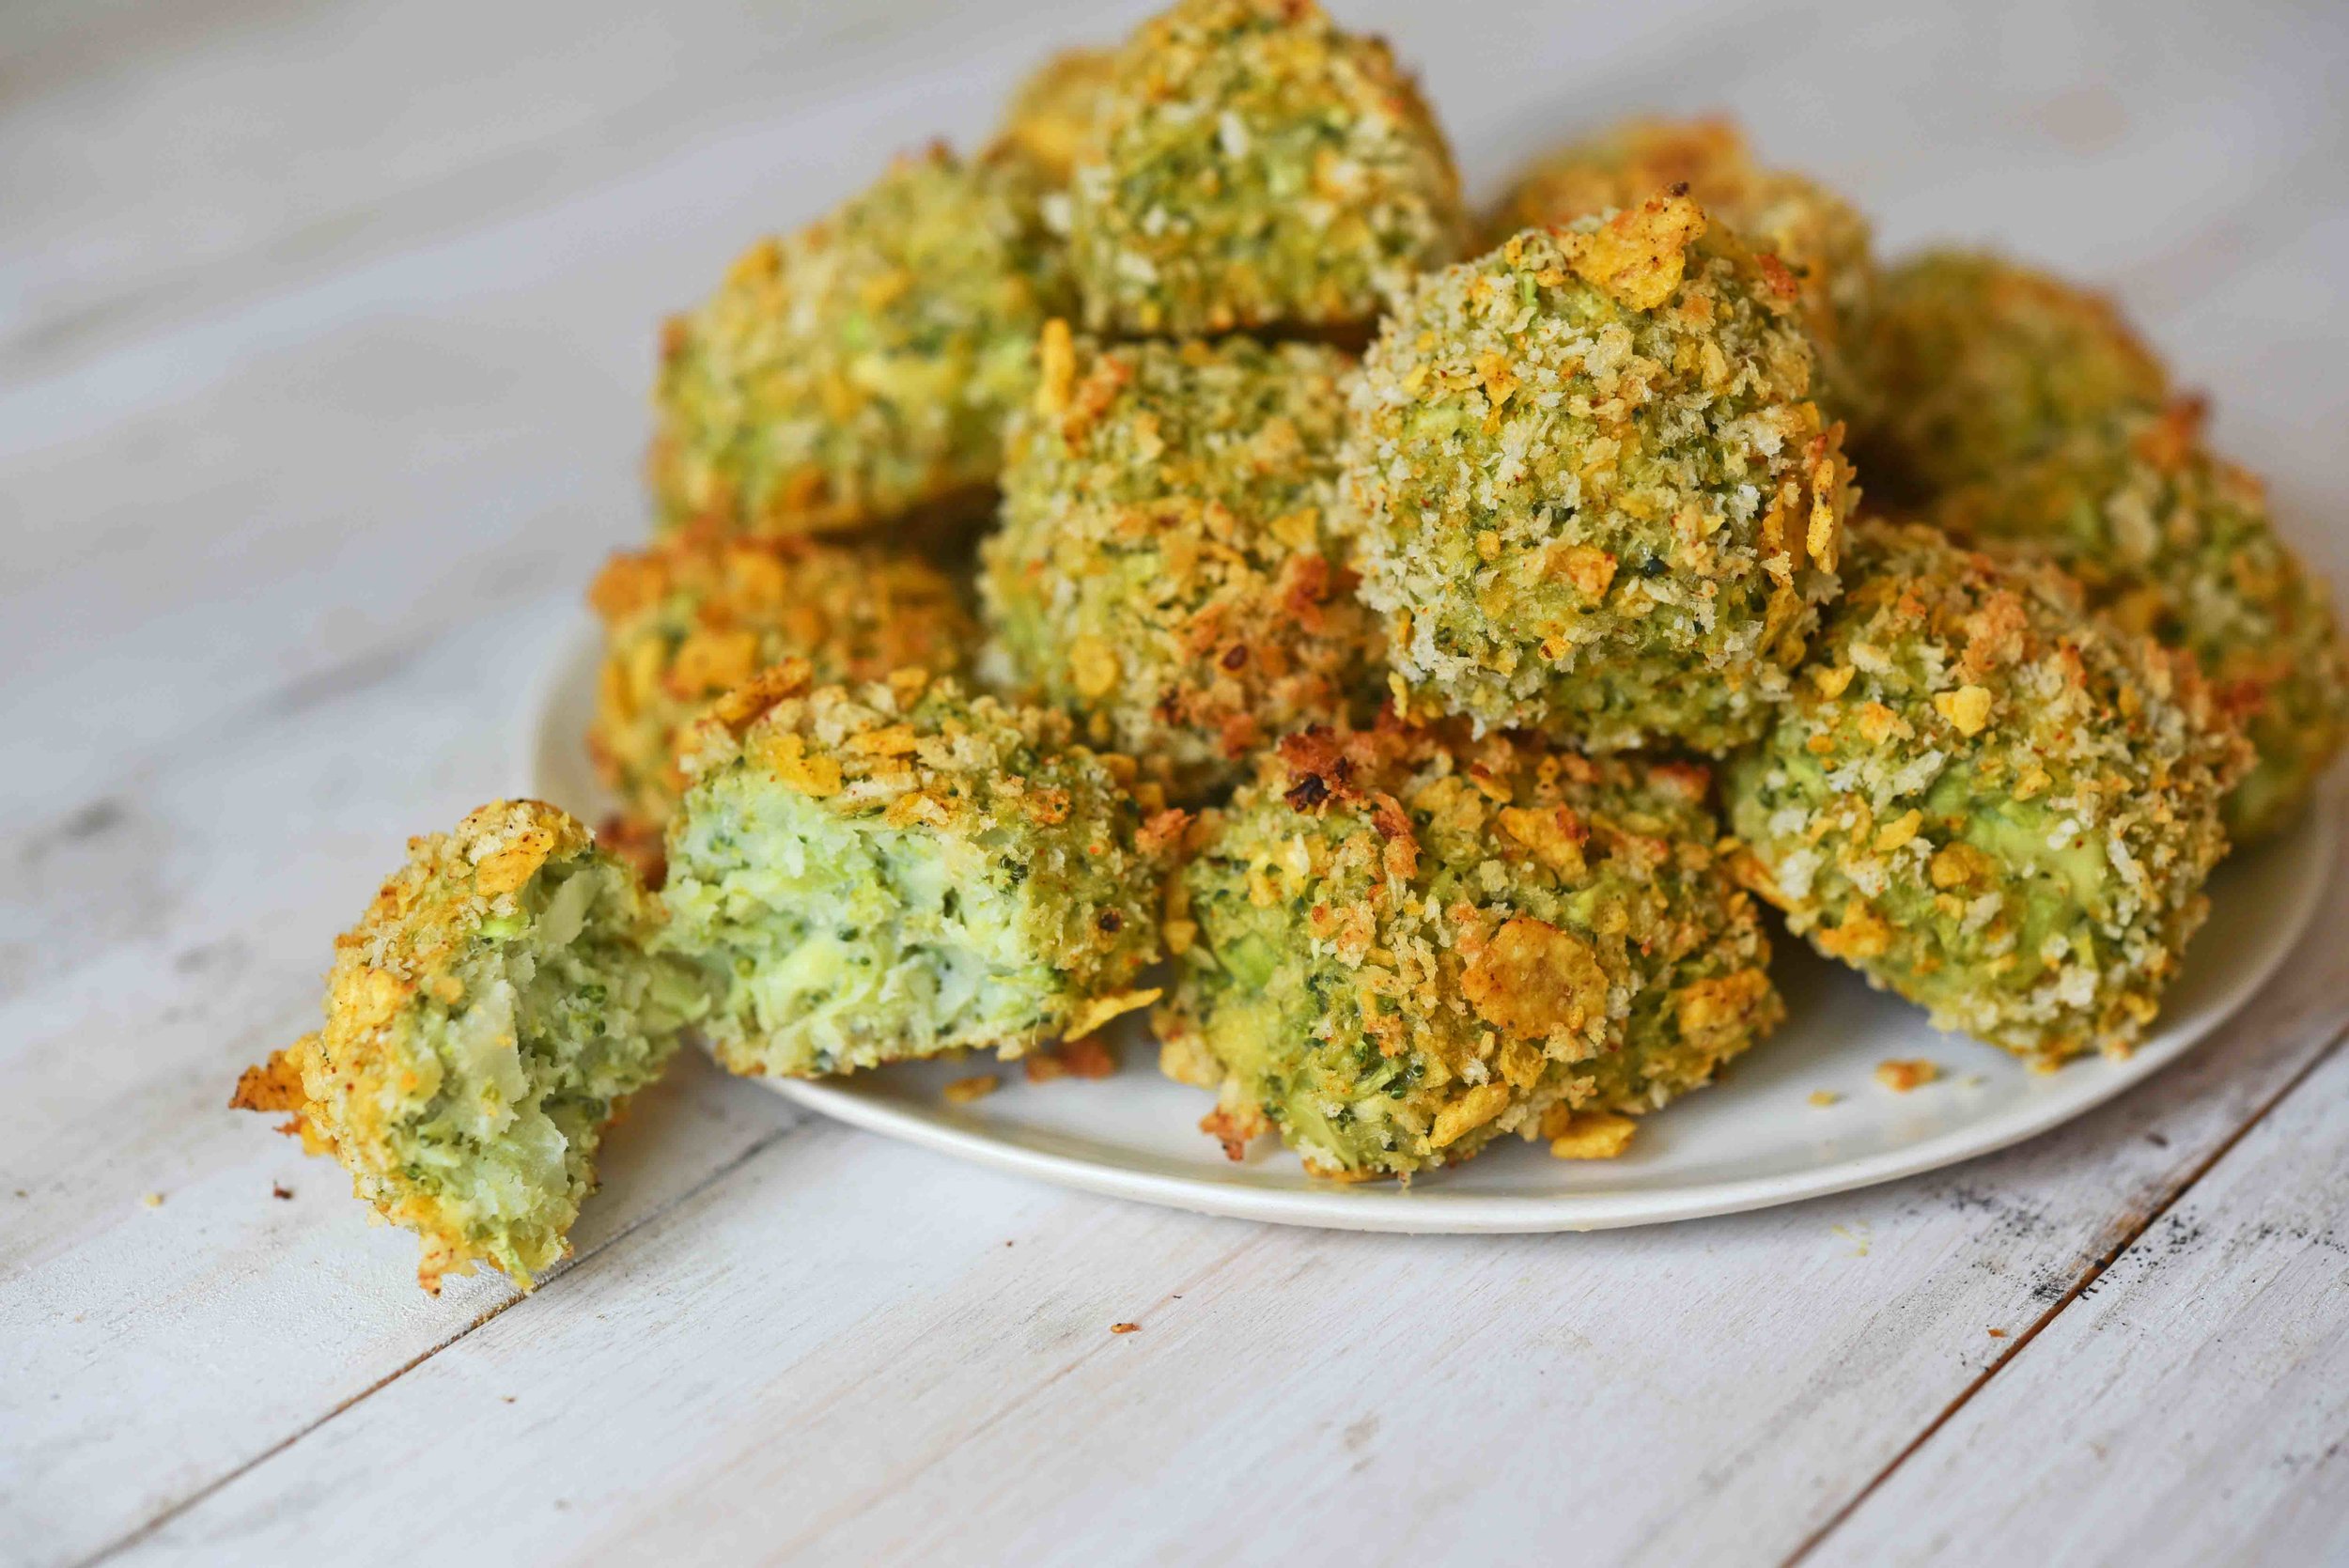
Queso with Squash + Cauliflower

Makes 2 cups of queso


½ tablespoon extra-virgin olive oil

½ large yellow onion, coarsely chopped (about ¾ cups)

2 garlic cloves, sliced

¼ medium head cauliflower, cut into large chunks, (about ½ pound or 1½ cups)

⅛ small butternut squash, peeled and cut into 1-inch chunks (about ½ pound or 1¼ cups)

1 cup chicken stock

½ teaspoon kosher salt, more to taste

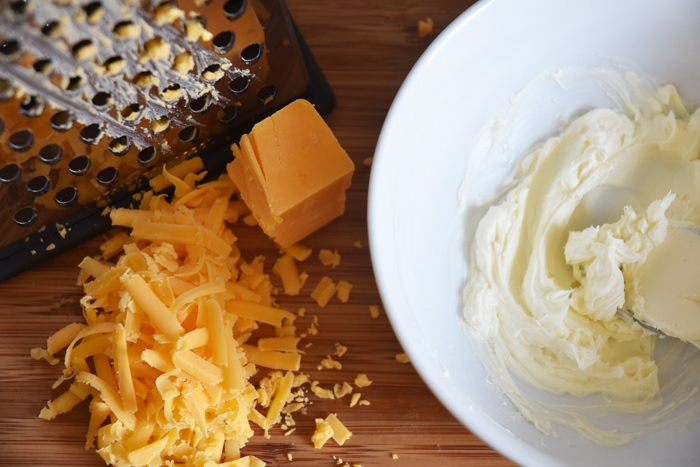
6 ounces sharp cheddar cheese, shredded (about 1½ cups)

4 ounces Monterey Jack cheese, shredded (about 1 cup)

½ cup jarred salsa

Chips, for dipping


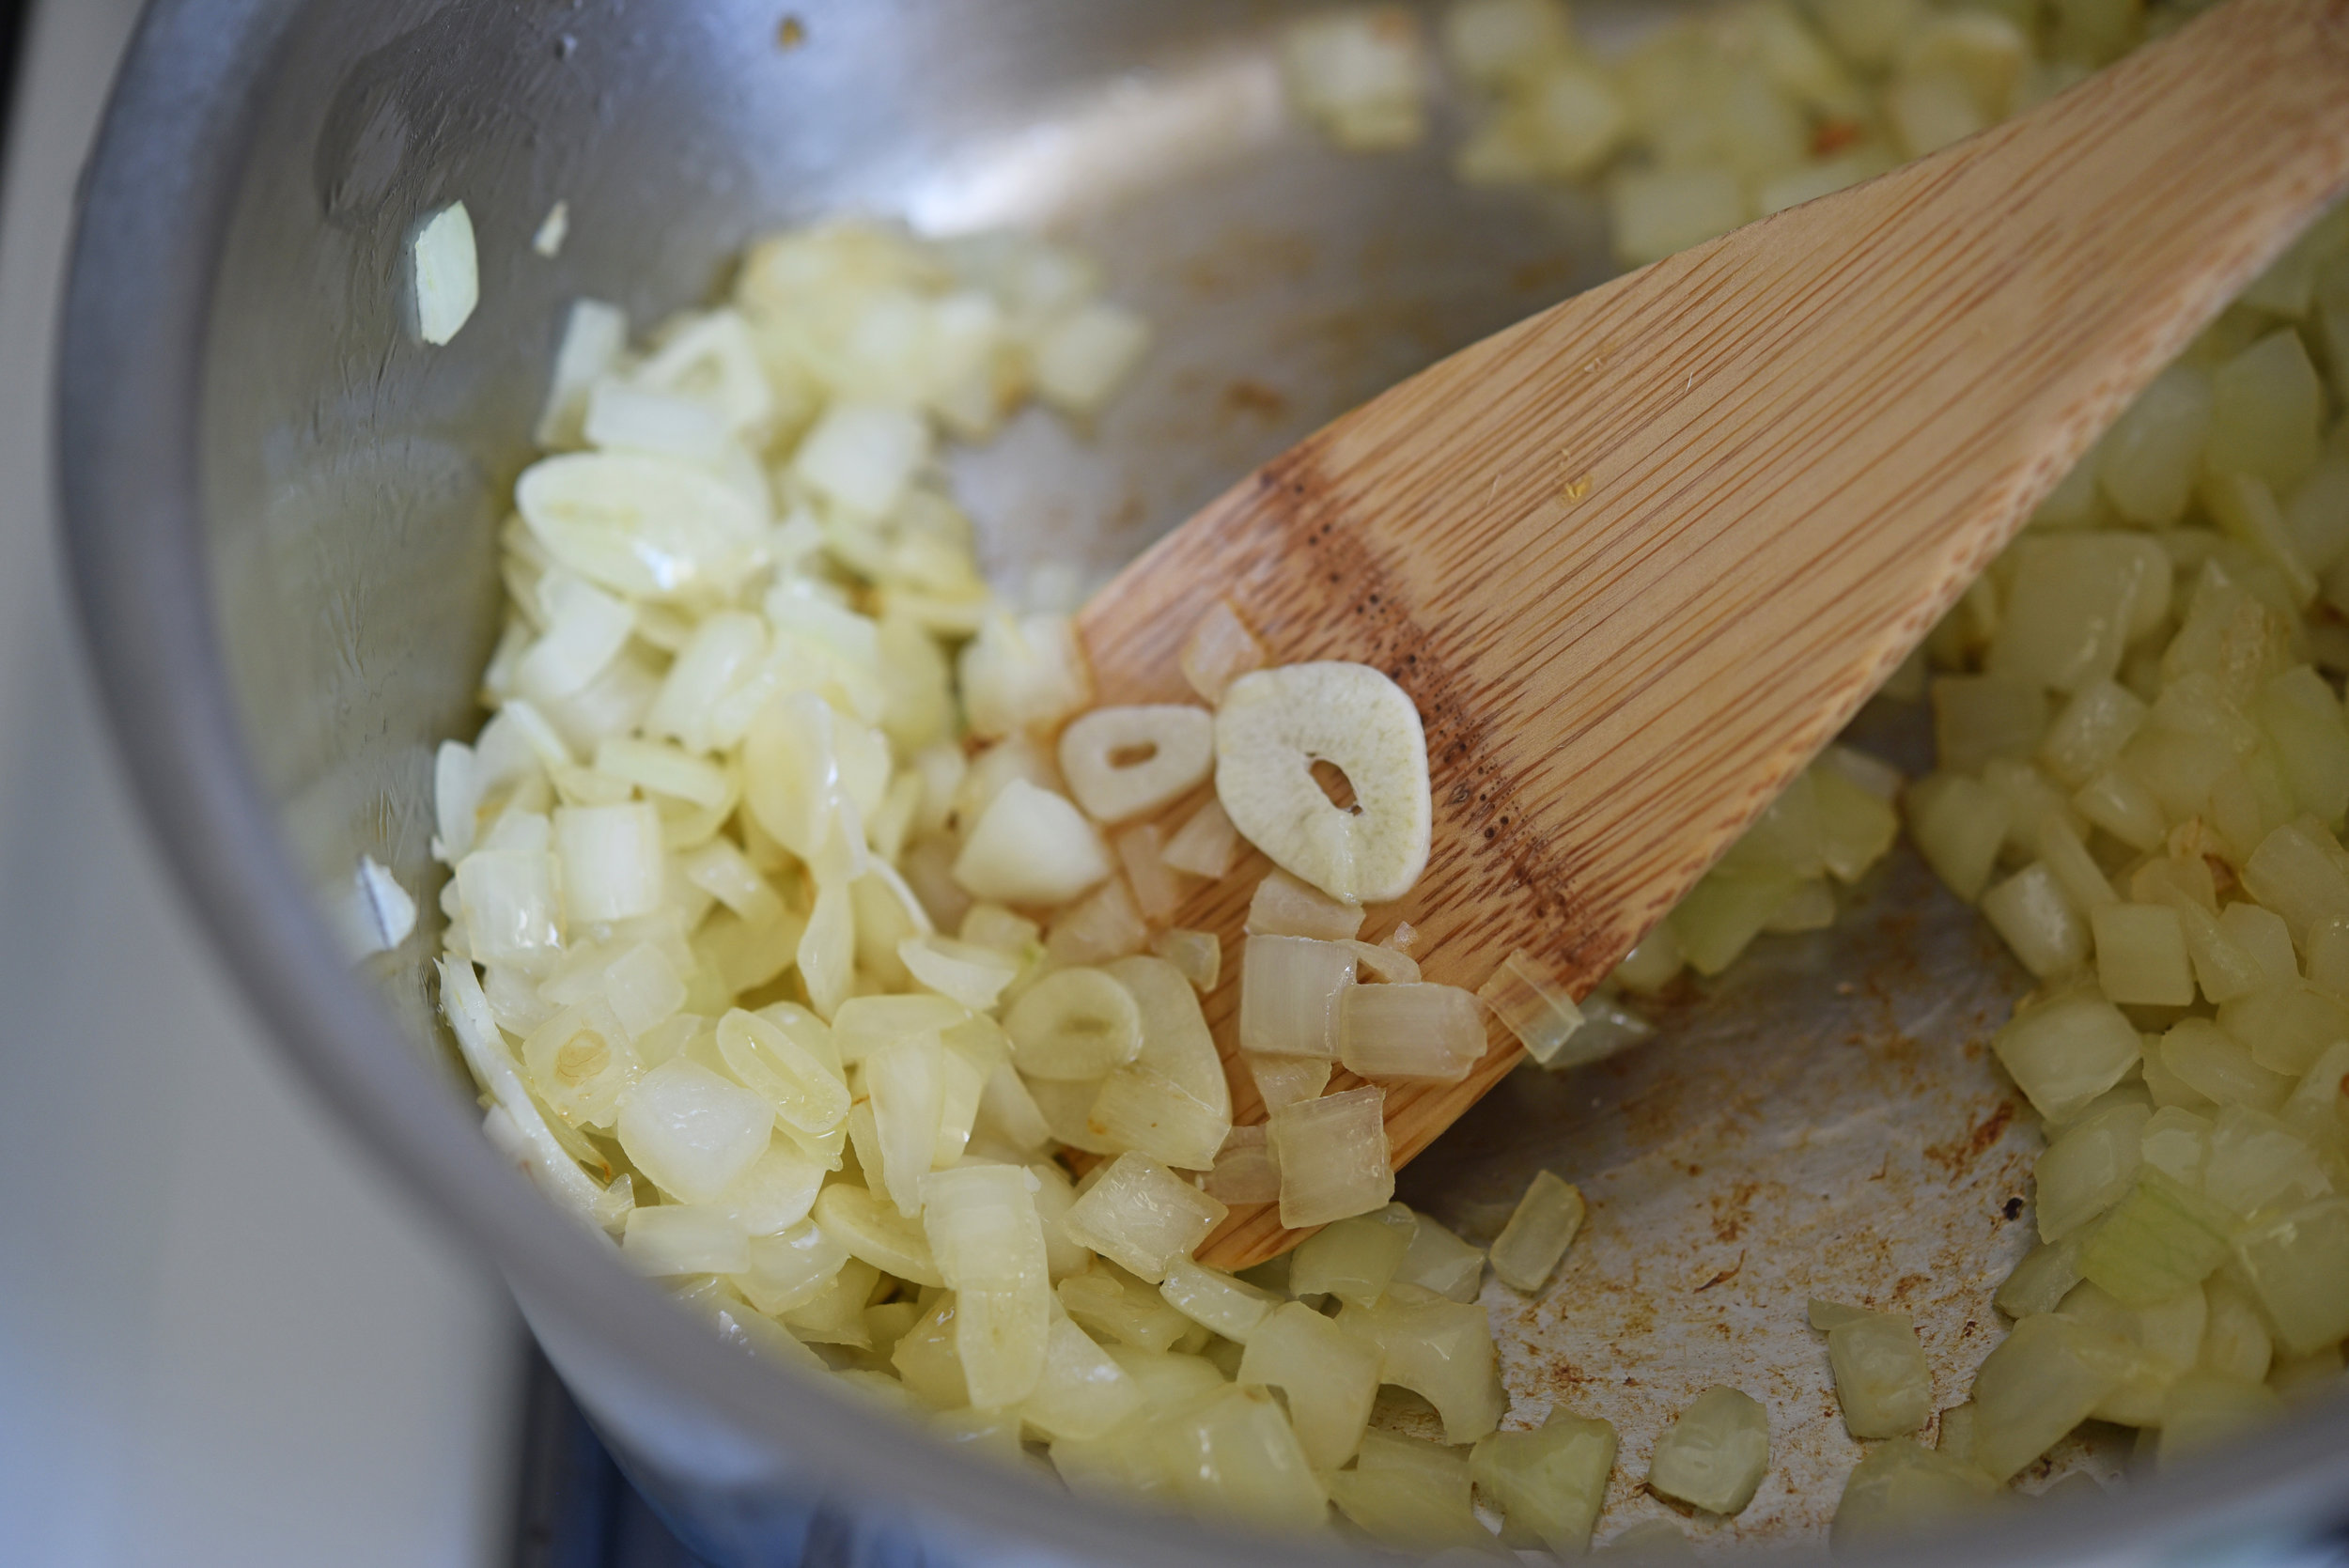
1. Heat the oil in a large saucepan set over medium heat. Add the onion and garlic and sauté until tender, 5 to 7 minutes. Stir in the cauliflower, squash, chicken stock, and the ½ teaspoon salt. Bring this mixture to a boil, and then reduce the heat to a simmer. Cook covered, stirring occasionally, until the vegetables are tender—about 20 minutes. This should give you about ¼ cup liquid along with the veggies.


2. Place the mixture in a blender and process it until it is completely smooth. Add more stock or water if there is not enough liquid to blend easily.


3. Transfer the mixture back to the saucepan over low heat. Add the cheddar and Monterey Jack and stir until the cheese melts. Add the salsa and stir to combine. Taste the queso; add more salt if necessary and more stock if your mixture is too thick. Serve with tortilla chips and enjoy hot!


Homemade Doritos

Makes 56 chips

Read More

Cauliflower Alfredo Sauce with Pasta

Cauliflower Alfredo Kids Version_SMALL(1).jpg

When I create a recipe, I’m always thinking about what different versions of a dish I can suggest to different groups of people.

For instance, sometimes I think about how to make my vegetarian recipes “meaty.”

Or I might toss out some ideas about how to make a dish more family-friendly (something adults can enjoy that kids will also eat!).

I love when—with just a few tweaks—you can make a couple of versions of a meal at the same time, so everyone is satisfied.

Cauliflower Alfredo Process 1.JPG

And it’s always a bonus if we get our kids to eat their veggies!

This Cauliflower Alfredo Sauce is one of the most melt-in-your-mouth pasta sauces I’ve ever made.

And I honestly can’t tell the difference between this version and the full-on-million-calorie version.

Cauliflower Alfredo Process 2.JPG

Actually, I can tell the difference, oh-so-slightly. And I’m not lying when I say I like this one better.

It’s garlicky, cheesy, and creamy—as you would expect.

But the cauliflower adds a whole new element that deepens the flavor and literally makes you want to eat the sauce with a spoon (nooooo, I’ve never done that 😉).

Cauliflower Alfredo Process 3.JPG

And by dividing the sauce in two and adding parsley and pepper to one half and peas to the other, you’ve got a dish that makes both parents and kids happy.

Grownup version: linguine, parsley + freshly ground black pepper.

Grownup version: linguine, parsley + freshly ground black pepper.

Cauliflower Alfredo Sauce with Pasta

servings: 4

Ingredients:

  • 1 large head cauliflower, broken or cut into bite-size florets (about 5 to 6 cups)
  • 3 cups chicken stock
  • 3 garlic cloves, smashed
  • 4 ounces cream cheese
  • 2 ounces parmesan cheese (about ½ cup)
  • ½ cup heavy cream
  • 1½ teaspoons kosher salt
  • ½ teaspoon ground black pepper
  • 1 pound pasta shells
  • 1 cup frozen peas, thawed

Directions:

  1. Place a large pot of salted water over high heat for cooking the pasta shells. To a second large pot, add the cauliflower, chicken stock, and garlic. Bring this mixture to a simmer, then lower the heat to medium and cook until the cauliflower is very soft—10 to 12 minutes.
  2. Transfer the mixture to a blender and add the cream cheese, parmesan cheese, heavy cream, salt, and pepper, and puree until very smooth.
  3. When the water boils, add the pasta shells and cook according to the package directions; drain when done.
  4. To serve, fold the cauliflower sauce and the peas into the pasta.

Notes:

  • The kid’s version is delicious! But if you want to make it a little more adult, replace the pasta shells with linguine. And instead of folding peas in with the cauliflower sauce, fold in about 2 tablespoons of the parsley. Divide among four bowls and top with parsley and freshly ground black pepper. Voilà!
: @NikkiDinki

: @NikkiDinkiCooking
 

Find more recipes like this in Meat on the Side!


You might also like these recipes:

Buffalo Cauliflower Wings

In my book, Meat On The Side, I have a Cauliflower Wing recipe...

Cauliflower 2.jpg

I roast cauliflower and toss it with my famous (and famously simple!) Buffalo sauce.

Then I douse it with blue cheese and shaved celery, for a “salad” worthy of an Oscar (Or whatever type of award is appropriate for a salad. Probably not an Oscar, huh?).

It’s an easy and light way to get your Buffalo fix.

However, I've been playing with the whole cauliflower + Buffalo sauce thing for awhile now, and I've recently come up with a new version.

This one has just a few more calories and takes just a little more time, but in the end you are left with something that will really, truly satisfy your craving for wings.

The batter is simple—a combination of flour and milk...

You whisk it up, add some cauliflower, and suddenly start to see the magical way a piece of cauliflower can become a wing.

Once baked, you simply toss these "wings" with Buffalo sauce and, most importantly, prepare yourself to eat them all!

It’s a plate of wings that are baked—not fried! And it's cauliflower—not chicken!

Really, what more could you ask for?!

No need to send a thank you gift, just remember you owe me. ;)

Buffalo Cauliflower Wings

servings: Makes 40-50 cauliflower “wings”

Ingredients:

  • 1½ cups all-purpose flour
  • 1¼ cups whole milk
  • ¾ cup + 2 tablespoons Frank’s RedHot Original Cayenne Pepper Sauce
  • 4 teaspoons Worcestershire sauce
  • 2 teaspoons kosher salt
  • 1 teaspoon garlic powder
  • ¼ teaspoon ground black pepper
  • 1 medium head cauliflower, broken or cut into bite-size florets
  • 8 tablespoons unsalted butter (1 stick)
  • 2 tablespoon distilled white vinegar
  • 2 tablespoon light brown sugar

Directions:

  1. Preheat the oven to 475°F. Line two rimmed baking sheets with foil. Spray the foil generously with nonstick cooking spray.
  2. In a large bowl, whisk together the flour, milk, 2 tablespoons of the hot sauce, 3 teaspoons of the Worcestershire sauce, the salt, garlic powder, and black pepper.
  3. Toss the cauliflower in the batter, then spread it on the baking sheets. Bake the cauliflower until it is slightly browned in spots—about 20 minutes.
  4. While the cauliflower bakes, in a small pot, whisk together the remaining ¾ cup hot sauce, the butter, vinegar, brown sugar, and remaining 1 teaspoon Worcestershire sauce.
  5. Once the cauliflower is browned, remove it from the oven and toss it well in the Buffalo sauce. Turn on the broiler, to high if you have that option. Then return the cauliflower to the baking sheets and cook it under the broiler until it is crispy and browned in spots—2-3 minutes more. Remove the cauliflower from the oven and toss or brush it with the remaining sauce. Enjoy by serving with blue cheese.

Notes:

  • Freezing Instructions: To enjoy later, freeze the completed Buffalo Cauliflower Wings in a single layer (not touching) on a baking sheet lined with foil. Once they are frozen, remove the wings from the baking sheet, place them in a food storage bag, and put them back in the freezer until you are ready to eat them. To reheat, begin by preheating the oven to 375°F and lightly spraying a baking sheet with cooking spray. Cook the wings until they are warmed through, 10-15 minutes, depending on their size.
: @NikkiDinki

: @NikkiDinkiCooking
 

Find more recipes like this in Meat on the Side!


You might also like these recipes:

Ultimate Veggie Burgers

ULTIMATE VEGGIE BURGERS!!!

It's been my goal for awhile now to make a bang-up version of a veggie burger.

But every time I really thought about it, I was super intimidated.

I mean, all of those weird ingredients, lots of chopping, and then the fear that after the first bite, the whole thing might just fall apart.

So instead of tackling this daunting task head-on, I've avoided it like the plague.

I just told myself that someday I'd make a better—no, a perfect—veggie burger.

More perfect than any other one out there.

And so when the time came for me to face my fear, I came up with something that makes me wonder what I was so afraid of in the first place.

My Ultimate Veggie Burgers have no weird ingredients, are super dense (for that BIG bite experience!), and look better than some of the best beef patties you've ever laid eyes on!

Like all amazing things we can't have right away, the reward is SO worth the wait!

Ultimate Veggie Burgers

servings: 4 large or 6 small patties

Ingredients:

  • One 15-ounce can brown lentils, rinsed + drained (1½ cup cooked lentils)
  • 8 ounces baby bella mushrooms, sliced (about 3 cups)
  • 1½ cups cooked brown rice
  • ½ cup walnuts halves + pieces
  • ¼ cup all-purpose flour
  • 2 tablespoons barbeque sauce
  • 1 large egg
  • 1¼ teaspoon kosher salt
  • 1 teaspoon garlic powder
  • 1 teaspoon finely chopped fresh rosemary leaves
  • ¼ teaspoon smoked paprika
  • 1 tablespoon olive oil

Directions:

  1. Preheat the oven to 400°F. Spread the lentils and mushrooms on a parchment-lined or lightly sprayed baking sheet and roast them until the lentils are dry and crisp on the outside and the mushrooms are dry and shrunken to half their original size—25 minutes.
  2. Use a wooden spoon to move the mushrooms to the side, then spread the cooked rice in the open space. Return the pan to the oven and cook until the rice is lightly toasted in places and the lentils are very dry—15 minutes.
  3. While the beans, mushrooms, and rice are cooking, place the walnuts in the bowl of a food processor and pulse them until they are coarsely ground. When the lentils, mushrooms, and rice have finished roasting, add them to the food processor and pulse until well-combined, but not completely smooth. Then add the flour, barbeque sauce, egg, salt, garlic powder, rosemary, and paprika and pulse just until all ingredients are combined.
  4. Next, form the mixture by hand into either 4 large patties or 6 small ones. Then heat the oil in a large skillet over medium-high heat. Add the patties and cook them until they are well-browned and crisp—about 3 to 4 minutes per side.

Notes:

  • ¾ cup dried lentils should yield the 1½ cups cooked lentils you need in this recipe. Also, ½ cup uncooked brown rice should yield the 1½ cups cooked rice needed.
  • If you prefer to bake the patties rather than sautéing them, place them on a lightly-sprayed unlined tray and bake them at 400°F until they are golden brown and crispy on the outside, flipping halfway through—about 20 minutes.
  • You can omit the flour for a gluten-free patty. The patties will be slightly less stable, but still very good.
  • To prepare from frozen, bake patties at 400°F for 13 to15 minutes.
: @NikkiDinki

: @NikkiDinkiCooking
 

Find more recipes like this in Meat on the Side!


You might also like these recipes:

Hamburger Helper with Squash + Lentils

There is nothing wrong with classic comfort food, and Hamburger Helper was something that I grew up with and still has a special place in my heart.

I'm not trying to make the original super healthy or low-cal, I'm just making it from scratch and making smart choices so that it's as nutritious as possible while still tasting exactly how you remember.

Taste is always first in my book, the bonus is a little extra nutrition.

Nobody even needs to know that there is squash in the sauce and that you used half the meat because you added in lentils.

You'll be gobbling up this melty, meaty pasta dish only to remember at the end that you had a balanced meal.

Sounds kind of awesome right?!

Homemade Hamburger Helper with Squash + Lentils

servings: 6

Ingredients:

  • 1½ pounds butternut squash, peeled and cubed (about 6-8 cups)
  • 1 cup cooked lentils (⅓ cup dried)
  • ⅔ pound ground beef
  • 2½ teaspoons kosher salt
  • 2 tablespoons olive oil
  • 4-6 cups beef broth
  • 1 pound elbow pasta
  • ½ cup cream
  • 2½ teaspoons garlic powder
  • 1½ teaspoons smoked paprika
  • ½ teaspoon ancho chili powder (or regular chili powder)
  • 4 cups shredded cheddar cheese (16 ounces)
  • 4 tablespoons chopped chives, plus more for a garnish
  • Pinch of ground black pepper

Directions:

  1. Bring a large pot of water to a boil. Add the squash and cook it until it is easily pierced with a fork—about 10 minutes. Then puree the squash in a food processor (this should give you about 2 cups of puree) and set it aside.
  2. While the squash cooks, heat a large skillet over medium-high heat. Mash the cooked lentils with a fork and combine them with the ground beef. Using your hands, mush the lentils, beef, and 1 teaspoon of the salt together. Add the oil to the skillet and then the beef and lentil mixture. Cook the mixture, breaking it up with a spoon as it cooks, until the meat is brown—about 7 minutes.
  3. Add 4 cups of the beef broth, the pasta noodles, squash puree, cream, garlic powder, paprika, and chili powder to the meat. Stir this mixture to combine, and cook it until the noodles are al dente, 10-15 minutes. Add more broth as needed until the noodles are cooked through.
  4. Add the cheese, chives, remaining salt, and a pinch of pepper. Stir to combine, again adding more broth if the mixture is too thick. Serve hot topped with extra chives.

Notes:

  • You can substitute ancho chili powder with regular chili powder. The smoked paprika can also be subbed out for regular paprika—or you can use more chili powder in its place. A packet of taco seasoning can be used here as well, but you may need more liquid as some seasoning packets will thicken up the mixture. Also if your looking to make this dish a bit leaner add 2 cups of cheese instead of 4, you will still find it cheesy and flavorful.
  • When reheating this dish as a leftover, add an extra splash of water or stock. This will help bring it back to the right consistency.
: @NikkiDinki

: @NikkiDinkiCooking
Hamburger Helper with Squash + Lentils Healthy
 

Find more recipes like this in Meat on the Side!


You might also like these recipes:

Banana Carrot Oat Muffins

Banana Oat Carrot Muffins_SMALL.jpg

My daughter, Ivy, loves all carbs (I can’t imagine where she gets it from 😉).

She'll also gobble up anything that looks like a muffin.

And from a mom point-of-view, I know muffins are the perfect food to freeze and pull out as needed.

Banana Oat Carrot Muffins 1.jpg

So I challenged myself to make a super healthy muffin that would taste just as delicious as a regular not-as-healthy one.

My goal was to make this muffin so tasty that not only would Ivy eat it, but the big kids in the house (my husband and I) would gobble it up as well.

Banana Oat Carrot Muffins 2.jpg

The result is a muffin basically made of bananas, carrots, oats, and a touch of maple syrup. You puree all of these ingredients up and put the batter in the cups of a muffin tin.

These muffins couldn’t be easier to make and they actually taste like banana bread!

Whenever I’m eating one I have to remind myself how healthy they are because all I’m thinking is, I’m in muffin heaven.

Banana Oat Carrot Muffins 3.jpg

Now don’t get me wrong, they're a little denser than a regular muffin (they're all oats instead of flour, so that's why that happens).

And they're a touch more moist than you might be used to (this makes them perfect when re-heated though!).

But the fact that you can eat ten of these and still feel like Healthy Eating Champion of the World makes it all worth it!

Banana Oat Carrot Muffins 4.jpg

Banana Carrot Oat Muffins

makes: 36 mini muffins

Ingredients:

  • 2½ cups rolled oats, more for a garnish
  • 3 medium ripe bananas, sliced
  • 2 cups grated carrots (about 6 ounces)
  • ¼ cup maple syrup
  • 2 large eggs
  • 2 teaspoons baking powder
  • 1½ teaspoons ground cinnamon
  • ½ teaspoon kosher salt

Directions:

  1. Preheat the oven to 350°F. Add the oats, bananas, carrots, maple syrup, eggs, baking powder, cinnamon, and salt to the to a blender or food processor, then pulse until all ingredients are well-combined and the mixture is almost pureed, but not quite smooth. You may have to stop and stir the mixture a bit to make sure it doesn’t contain any large chunks.
  2. Scoop the batter evenly into 36 cups of a mini muffin tin prepared with cooking spray, then top each muffin with a light sprinkle of the reserved oats.
  3. Bake the muffins until a knife inserted into the center of one of the muffins comes out clean and dry —24 to 28 minutes.
: @NikkiDinki

: @NikkiDinkiCooking
Banana Oat Carrot Muffins 5.jpg
 

Find more recipes like this in Meat on the Side!


You might also like these recipes:

Coconut Bacon


On my show Junk Food Flip, Bobby Deen and I go around and transform comfort food into delicious dishes that you can actually eat every day.


Read More

Zucchini Salsa


Recently I was honored to appear on the Food Network television show The Kitchen.


The show includes five amazing co-hosts who introduce viewers to a bunch of awesome recipes, cocktails, and crafts.


Before showing up, I knew I had to bring my A-game—and a recipe that would make people sit up and listen.


Read More