Tomato Soup with Rice + Basil Yogurt Drizzle

Is there really anything better than tomato soup?

Let me clarify—homemade tomato soup.

When I was younger, I was addicted to cans of the Progresso version.

I can picture myself at age 22, squeezing my way into my 2x2 foot kitchen, cracking open that blue can, and then waiting those 2 minutes for the microwave to deliver my spoils.

If only I had known how much better making my own tomato soup could be.

Like, SO much better, and requiring no skills or fancy ingredients.

And what I also couldn’t have imagined at the time was how adding tender rice to my soup would completely take it to the next level.

Or that topping it with a beautiful and refreshing three-ingredient basil yogurt drizzle would boost its amazing-factor sky-high.

But now that I know what I didn't know, let's take our tomato soup there.

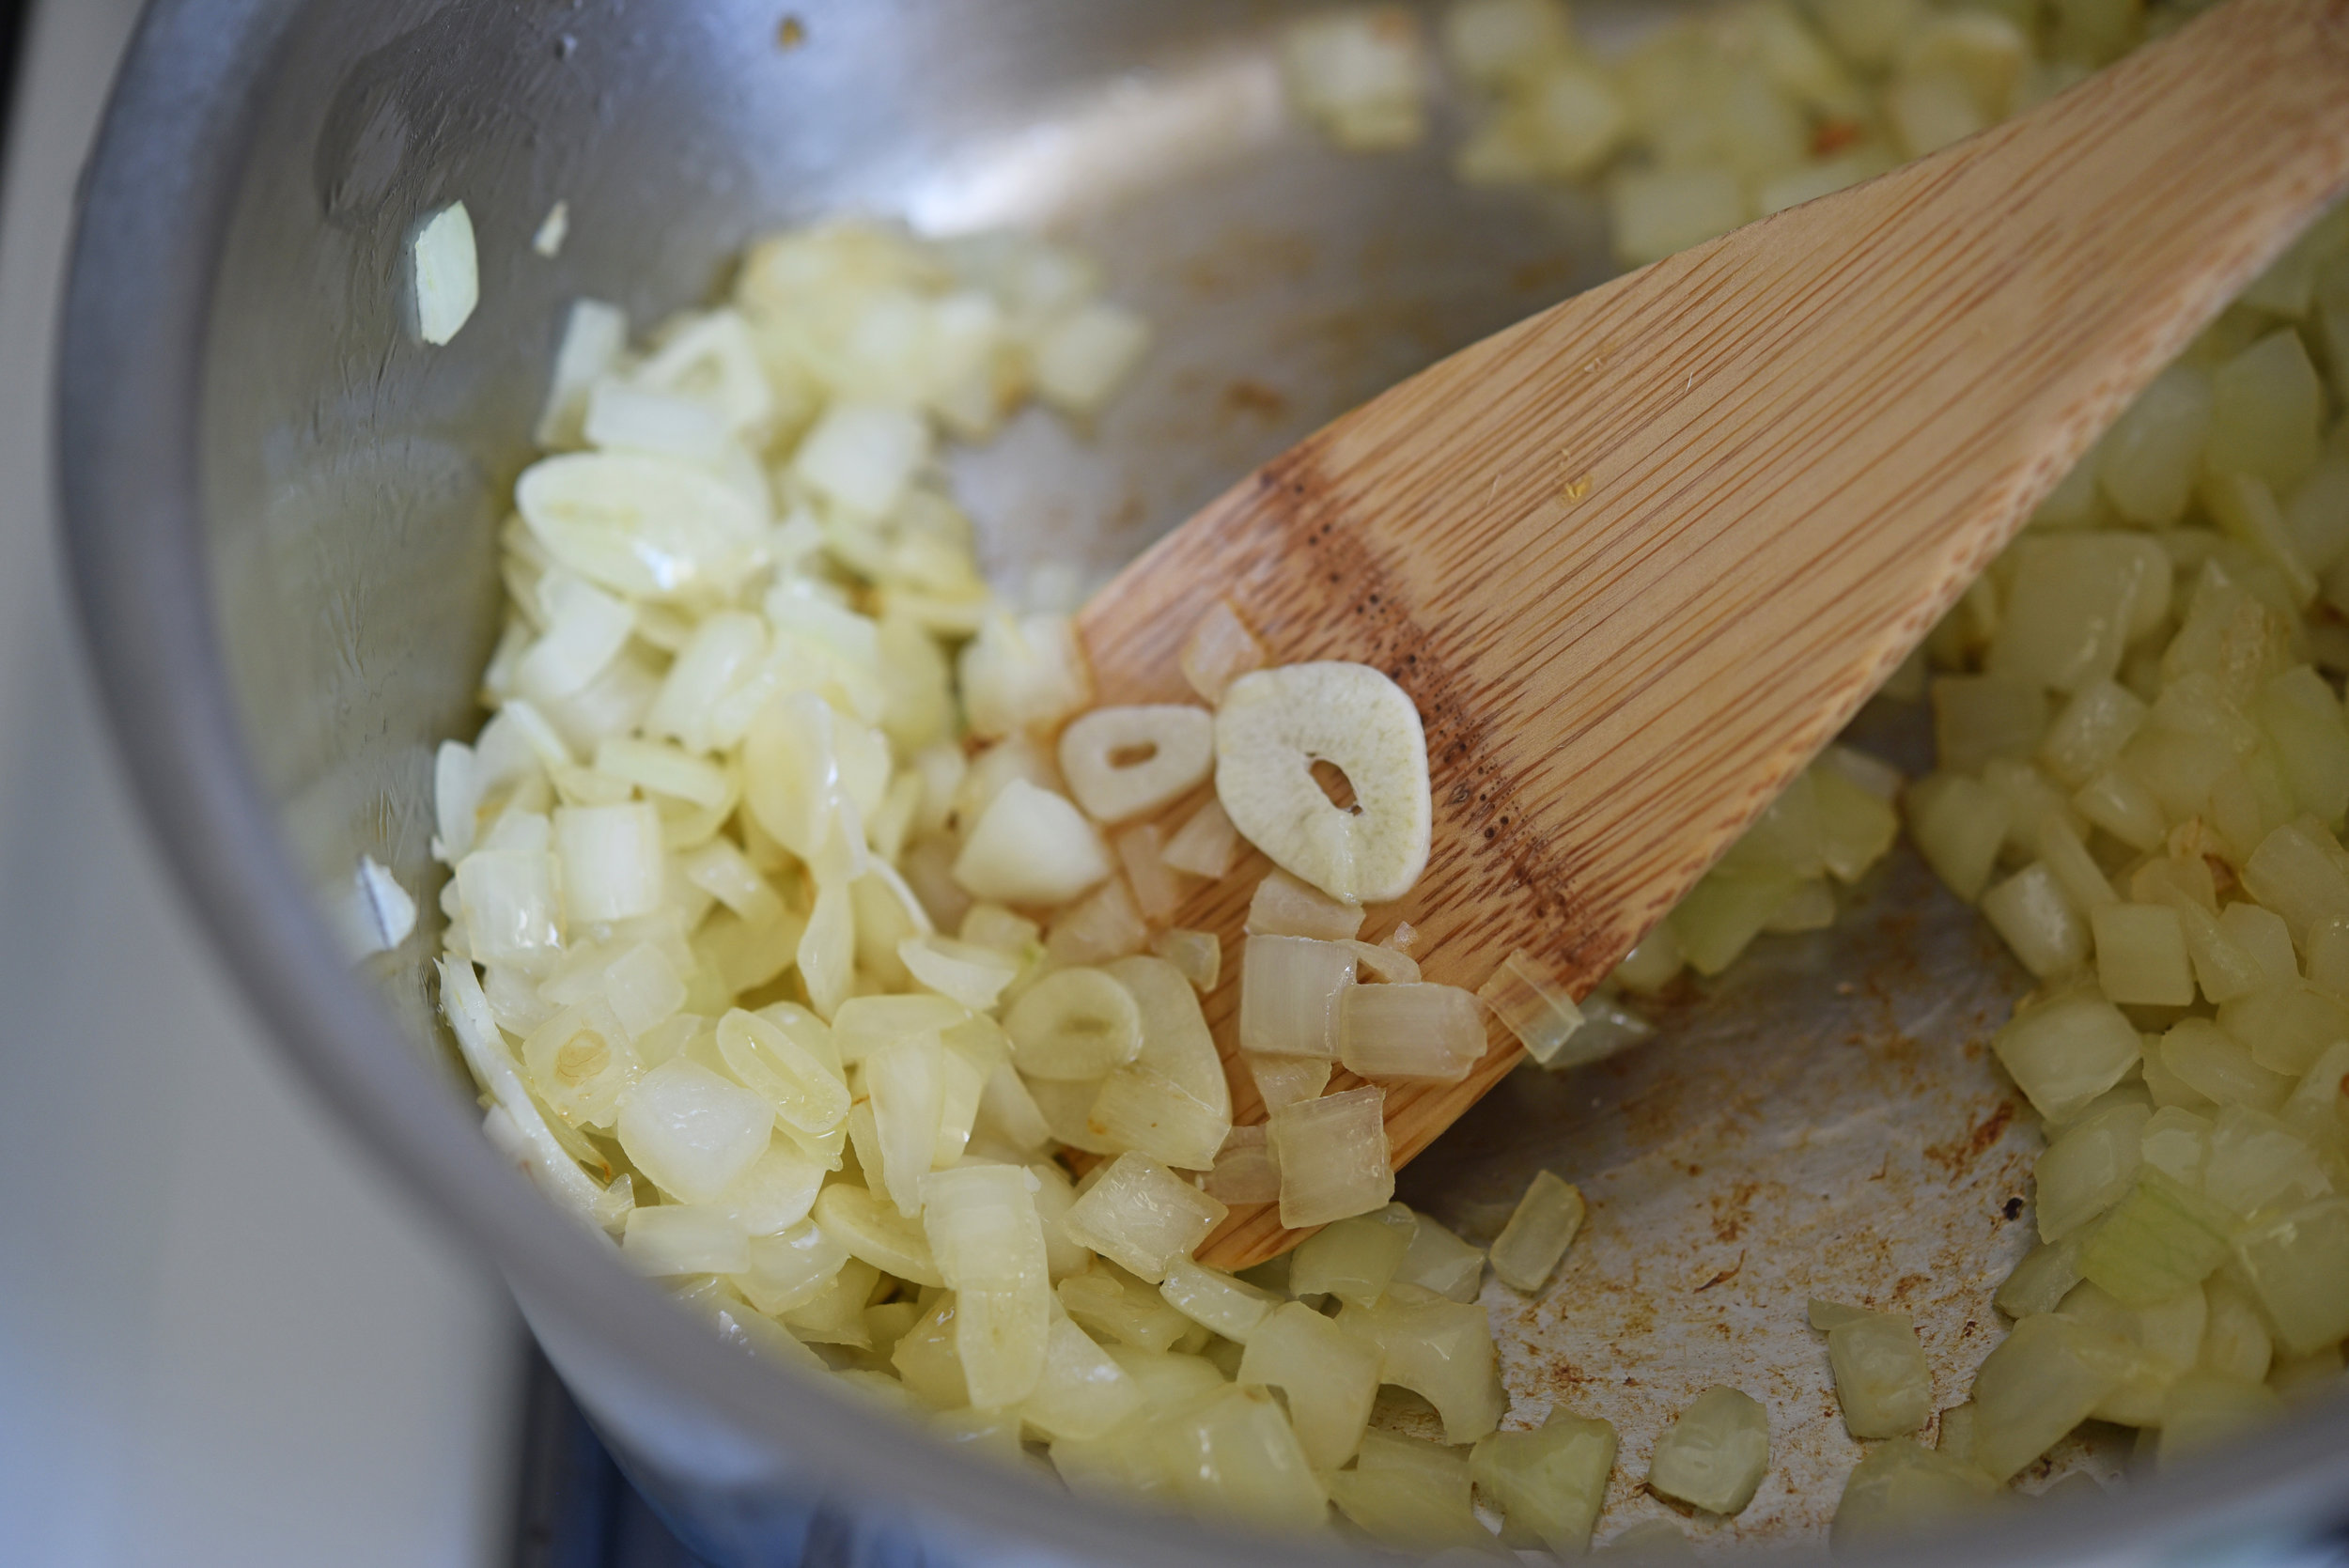
We just need to sauté some garlic and onions...

Add some crushed and juiced tomatoes...

And while that all simmers, combine yogurt, basil and a little salt for a drizzle you could never find in a Progresso can.

Tomato Soup with Rice + Basil Yogurt Drizzle

servings: 8 cups of soup, with about ½ cup drizzle; serves 4

Basil Yogurt Drizzle:

  • ½ cup Greek yogurt
  • ½ cup loosely packed fresh basil leaves
  • ¼ teaspoon kosher salt

Tomato Soup with Rice:

  • One 10.6-ounce package Veetee Microwavable Thai Jasmine Rice (makes 1½ cups)
  • 4 tablespoons unsalted butter
  • 1 medium yellow onion, finely chopped (about 1 cup)
  • 4 garlic cloves, minced
  • 1½ teaspoons kosher salt
  • One 46-ounce can tomato juice
  • Two 14-ounce cans diced tomatoes
  • ¼ teaspoon ground black pepper
  • ¾ cup heavy cream
  • Basil Yogurt Drizzle
  • Fresh basil leaves, finely chopped, for a garnish (optional)

Basil Yogurt Drizzle:

  1. Add the yogurt, basil, and salt to a blender along with ¼ cup water and blend this mixture until it is mostly smooth. If you prefer, you can skip the blender and instead finely chop the basil, then mix it by hand with the yogurt, water, and salt until all ingredients are well combined.

Tomato Soup with Rice:

  1. Microwave the rice for 2 minutes as per the package instructions, and set aside.
  2. Melt the butter in a large pot over medium heat. Then add the onion, garlic, and ½ teaspoon of the salt and cook until the vegetables are tender and fragrant—3-4 minutes.
  3. Add the tomato juice, diced tomatoes, remaining 1 teaspoon of salt, and the pepper. Bring the mixture to a simmer and cook until slightly thickened, about 10 minutes. Transfer the soup to a blender and puree it until smooth, then return it to the pot and stir in the rice and cream.
  4. To serve, divide the soup into bowls, top with the Basil Yogurt Drizzle, and sprinkle with the basil leaves if desired.
: @NikkiDinki

: @NikkiDinkiCooking
 

Find more recipes like this in MORE VEGGIES PLEASE!


You might also like these recipes:

Sweet Potato Boxed Mac + Cheese

Sweet Potato Boxed Mac and Cheese_SMALL.jpg

For this hack on your mac, I really wanted to bring some veggies to the party—while also giving some new flavors and textures to the mac and cheese.

Sweet Potato Boxed Mac and Cheese_1.jpg

This is an exciting version to say the least, and it still involves almost no extra cooking!

Sweet Potato Boxed Mac and Cheese_2.jpg

Throw the sweet potato in the microwave, then puree it or just mash it with a fork.

Sweet Potato Boxed Mac and Cheese_3.jpg

Add in the the sage, nutmeg, cheese, and sweet potato, then mix it all up and top with pecans and cranberries.

You get a whole new flavor—and seriously the only extra thing you did was put a sweet potato in the microwave!

Sweet Potato Boxed Mac + Cheese

makes: 3 cups

Ingredients:

  • One 14-ounce boxed mac + cheese with liquid cheese sauce (such as Kraft Deluxe Macaroni + Cheese Dinner Original Cheddar)
  • 1 small or medium sweet potato
  • 1 tablespoon finely chopped sage, more for a garnish
  • ½ teaspoon fresh ground nutmeg
  • ½ teaspoon kosher salt
  • 2 tablespoons dried cranberries
  • 2 tablespoons coarsely chopped pecans

Directions:

  1. Place a medium pot of salted water over high heat for cooking the macaroni. When the water boils, add the macaroni and cook according to the package directions; drain when finished.
  2. While the pasta cooks, pierce the sweet potato all over with a fork. Cook the potato in the microwave on high in 2-minute increments until soft—4 to 6 minutes total. Then set the potato aside until it is cool enough to handle.
  3. Peel the sweet potato (alternatively, you can cut the potato in half and scoop out the insides) and place it in the bowl of a food processor. Process until smooth; this should give you about ¾ cup of sweet potato puree. If you don’t have a food processor, you can mash the sweet potato with a fork, adding a little of the hot pasta cooking water to make it easier to mash.
  4. Return the cooked and drained pasta to the medium pot over medium heat, adding the sweet potato puree, cheese sauce packet, sage, nutmeg, and salt, then stir until fully combined.
  5. To serve, garnish with the cranberries, pecans, and additional sage.
: @NikkiDinki

: @NikkiDinkiCooking
Sweet Potato Boxed Mac and Cheese_4.jpg
 

Find more recipes like this in MORE VEGGIES PLEASE!


You might also like these recipes:

Tomato + Cheddar Sandwich with Lemon Aioli


When I’m not making lunch at home, I try to find simple, well-crafted, veggie-focused foods to pick up that almost make me feel like I've made them myself.


One of my favorite go-to sandwiches is a delicious tomato and cheddar number from a local sandwich place.


Besides the main ingredients, it includes a little mayo, some crunchy greens, and great bread.


Read More

Charred Tomato Garlic Bread

Charred Tomato Garlic Bread small.jpg

I love bread.

And by that, I mean:

I. LOVE. BREAD.

Charred Tomato Garlic Bread 1.jpg

And if you have a fresh loaf of bread, according to me (or you!), of course it’s good all on it’s own.

But let me tell you how it gets even better...

Charred Tomato Garlic Bread 2.jpg

It's so simple to char the bread in a grill pan with a little olive oil—on high heat.

It will get mouth-wateringly crusty on the outside, while still remaining soft and chewy on the inside.

Charred Tomato Garlic Bread 3.jpg

And when it’s crisp and browned, take it off of the grill pan and rub it with cut garlic and tomato.

This infuses those flavors ever-so-delicately—and just so incredibly perfectly!—into the bread.

Charred Tomato Garlic Bread 4.jpg

Sprinkle this amazing bread with salt and another drizzle of olive oil, and you have definitely transported that fresh loaf of bread to a whole new level.

Charred Tomato Garlic Bread 5.jpg

Charred Tomato Garlic Bread

servings: 4 to 6

Ingredients:

  • One 8 X 5-inch loaf ciabatta bread (or other crusty bread)
  • 2 tablespoons olive oil, more for drizzling
  • 1 garlic clove, halved
  • 1 medium tomato, halved
  • ¼ teaspoon kosher salt

Directions:

  1. Heat a grill pan over high heat. Cut the loaf of bread in half length-wise and drizzle all sides of it with the olive oil. Place the bread crust side-down on the pan, and cook until grill marks appear and the bread is crusty—2 to 3 minutes. Flip the bread over, then press it down to ensure good contact with the pan; continue to cook until grill marks appear and the bread is charred in spots—2 to 3 minutes more.
  2. Remove the bread from the heat and and rub the cut side with the cut side of the garlic, going over the bread a few times. Then rub the bread with the cut side of the tomato, squeezing the juice out of the tomato and onto the bread as you do so.
  3. Sprinkle the cut side of the bread with the salt and a little extra olive oil. Serve hot and enjoy!
: @NikkiDinki

: @NikkiDinkiCooking
 

Find more recipes like this in MORE VEGGIES PLEASE!


You might also like these recipes:

Grilled Romaine + Radicchio Salad with Honey-Orange Dressing

IMG_3075.jpg

I LOVE this salad.

Yes, LOVE.

The char from the grill, the slightly bitter radicchio sweetened up by a dressing of honey and orange, and then the burst of fresh grapes to brighten up the smokiness.

Make this for your next dinner party, make it tonight, heck make it for breakfast—just make it!

Grilled Romaine + Radicchio Salad with Honey-Orange Dressing

servings: 4; makes about 1 cup dressing

Honey-Orange Dressing:

  • ½ cup Greek yogurt
  • ¼ cup mayonnaise
  • ¼ cup orange juice
  • 1 tablespoon honey
  • 1 teaspoon white wine vinegar
  • ½ teaspoon kosher salt
  • 1 teaspoon finely chopped chives

Romaine + Radicchio Salad:

  • 2 romaine lettuce hearts, cut lengthwise into 4 wedges
  • 1 radicchio, cut lengthwise into 8 wedges
  • 1 red onion, cut lengthwise into 8 wedges
  • 2 tablespoons olive oil
  • 1 teaspoon kosher salt
  • 1½ cups halved red grapes

Honey-Orange Dressing:

  1. Add the yogurt, mayonnaise, orange juice, honey, vinegar, and salt to a medium bowl. Whisk together until well blended; then whisk in the chives.

Romaine + Radicchio Salad:

  1. Heat a gas or charcoal grill (or plan to use a grill pan). Use a pastry brush to brush the oil over all surfaces of the romaine, radicchio, and onion wedges; then sprinkle the salt evenly over them.
  2. If not using a grill, heat a grill pan over high heat. Working in batches if necessary, arrange the romaine, radicchio, and onions on the hot grill or grill pan. Cook until all pieces are slightly wilted and charred on all sides—1 to 2 minutes per side for the romaine and radicchio, 2 to 4 minutes per side for the onions.
  3. To serve, divide the romaine, radicchio, and onions among 4 plates. Ladle one-quarter of the dressing (about ¼ cup) over each serving. Divide the grapes over the tops.

Make It Meaty:

  • When the veggies are done, leave the grill or grill pan on and cook up a small pork tenderloin. Cut, place next to the veggies and top everything with the dressing.
: @NikkiDinki

: @NikkiDinkiCooking
 

Find more recipes like this in MORE VEGGIES PLEASE!


You might also like these recipes:

Roasted Broccoli, Corn + Green Chile Stuffed Naan

IMG_2161.jpg

Naan bread is tasty…

OK, I assume you’re looking for me to describe it as more than “tasty.”

Naan is an Indian bread that, like a pita, has a large hollow in the center, created by the moisture in its dough turning to steam and forming an air pocket when it bakes.

But unlike pita, naan is chewy and delicate in flavor and texture, and once again…very tasty!

Besides stuffing it like I do here, you can use naan as the base for a flatbread or pizza or cut it up for dipping into any kind of hummus or cheese dip.

However you prepare it, it's sure to be (you guessed it)…

TASTY!

Roasted Broccoli, Corn + Green Chile Stuffed Naan

servings: 2; double the recipe as you wish

Ingredients:

  • 1 cup very finely chopped broccoli
  • ¾ teaspoon kosher salt
  • 1 teaspoon + 2 tablespoons olive oil
  • ⅓ cup corn kernels
  • 1½ cups shredded pepper Jack cheese
  • Half a 4-ounce can chopped green chiles
  • 1 naan
  • ½ teaspoon turmeric

Directions:

  1. Turn on the broiler, to high if you have that option. Toss the broccoli with ½ teaspoon of the salt and 1 teaspoon of the oil in a medium bowl until well coated. Then spread it on a rimmed baking sheet and place under the broiler until charred and tender—3 to 5 minutes.
  2. Return the broccoli to the medium bowl. Add the corn to the broccoli, along with the cheese, the remaining ¼ teaspoon salt, and the chiles. Stir to combine.
  3. Very gently open the naan by running a knife along one edge, between the layers. Naan usually has one layer that is thicker than the other, so try not to rip the thin layer. If some breaking occurs, that’s okay—the filling should stay in and the cheese will act as a glue, sealing up the bread as it cooks.
  4. Gently spoon the broccoli mixture into the naan. You want to push it to the edges but if you are having trouble getting the filling into a particular spot don’t worry, it will melt into those areas, it doesn’t need to be perfect.
  5. Briefly heat the remaining 2 tablespoons oil in a large skillet over medium heat. Stir in the turmeric, making sure it spreads evenly through the oil. Lay the naan in the skillet and cook until crisp and golden brown on the bottom—3 minutes. Gently turn it over and cook the other side until it is golden brown and the cheese inside has melted—for 3 minutes more. Cut the naan into sixths or quarters and serve immediately.

Keep It Simple:

  • Though most stores are carrying naan bread these days, there are lots of substitutes that you can use for this recipe if it’s hard to find: Pita works very nicely, you can use two tortillas and make it like a quesadilla, or use the filling in between two slices of regular loaf bread, creating an outrageous grilled cheese.
  • Turmeric has a warm, peppery flavor and adds a great bright yellow color to the dish, but it can successfully be replaced with paprika or garlic powder or simply left out.
  • Green chiles come in a small can and can usually be found next to the refried beans, taco sauce and tortillas in your grocery store.
  • Instead of buying frozen corn or corn in a can use the kernels from one ear of fresh corn. Simply place the husked ear in boiling water for 5 minutes or better yet, put it on your grill till slightly charred. Use a sharp knife to cut down the side of the ear to remove the kernels.

Make It Meaty:

  • Add 2 ounces of very finely chopped cooked chicken to the filling mixture. Or to add an extra protein kick without the meat, add ¼ cup very finely chopped edamame.

Family Friendly:

  • Nothing like hiding broccoli in cheese and between some bread to get your kids to gobble it up. But if the spice from the pepper Jack cheese is too much for them, replace it with mozzarella or cheddar.
: @NikkiDinki

: @NikkiDinkiCooking
 

Find more recipes like this in MORE VEGGIES PLEASE!


You might also like these recipes:

Quinoa Crust Cheese Pizzas

Quinoa Crust Cheese Pizza_SMALL.jpg

My kids have LOVED pizza since before they could even say “pizza!”

N_275.jpg

This obviously means that we have pizza once a week in our house (or, possibly four times a week?).

Quinoa Crust Cheese Pizza 1.jpg

Often we go out to one of our local pizza places and then eat our slices in the park.

But lately I’ve been trying to find a version I can make at home that's a little healthier—but still satisfies our need for pizza!

Quinoa Crust Cheese Pizza 2.jpg

These quinoa crust pizzas are remarkably easy.

You just cook up some quinoa and mix it with the eggs—which believe it or not—gives you a nice, sturdy crust.

Quinoa Crust Cheese Pizza 3.jpg

If you're trying to understand how that wet mixture of quinoa, eggs, baking powder, and Italian seasoning forms a crust, you'll have to trust me.

It firms up so beautifully in the oven and is one of the most robust alternative-type crusts I've ever made.

Quinoa Crust Cheese Pizza 4.jpg

This crust has a slightly wheat-y taste, which my kids don’t mind at all.

But if you have an extra picky eater, try making the crust on the thin side and loading on the toppings.

This will allow the focus to be more on the flavors of the sauce and cheese rather than the quinoa.

Quinoa Crust Cheese Pizza 5.jpg

This is the kind of meal I love to make because you don’t feel like you're being healthy—you just feel like you're eating pizza!

Quinoa Crust Cheese Pizza 6.jpg

These are also great to freeze so you have individual-sized pizzas ready to go anytime!

Quinoa Crust Cheese Pizza 7.jpg

Quinoa Crust Cheese Pizzas

servings: Eighteen 4-inch pizzas

Ingredients:

  • 1½ cups quinoa
  • 6 large eggs
  • 1½ teaspoons baking powder
  • 1½ teaspoons Italian seasoning
  • 1½ teaspoons kosher salt
  • 2 cups pre-made pizza or tomato sauce
  • 2 cups shredded mozzarella (16 ounces)

Directions:

  1. Preheat the oven to 450°F. Rinse the quinoa in a mesh strainer and then transfer it to a medium saucepan. Add 3 cups of water and bring to a boil over high heat; cover the pan and turn down the heat to maintain a simmer. Let the quinoa cook until it is tender—10 to 15 minutes, then transfer it to a medium bowl and let it cool.
  2. Mix the eggs, baking powder, Italian seasoning, and salt in a small bowl. Then add this mixture to the cooled quinoa and stir to combine.
  3. Line a baking sheet with parchment paper and pour the quinoa onto it; flatten and shape it with your hands into 4-inch-diameter rounds (using about ¼ cup of dough for each round), ¼- to ½-inch thick.
  4. Place the crusts in the oven and bake them until they are golden brown—about 15 minutes. Remove them from the oven and top each with about 2 tablespoons of the pizza or tomato sauce, then 2 tablespoons of the cheese.
  5. Return the pizzas to the oven until the cheese is melted—5 minutes more.

Notes:

  • If your kids are weary of the quinoa crust, try adding some extra toppings so you have a lot of sauce and cheese and just a little crust in each bite. Another option is to make the crusts a little thinner.
  • To Freeze: Let the crusts cool before adding the toppings; once cooled, add the toppings as in Step 4. Freeze the pizzas topped, but not baked. To heat from frozen, bake at 450°F until the cheese is melted and the crust is thawed through—7 to 10 minutes.
: @NikkiDinki

: @NikkiDinkiCooking
Quinoa Crust Cheese Pizza 8.jpg
 

Find more recipes like this in MORE VEGGIES PLEASE!


You might also like these recipes:

Zucchini Crostini with Pomegranate Goat Cheese Spread

Putting the words “zucchini” and “crostini” together made for a lot of fun as they rolled off my tongue…

So I decided to create something to go along with those words that would be just as fun to eat. 

And here you have it! You can have fun saying—and eating!—your Zucchini Crostini! 

Zucchini Crostini with Pomegranate Goat Cheese Spread

servings: 15 Crostini

Ingredients:

  • 4 ounces cream cheese, at room temperature
  • 2 ounces soft goat cheese, at room temperature
  • 2 teaspoons minced fresh thyme leaves
  • Zest of half a lemon
  • ½ teaspoon kosher salt
  • ¼ cup dried cranberries
  • 1 large zucchini, cut diagonally into fifteen ¼-inch-thick slices
  • ¼ cup pomegranate seeds

Directions:

  1. Blend the cream cheese, goat cheese, thyme, lemon zest, and ¼ teaspoon of the salt in a medium bowl. Stir in the cranberries, distributing evenly.
  2. Sprinkle the remaining ¼ teaspoon salt over both sides of the zucchini slices and arrange the slices on a serving platter. Divide the cheese mixture smoothly over the slices and top each with a generous sprinkling of the pomegranate seeds.

Notes:

  • KEEP IT SIMPLE - This pomegranate goat cheese combo is one of my all-time favorite spreads and it works great on classic crackers or bread, too. Just be sure to fold the pomegranate seeds into the spread if you use it this way.
  • While I’m crazy for the goat cheese, these zucchini crostini are super versatile and can be topped with anything from hummus to crab.
  • All you can find are small zucchinis? Not a problem. Just cut the zucchini on more of a diagonal for a larger slice.
: @NikkiDinki

: @NikkiDinkiCooking
 

Find more recipes like this in MORE VEGGIES PLEASE!


You might also like these recipes:

Creamed Spinach Garlic Bread


Sure, you could have regular old garlic bread.


Yes, it is warm, garlicky, and of course, buttery.


But why not throw some creamed spinach into the mix, creating a garlic bread with a creamy, spicy base that also gives you a Popeye’s dose of spinach?!


Read More

Brown Butter Garlic Carrots

If you have read my vegetable-focused cookbook, Meat on the Side, it was probably shocking to learn on page 108 that...I don’t like carrots.

Because as much as I’m a huge veggie fan, I have to say that not all veggies are created equal.

In my mind, carrots just fall low on the list.

But that doesn’t mean I don't eat them.

I know that the more I eat them, the more I’ll get used to them and develop a taste for them.

In other words, I'll actually learn to like them.

So when thinking about a carrot side dish, I knew I wanted it to be delicious to carrot-lovers, carrot-likers, and carrot-tolerators alike. 

And I figured the best way to do this was to invite some of my favorite things like brown butter and garlic to party.

In the end I seriously LOVED these carrots—like shockingly LOVED these carrots.

YOU MUST MAKE THEM!

Brown Butter Garlic Carrots

servings: 2

Ingredients:

  • One 8-ounce bunch carrots, with tops
  • 1 tablespoon olive oil
  • ½ teaspoon kosher salt
  • ¼ teaspoon ground black pepper
  • 4 tablespoons unsalted butter
  • 2 garlic cloves, finely minced
  • 1 cup panko bread crumbs
  • 1 tablespoon finely chopped chives

Directions:

  1. Preheat the oven to 425°F. Place the carrots in a single layer on a baking sheet and toss them with the olive oil, salt, and pepper. Roast in the oven until they are tender and browned in spots—about 30 minutes (If your carrots are thicker, they will take a little longer to cook).
  2. Meanwhile, add the butter to a small saucepan over medium heat, stirring until the butter stops foaming and bubbling and there are brown specks on the bottom of the pan—about 5 minutes.
  3. Remove the pan with the butter from the heat and stir in the garlic, then transfer this mixture to a small bowl and reserve; leaving 1 tablespoon in the pan.
  4. Add the breadcrumbs to the pan with the 1 tablespoon of butter-garlic mixture, stirring to combine, then cook until the breadcrumbs are toasted—2 to 3 minutes.
  5. When the carrots are done cooking, drizzle them with the reserved browned butter and garlic and toss to combine.
  6. Arrange the carrots on a serving plate and top with the breadcrumbs and chives!
: @NikkiDinki

: @NikkiDinkiCooking
 

Find more recipes like this in Meat on the Side!


You might also like these recipes:

Toddler PB + J with Quick Frozen Fruit Jam

Toddler PB+J with Quick Frozen Fruit Jam_SMALL(1).jpg

There are a lot of delicious peanut butters out there, but not as many good jams. 

Toddler PB+J 1.jpg

So I'd like you to imagine an incredibly tasty jam—a jam that is made simply of fruit and a touch of sugar.

Toddler PB+J 2.jpg

And now that you're conjuring up this super appetizing vision, this is where I say, “Oh, but you can make a jam like that yourself!”

Toddler PB+J 3.jpg

And then you snap out of your jam-filled fantasy and say, “Um, Nikki? I really don’t have time to be making my own jam.”

Toddler PB+J 4.jpg

But here's the thing—you do!

It's as easy as grabbing a bag of frozen berries, adding a tablespoon of sugar, and cooking for only 15 minutes.

That’s it!

Toddler PB+J 5.jpg

And if you want to combine this amazing new jam (that you made!) with some peanut butter and hemp seeds on your favorite bread, you suddenly have a seriously awesome lunch for yourself!

Oh, and your kids, too, of course. ;)

Toddler PB+J 6.jpg

Toddler PB + J with Quick Frozen Fruit Jam

servings: 1 sandwich with ¾ cup of jam

Quick Frozen Fruit Jam:

  • One 10-ounce bag frozen fruit (such as mixed berries)
  • 1 tablespoon sugar

Toddler PB + J:

  • 2 slices sandwich bread (such as whole wheat)
  • 2 tablespoons peanut butter
  • 1 teaspoon hemp hearts
  • 2 tablespoons Quick Frozen Fruit Jam

Quick Frozen Fruit Jam:

  1. In a small saucepan over high heat, combine the frozen fruit, 2 tablespoons of water, and the sugar. Bring this mixture to a high simmer, stirring occasionally and breaking up the fruit with a spoon.
  2. Continue cooking the fruit mixture over high heat, stirring occasionally, until the mixture is thick enough to leave trails in the pan when stirred—10 to 15 minutes.
  3. Remove the pan from the heat and allow it to sit for 10 to 15 minutes, then transfer the fruit mixture to a small bowl. Place the bowl in the refrigerator for at least 30 minutes to allow the jam to set and chill.

Toddler PB + J:

  1. Spread one slice of bread with the peanut butter, then sprinkle it with the hemp hearts.
  2. Spread the Quick Frozen Fruit Jam onto the other slice of bread, then sandwich the two slices of bread together.

Notes:

  • The ¾ cup of jam yielded by the Quick Frozen Fruit Jam can make 6 sandwiches.
  • You can omit the sugar if you prefer; the jam will still be super tasty.
  • If you use tarter fruits, such as cranberries, you may need more sugar.
: @NikkiDinki

: @NikkiDinkiCooking
Toddler PB+J 7.jpg
 

Find more recipes like this in Meat on the Side!


You might also like these recipes:

Broccoli Tater Tots

Broccoli Tots_BIG.jpg

Does anyone really want to eat their broccoli steamed?

Sitting there, waterlogged and sad on the side of the plate?

Broccoli Tots 1.jpg

I don’t know about you, but broccoli tater tots seem like a MUCH more exciting way to eat this green veggie!

Broccoli Tots 2.jpg

Sure, these tots take a minute or so longer than steaming up some florets, but I’ve streamlined the process for you.

And they're the perfect food to store in the freezer, so yes, you can have tots ANYTIME!

Broccoli Tots 3.jpg

To make them, just mix together finely chopped broccoli (stems and all!), throw in some eggs, seasonings, a touch of cheese and flour...

Broccoli Tots 4.jpg

Form them into whatever shapes you like and let them roll around in a flurry of panko and crushed tortilla chips...

Broccoli Tots 5.jpg

Then bake them up into crunchy perfection!

You'll never look at broccoli the same way!

Broccoli Tots 6.jpg

Broccoli Tater Tots

servings: 36 tater tots

Ingredients:

  • ¾ cup crushed yellow corn tortilla chips
  • ¾ cup plain panko bread crumbs
  • ½ teaspoon paprika
  • 1 large bunch broccoli (about 1½ pounds), entire stem + florets coarsely chopped + rinsed
  • ¾ cup grated parmesan cheese (about 3½ ounces)
  • ½ cup all-purpose flour
  • 3 large eggs
  • 2 teaspoons kosher salt
  • 1½ teaspoon garlic powder
  • Pinch of ground black pepper

Directions:

  1. Preheat the oven to 425°F. Add the corn chips to the food processor and pulse until the chip pieces are close to the size of panko breadcrumbs (this should make about 1 cup). If you don’t have a food processor you can also place the chips in a Ziploc bag and smash them with a pan or rolling pin. Then transfer the corn chip pieces to a medium-sized bowl along with the panko and paprika and mix these ingredients well.
  2. Clean the bowl of the food processor, then place the broccoli inside and pulse until it is coarse and grain-like in texture (you should have about 4 cups of this broccoli “rice”).
  3. Transfer the broccoli to a large bowl with the parmesan, flour, eggs, salt, garlic powder, and pepper and mix together to combine.
  4. Using your hands, roll the broccoli mixture and pack it tightly by the tablespoon into tater tot (or other desired) shapes approximately 1 inch wide and 2 inches long. Roll each tot in the corn chip breading mixture, reshaping afterwards if necessary.
  5. Place the formed broccoli tots on a nonstick baking pan or a pan lined with parchment paper. Spray the tots lightly with nonstick olive oil spray and bake them until browned—about 20 minutes.

Notes:

  • Freezer Instructions: Place cooked and cooled tots on a baking sheet or plate in a single layer. Let freeze completely; once frozen place them in a plastic food storage bag. To reheat, place in a 425°F oven on a baking sheet and cook for 10 minutes
: @NikkiDinki

: @NikkiDinkiCooking
 

FIND more recipes like this in MEAT ON THE SIDE!


You might also like these recipes:

Spaghetti Squash Crust Pizza


Cauliflower is definitely having its moment in the sun.


One of the reasons it’s so popular is that everyone is churning out cauliflower crust pizzas--and loving how tasty an all-veggie crust can be!


Read More

Sundried Tomato + Pesto Mac and Cheese Cups

Baked Boxed Mac and Cheese Cups 2_SMALL(1).jpg

Why make your mac and cheese into a cup?

Baked Boxed Mac and Cheese Cups 1.jpg

Why not?!

It’s cute, your kids will be more likely to eat it no matter what is inside, and you can serve it at parties!

And did I mention how cute it is?!

Baked Boxed Mac and Cheese Cups 2.jpg

For this hacked version of mac and cheese, I'm adding sundried tomatoes and pesto.

Two easy-to-find, jarred ingredients that suddenly make mac and cheese feel elegant!

Baked Boxed Mac and Cheese Cups 3.jpg

All you need to do is make the mac, add the sundried tomatoes, top it with pesto and parm, bake and serve!

Baked Boxed Mac and Cheese Cups 4.jpg

The tomatoes deepen the flavor, while the zingy pesto adds a fresh note!

Baked Boxed Mac and Cheese Cups 5.jpg

It’s mac and cheese that you can suddenly serve to guests!

Or just devour standing in the kitchen on a Tuesday night.

Either way, you win.

Baked Boxed Mac and Cheese Cups 6.jpg

Sundried Tomato + Pesto Mac and Cheese Cups

makes: 10 cups

Ingredients:

  • One 14-ounce box of macaroni and cheese (with liquid cheese packet)
  • ½ cup coarsely chopped sundried tomatoes
  • ¼ cup basil pesto
  • 2 tablespoons grated parmesan cheese

Directions:

  1. Preheat the oven to 350°F and prepare a non-stick muffin tin with cooking spray. Place a medium pot of salted water over high heat for cooking the macaroni. When the water boils, add the macaroni and cook until al dente—about 9 minutes; drain when finished. Return the cooked pasta to the pot and turn the heat down to medium, then stir in the cheese packet and tomatoes.
  2. Scoop ½ cup of the macaroni mixture into each of the prepared muffin cups, then top each cup with about 1 tablespoon of the pesto and about ½ teaspoon of the parmesan.
  3. Bake the cheese cups until the pasta on the top of each is lightly browned but not crunchy—about 12 to 15 minutes. Allow the cups to sit in the pan to cool for at least 10 minutes before unmolding them.
: @NikkiDinki

: @NikkiDinkiCooking
Baked Boxed Mac and Cheese Cups 1_SMALL.jpg
 

Find more recipes like this in Meat on the Side!


You might also like these recipes:

Cucumber Zucchini Salad

Cucumber Zucchini Salad_BIG.jpg

A friend of mine wrote an article about having a ton of zucchini in her family's garden when she was growing up.

So much, in fact, that her family resorted to dressing their excess of squashes in "outfits" and leaving them on a "lucky" neighbor's doorstep (read more).

Cucumber Zucchini Salad 2.jpg

I suppose that is one (uh...ahem) effective way to deal with an excess of zucchini in your garden.

However, may I gently suggest another?

Cucumber Zucchini Salad 3.jpg

To bring another vegetable into the conversation, cucumbers are similar to zucchini.

For instance, both vegetables are delicious raw as well as cooked.

With this in mind, I'd like to point out that anything cucumbers can do, zucchinis can do also!

Cucumber Zucchini Salad 4.jpg

So instead of making the same old cucumber salad (don't get me wrong, those cucumber salads can be delicious!), I decided to bring our mutual friend, Mr. Zucchini, to the pickling party.

Cucumber Zucchini Salad 5.jpg

The best think about this Cucumber Zucchini Salad is that it takes only a few minutes to make and only a few more to marinate.

Cucumber Zucchini Salad 6.jpg

In the end, you have a light, refreshing salad with crunchy cucumbers and zucchini that are seriously a match made in heaven.

And as a bonus, it’s like -20 calories (okay, not really, but I'm sure it's close)!

Cucumber Zucchini Salad 7.jpg

Cucumber Zucchini Salad

servings: 4 cups

Ingredients:

  • 1 English cucumber (about 12 ounces)
  • 1 medium zucchini (about 8 ounces)
  • ½ small red onion (about 2 ounces), very thinly sliced
  • 1 teaspoon kosher salt
  • ½ cup apple cider vinegar
  • 2 tablespoons granulated sugar
  • ½ teaspoon red pepper flakes

Directions:

  1. Using a mandoline or a sharp knife, cut the cucumber and zucchini into very thinly sliced rounds. When you are finished slicing, you should have about 2 cups of cucumber and 1½ cups of zucchini.
  2. In a medium size bowl, toss the cucumber and zucchini slices with the onion and salt, allow this mixture to sit for 30 minutes, then transfer it to a colander to drain off the excess liquid. Return the veggie mixture to the bowl and set aside.
  3. Next, combine the vinegar, sugar, and red pepper flakes, whisking or stirring until the sugar has dissolved. Then pour this mixture over the veggie mixture, tossing the veggies to coat them evenly.
  4. Chill the salad for at least 30 minutes in the refrigerator. Be sure to drain off any excess liquid once again, before serving.
: @NikkiDinki

: @NikkiDinkiCooking
 

FIND more recipes like this in MEAT ON THE SIDE!


You might also like these recipes:

Creamy + Spicy Corn Dip

>


I didn't just get the nickname “Picky Nikki” for no reason at all, no, I gave my mother so many reasons to call me “Picky” that I'm almost surprised that she ever called me anything else.


When I talk about my childhood I sometimes generalize and say that I ate no vegetables.


Read More

Cauliflower Egg Salad Sandwich

cauliflower.gif

So you think adding cauliflower to your egg salad is weird?

While it may sound newfangled, twenty years from now, this version will be a household staple everywhere—it’s that good.

Cauliflower Egg Salad 2.jpg

A little steamed cauliflower added to a traditional egg salad gives you the perfect texture you didn’t know was missing from the classic recipe.

Cauliflower Egg Salad 3.jpg

But the egg salad is still soft and creamy when you bite into it.

Cauliflower Egg Salad 5.jpg

Let's not forget to mention that this recipe includes the perfect combo of mayo, mustard, celery, and scallions—and, of course, those beautiful eggs!

It's hard for me to talk about this any more without actually eating the sandwich, like, RIGHT NOW!

Cauliflower Egg Salad 7.jpg

Veggies shouldn’t just make things healthier, they should make things better!

And this is a better sandwich.

Cauliflower Egg Salad 1.jpg

Cauliflower Egg Salad Sandwich

makes: 2 sandwiches, with about 2 cups of egg salad

Ingredients:

  • 4 large eggs
  • 1½ teaspoons kosher salt
  • ¼ head cauliflower, stems removed + broken into florets or coarsely chopped
  • ½ cup mayonnaise
  • ¼ cup finely chopped celery
  • 1 tablespoon finely chopped scallions
  • 2 teaspoons mustard
  • ½ teaspoon paprika
  • 4 slices white bread
  • 4 pieces romaine lettuce
  • 1 medium tomato, sliced

Directions:

  1. Begin by hardboiling the eggs; in a small saucepan, arrange them in a single layer and add cold water until it reaches an inch above them. Set the saucepan over high heat and bring the water to boiling. Then cover, remove from the heat, and let the eggs sit for 10 minutes. Transfer the eggs to a bowl of ice water and set this aside to cool; peel when ready to use.
  2. Add ½ inch of water and 1 teaspoon of the salt to a large saucepan and bring this to boiling over medium-high heat. Next, add the cauliflower, cover, and cook until the cauliflower is tender but not mushy—3 to 5 minutes. Drain and run the cauliflower under cold water, finely chop it, and then pat it dry (this should give you about 1½ cups of cooked, finely chopped cauliflower).
  3. Peel the eggs and finely chop them. Place the cauliflower, eggs, mayonnaise, celery, scallions, mustard, paprika, and remaining ½ teaspoon of salt into a large bowl. Gently toss this mixture until it is well combined.
  4. Place a slice of bread on each of 2 plates. Mound the salad on top, dividing equally. Then divide the lettuce and tomato between both sandwiches, and top each with a piece of bread. Cut each sandwich in half and enjoy!

Notes:

  • Sometimes you can find cauliflower florets in a container in your produce section. If you buy the cauliflower this way, you will need about 6 ounces or 7 to 8 medium/large florets.
: @NikkiDinki

: @NikkiDinkiCooking
 

Find more recipes like this in Meat on the Side!


You might also like these recipes:

Irish Soda Bread

QUESTIONNAIRE:

Have you ever chosen a particular restaurant just because they serve great bread?

Have you ever ordered mussels just to be able to dip large amounts of bread into the broth?

Do you have a loaf of bread on your counter right now that costs more than you would like to admit?

Have you ever chosen a sandwich at a deli based solely on what bread it came on?

If you answered yes to these questions you may be...a BREAD-A-HOLIC.

And you maaaaaaaay love bread as much as I do. Though loving bread as much as I do is a hard and possibly unobtainable goal.

I know, I know, you're disappointed, but only one of us can be the bread queen. And considering I’m pretty sure 80% of my body is made of bread, I have to say I win that title.

As much as I love bread, and as simple as some recipes will tell you it is to make, making your own bread can easily go terribly, terribly wrong (BELIEVE ME!).

This is exactly why when I have a hankering for some fresh bread, I love QUICK BREADS!

You see, they are...well...QUICK! No rising, no kneading, just great bread...QUICK! And the quicker I am eating this bread, the better it is for not only me, but everyone around me. ;)

Irish Soda Bread with Buttermilk Wash

servings: Makes 1 loaf of bread

Buttermilk Wash:

  • ¼ cup butter, melted
  • ¼ cup buttermilk

Irish Soda Bread:

  • 4 cups all-purpose flour
  • ½ cup margarine, softened
  • 4 tablespoons granulated sugar
  • 1 tablespoon baking powder
  • 1 teaspoon baking soda
  • ½ teaspoon kosher salt
  • 1 cup buttermilk
  • 1 large egg

Buttermilk Wash:

  1. In a small bowl, combine the butter and the buttermilk, then set aside.

Irish Soda Bread:

  1. Preheat oven to 375° F. Then lightly grease a large baking sheet.
  2. In a large bowl, mix together the flour, margarine, sugar, baking powder, baking soda, and salt. Stir in the buttermilk and egg and mix until just combined.
  3. Turn the dough out onto a lightly floured surface and knead slightly. Then form the dough into a round and place it on the prepared baking sheet. Then brush the dough with the Buttermilk Wash.
  4. Use a sharp knife to cut an 'X' into the top of the loaf, then bake until a toothpick inserted into the center of the loaf comes out clean--40 to 50 minutes. During the baking process, brush the loaf with the Buttermilk Wash at least once.

Notes:

  • The buttermilk wash will burn if it gets on your pan, so try to not let it drip too much over the sides of the bread.
  • You can brush with the buttermilk as often as you wish, but just be sure you give it at least 10 minutes with no extra brushing of the wash at the end of the baking time to allow the top to brown completely.
  • It is supposed to be a little chunky and not overly smooth, so don’t over knead it.
: @NikkiDinki

: @NikkiDinkiCooking
 

Find more recipes like this in Meat on the Side!


You might also like these recipes:

Silent Recipe!: Creamed Spinach Garlic Bread


Sure, you could have regular old garlic bread.


Yes, it is warm, garlicky, and of course, buttery.


But why not throw some creamed spinach into the mix, creating a garlic bread with a creamy, spicy base that also gives you a Popeye’s dose of spinach?!


Read More

Kraft-Style Mac + Cheese with Cauliflower + Sweet Potato

As a kid--and still, as an adult--I was (am!) obsessed with mac and cheese.

But my kid-self wanted nothing to do with any kind of homemade mac and cheese sporting a bubbling crust.

Gross!

No, if it didn’t come out of a box, I wouldn’t go near it.

It’s been a couple of years, but there are still a lot of kids out there just like me (and maybe some adults, too).

So how do you get your kids to eat a homemade mac and cheese that’s also packed with veggies?

You make it look and taste as much like the original as possible!

The base of this sauce is pureed veggies.

There's no butter and no milk.

But there are so many hidden veggies inside, it will make your head spin.

It’s time to lose the box (...at least, sometimes)!

Kraft-Style Mac + Cheese with Cauliflower + Sweet Potato

servings: 6

Ingredients:

  • ½ tablespoon extra-virgin olive oil
  • 1 small yellow onion, coarsely chopped (about ¾ cups)
  • 2 garlic cloves, sliced
  • ½ medium head cauliflower, cut into large chunks, (about 1 pound or 3 cups)
  • 1 large sweet potato, peeled + cut into 1-inch chunks (about ½ pound or 1¼ cups)
  • 1 cup vegetable stock
  • 1¼ + ½ teaspoon kosher salt, more to taste
  • 8 ounces shredded cheddar cheese (about 2 cups)
  • 8 ounces American cheese (12 slices)
  • 1½ pounds macaroni pasta

Directions:

  1. Place a large pot of salted water over high heat for cooking the macaroni. Heat the oil in a large saucepan set over medium heat. Add the onion and garlic, and sauté until tender—5 to 7 minutes. Stir in the cauliflower, sweet potato, vegetable stock, and the 1¼ teaspoon salt. Bring this mixture to a boil, and then reduce the heat to a simmer. Cook covered, stirring occasionally, until the vegetables are tender—about 20 minutes. This should give you about ¼ cup liquid along with the veggies.
  2. Place the veggie mixture in a blender and process it until it is completely smooth. Add more stock or water if there is not enough liquid to blend easily.
  3. Then transfer the mixture back to the saucepan over low heat. Add the cheddar cheese, American cheese, and remaining ½ teaspoon salt; stir until the cheese melts (depending on the saltiness of your stock and cheese you may not need this extra ½ teaspoon of salt). Add more stock if your mixture is too thick or if it thickens over time.
  4. When the water boils, add the macaroni and cook according to the package directions. When done, drain and transfer the macaroni to the saucepan with the veggie and cheese mixture. Toss to combine and serve.

Notes:

  • You can use any combination of cheese that you like—cheddar, parmesan, fontina or provolone— though I do like to include a little American or Velveeta in my mix, as it gives the cheese sauce the right consistency.
  • This version is on the simple side; for a flavor that makes a bigger impact, I suggest stirring in some salsa or adding sautéed peppers to the mix.
: @NikkiDinki

: @NikkiDinkiCooking
 

Find more recipes like this in Meat on the Side!


You might also like these recipes: