Brown Butter Garlic Carrots

If you have read my vegetable-focused cookbook, Meat on the Side, it was probably shocking to learn on page 108 that...I don’t like carrots.

Because as much as I’m a huge veggie fan, I have to say that not all veggies are created equal.

In my mind, carrots just fall low on the list.

But that doesn’t mean I don't eat them.

I know that the more I eat them, the more I’ll get used to them and develop a taste for them.

In other words, I'll actually learn to like them.

So when thinking about a carrot side dish, I knew I wanted it to be delicious to carrot-lovers, carrot-likers, and carrot-tolerators alike. 

And I figured the best way to do this was to invite some of my favorite things like brown butter and garlic to party.

In the end I seriously LOVED these carrots—like shockingly LOVED these carrots.

YOU MUST MAKE THEM!

Brown Butter Garlic Carrots

servings: 2

Ingredients:

  • One 8-ounce bunch carrots, with tops
  • 1 tablespoon olive oil
  • ½ teaspoon kosher salt
  • ¼ teaspoon ground black pepper
  • 4 tablespoons unsalted butter
  • 2 garlic cloves, finely minced
  • 1 cup panko bread crumbs
  • 1 tablespoon finely chopped chives

Directions:

  1. Preheat the oven to 425°F. Place the carrots in a single layer on a baking sheet and toss them with the olive oil, salt, and pepper. Roast in the oven until they are tender and browned in spots—about 30 minutes (If your carrots are thicker, they will take a little longer to cook).
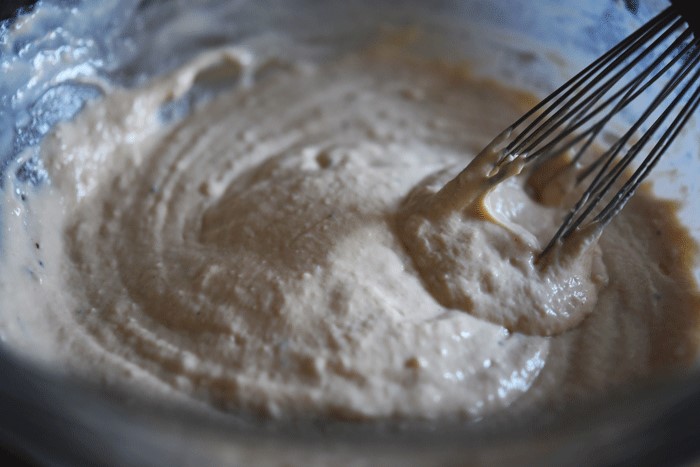
  2. Meanwhile, add the butter to a small saucepan over medium heat, stirring until the butter stops foaming and bubbling and there are brown specks on the bottom of the pan—about 5 minutes.
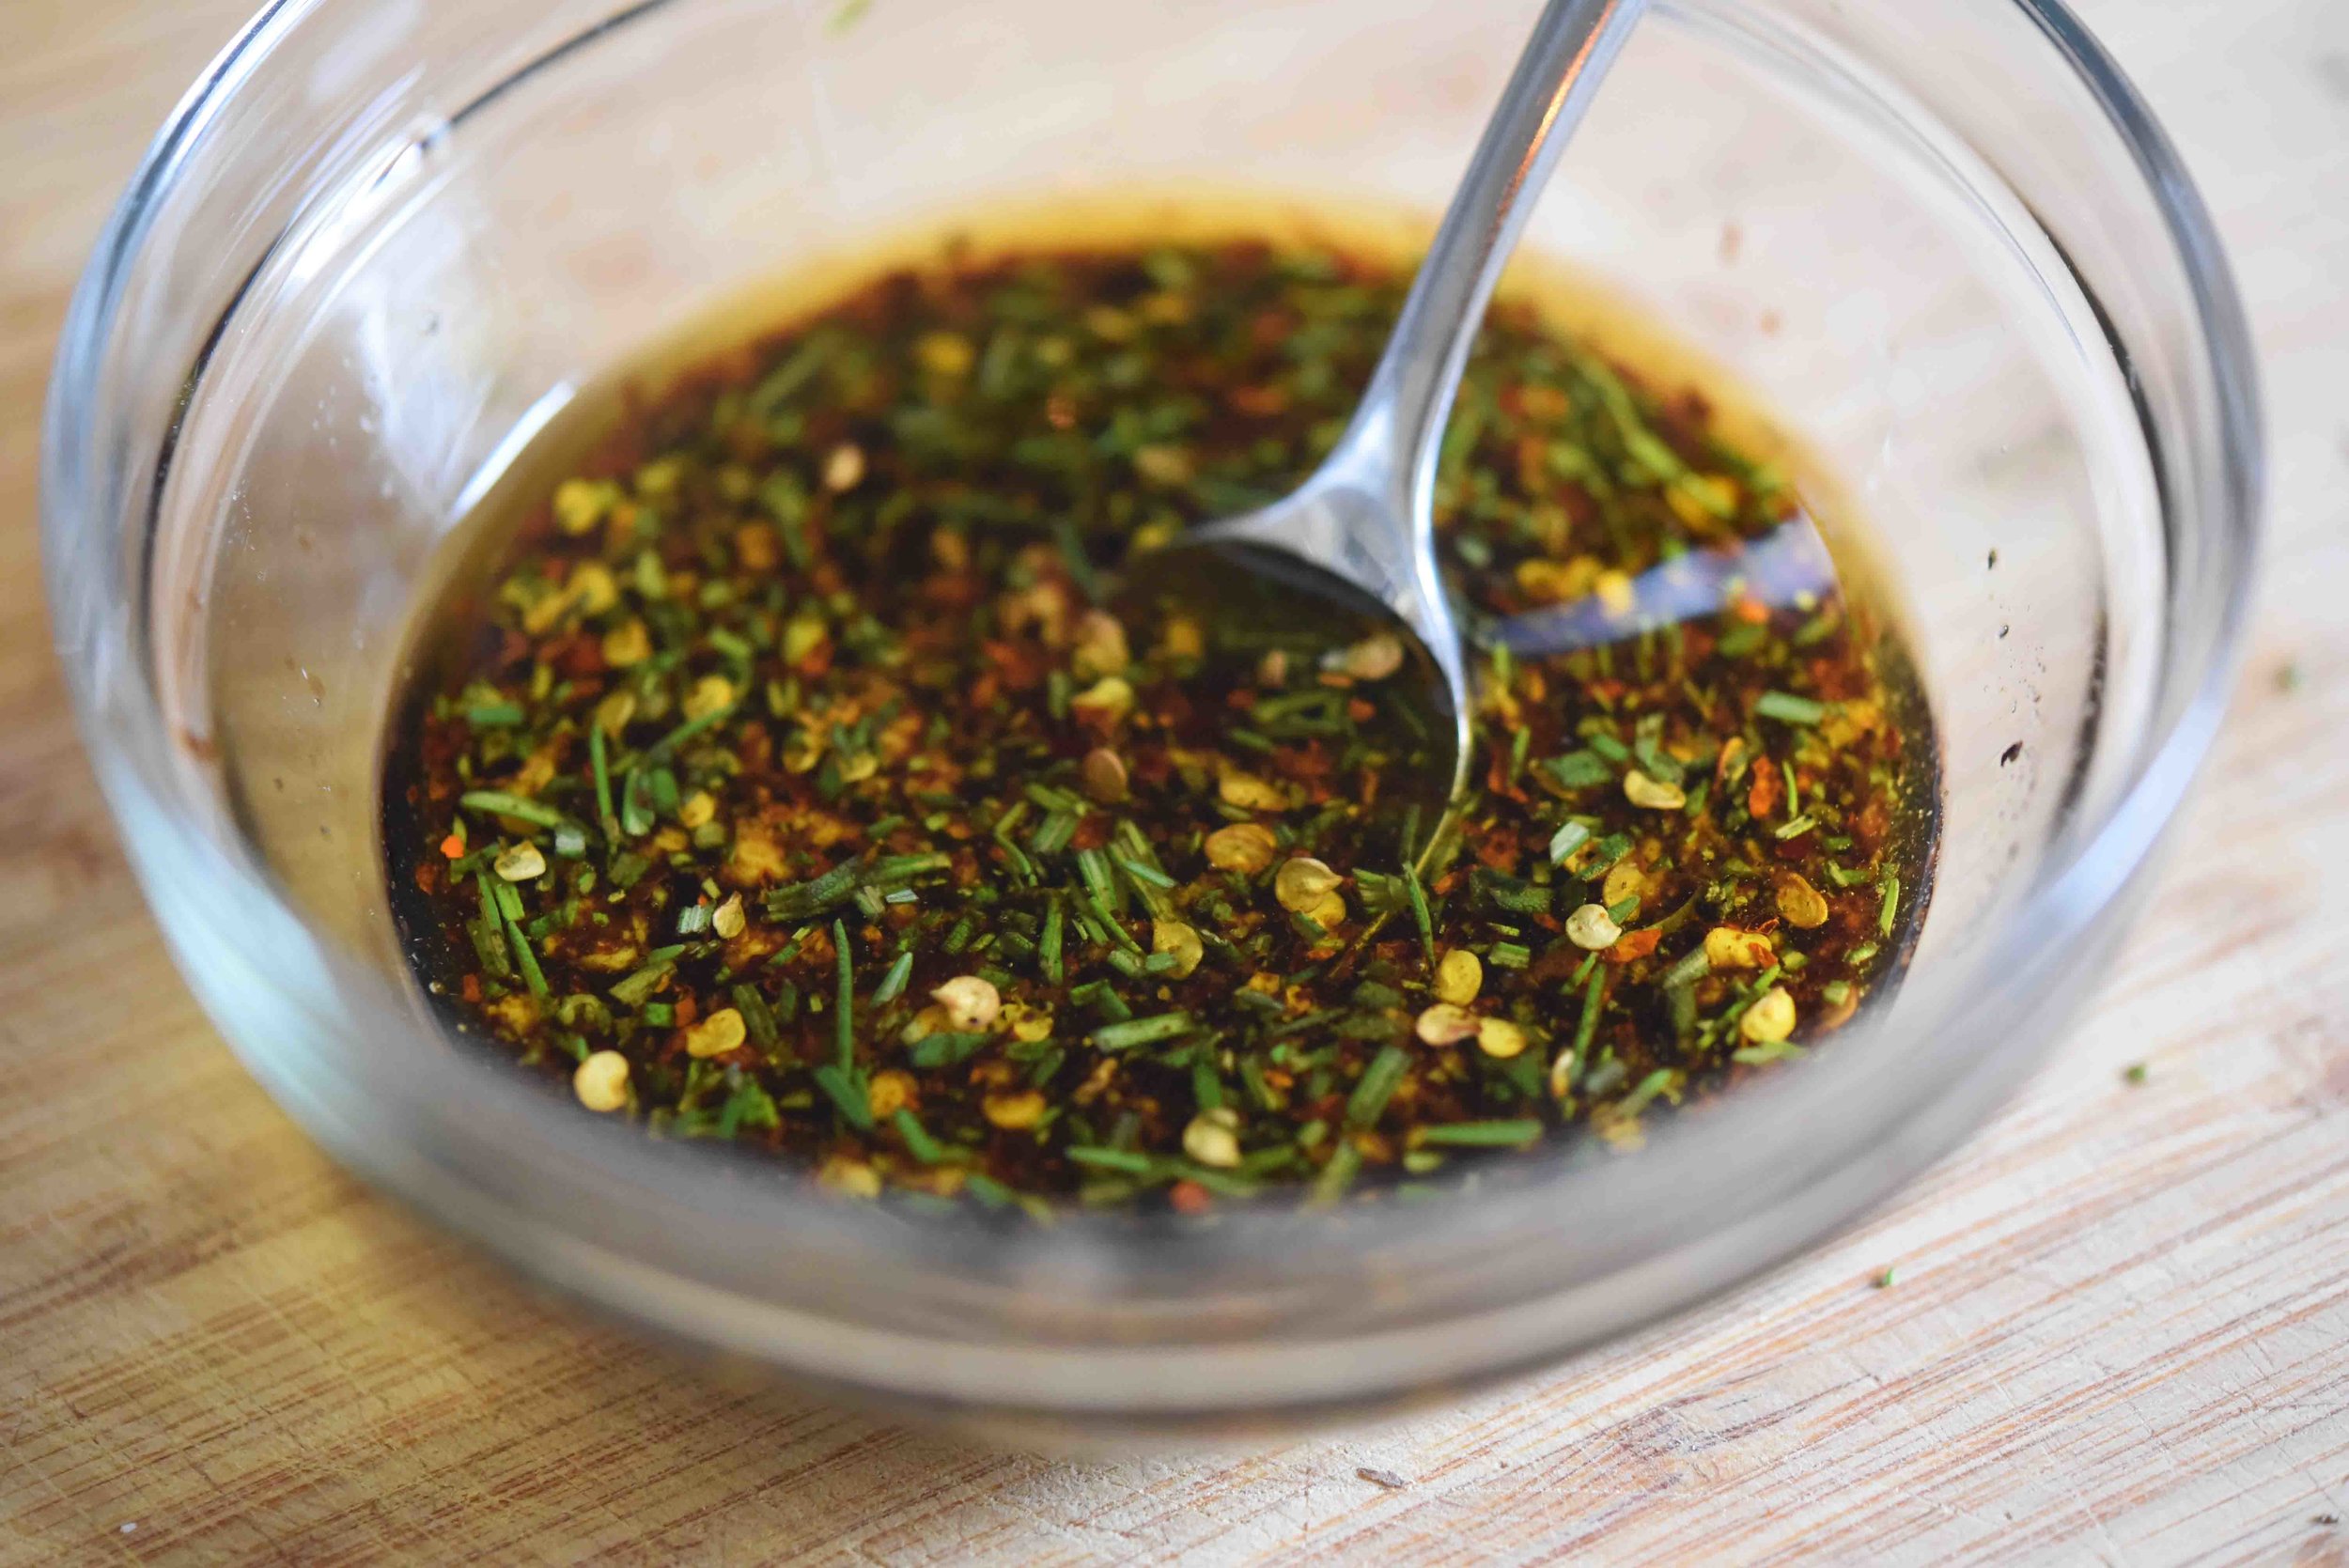
  3. Remove the pan with the butter from the heat and stir in the garlic, then transfer this mixture to a small bowl and reserve; leaving 1 tablespoon in the pan.
  4. Add the breadcrumbs to the pan with the 1 tablespoon of butter-garlic mixture, stirring to combine, then cook until the breadcrumbs are toasted—2 to 3 minutes.
  5. When the carrots are done cooking, drizzle them with the reserved browned butter and garlic and toss to combine.
  6. Arrange the carrots on a serving plate and top with the breadcrumbs and chives!
: @NikkiDinki

: @NikkiDinkiCooking
 

Find more recipes like this in Meat on the Side!


You might also like these recipes:

Broccoli Tater Tots

Broccoli Tots_BIG.jpg

Does anyone really want to eat their broccoli steamed?

Sitting there, waterlogged and sad on the side of the plate?

Broccoli Tots 1.jpg

I don’t know about you, but broccoli tater tots seem like a MUCH more exciting way to eat this green veggie!

Broccoli Tots 2.jpg

Sure, these tots take a minute or so longer than steaming up some florets, but I’ve streamlined the process for you.

And they're the perfect food to store in the freezer, so yes, you can have tots ANYTIME!

Broccoli Tots 3.jpg

To make them, just mix together finely chopped broccoli (stems and all!), throw in some eggs, seasonings, a touch of cheese and flour...

Broccoli Tots 4.jpg

Form them into whatever shapes you like and let them roll around in a flurry of panko and crushed tortilla chips...

Broccoli Tots 5.jpg

Then bake them up into crunchy perfection!

You'll never look at broccoli the same way!

Broccoli Tots 6.jpg

Broccoli Tater Tots

servings: 36 tater tots

Ingredients:

  • ¾ cup crushed yellow corn tortilla chips
  • ¾ cup plain panko bread crumbs
  • ½ teaspoon paprika
  • 1 large bunch broccoli (about 1½ pounds), entire stem + florets coarsely chopped + rinsed
  • ¾ cup grated parmesan cheese (about 3½ ounces)
  • ½ cup all-purpose flour
  • 3 large eggs
  • 2 teaspoons kosher salt
  • 1½ teaspoon garlic powder
  • Pinch of ground black pepper

Directions:

  1. Preheat the oven to 425°F. Add the corn chips to the food processor and pulse until the chip pieces are close to the size of panko breadcrumbs (this should make about 1 cup). If you don’t have a food processor you can also place the chips in a Ziploc bag and smash them with a pan or rolling pin. Then transfer the corn chip pieces to a medium-sized bowl along with the panko and paprika and mix these ingredients well.
  2. Clean the bowl of the food processor, then place the broccoli inside and pulse until it is coarse and grain-like in texture (you should have about 4 cups of this broccoli “rice”).
  3. Transfer the broccoli to a large bowl with the parmesan, flour, eggs, salt, garlic powder, and pepper and mix together to combine.
  4. Using your hands, roll the broccoli mixture and pack it tightly by the tablespoon into tater tot (or other desired) shapes approximately 1 inch wide and 2 inches long. Roll each tot in the corn chip breading mixture, reshaping afterwards if necessary.
  5. Place the formed broccoli tots on a nonstick baking pan or a pan lined with parchment paper. Spray the tots lightly with nonstick olive oil spray and bake them until browned—about 20 minutes.

Notes:

  • Freezer Instructions: Place cooked and cooled tots on a baking sheet or plate in a single layer. Let freeze completely; once frozen place them in a plastic food storage bag. To reheat, place in a 425°F oven on a baking sheet and cook for 10 minutes
: @NikkiDinki

: @NikkiDinkiCooking
 

FIND more recipes like this in MEAT ON THE SIDE!


You might also like these recipes:

White Bean Pancakes

White Bean Pancakes 1_SMALL(1).jpg

Every Sunday my husband takes my daughter, Ivy, to the diner for pancakes while I try to catch up on a weeks-worth of sleep.

White Bean Pancakes 2(1).jpg

Ivy LOVES pancakes.

And when I found out that her iron levels were a little on the low side, I started thinking about how I could get more iron into her diet.

White Bean Pancakes 3(1).jpg

Pancakes were just the thing!

I’ve done Acorn Squash Pancakes, so I figured why not try a new version by adding an iron-rich bean instead of the squash?!

White Bean Pancakes 4(1).jpg

I put a can of drained and rinsed cannellini beans in my batter, and I’m telling you, the result looks and tastes JUST LIKE regular pancakes!

White Bean Pancakes 5(1).jpg

It was so simple (opening a can of beans!) to turn a semi-indulgent breakfast into one we can feel really good about eating!

It’s easy to “eat healthy” when you’re eating like this!

White Bean Pancakes 6(1).jpg

White Bean Pancakes

makes: 10 to 12 medium (4 to 5 inches in diameter) pancakes

Ingredients:

  • One 15-ounce can cannellini beans (about 1¾ cups), rinsed + drained
  • 1½ cups all-purpose flour
  • 1 cup whole milk
  • 5 ounces frozen spinach (about 1 cup), thawed + drained (optional)
  • 2 large eggs
  • 1½ teaspoons baking powder
  • 1 teaspoon vanilla extract
  • ½ teaspoon kosher salt
  • 1 tablespoon unsalted butter

Directions:

  1. Add the beans, flour, milk, spinach (if desired), eggs, baking powder, vanilla, and salt to a blender, and blend this mixture until it is smooth.
  2. Next, add the butter to a large skillet over medium heat. Once the pan is hot, pour about ½ cup of the batter into the pan; this will make one pancake about 4 inches in diameter. Cook the batter until bubbles start to pop on its surface. Then flip the pancake and cook it until the other side is also brown and the edges are dry—about 3 to 5 minutes per side. Repeat with the remainder of the batter.
  3. Serve with extra butter, syrup, fruit, or whatever you like!

Notes:

  • If you prefer fluffier pancakes, separate the yolks and whites of the eggs. Rather than following Step 1 as written, add the beans, flour, milk, spinach (if desired), egg yolks, baking powder, vanilla, and salt, to a blender, and blend this mixture until it is completely smooth; then transfer to a large bowl. Meanwhile, beat the egg whites in a medium bowl with a handheld electric mixer on medium-high until they are white and fluffy and have soft peaks (they should be about 4 times larger than their starting size)—about 2 minutes; you could also whisk by hand or do this in a stand mixer. Gently fold the whipped egg whites into the bean and flour mixture, deflating them as little as possible. Then proceed to Step 2 as written above.
: @NikkiDinki

: @NikkiDinkiCooking
White Bean Pancakes 7(1).jpg
 

Find more recipes like this in Meat on the Side!


You might also like these recipes:

Buffalo Chicken Boxed Mac + Cheese

Buffalo Chicken Boxed Mac and Cheese_SMALL.jpg

Buffalo Mac and Cheese—made in minutes and good for you?!

If  you think you're dreaming, I would suggest pinching yourself! Then read on!

Buffalo Chicken Boxed Mac and Cheese 1.jpg

I wanted to bring all the usual Buffalo chicken suspects to the table: Franks RedHot Sauce, celery, and chicken, of course.

Then to make sure you feel good about piling your plate with seconds, we'll toss in some wilted spinach, which also livens things up a bit.

Buffalo Chicken Boxed Mac and Cheese 2.jpg

And because you already have butter in there from the mac and cheese, the hot sauce is all you need to finish off that classic Buffalo flavor.

Buffalo Chicken Boxed Mac and Cheese 3.jpg

This is sinfully delicious, but let’s not forget—you are eating chicken, celery, and spinach.

Buffalo Chicken Boxed Mac and Cheese 4.jpg

So it really is a complete meal, veggies included!

Dig in, already!

Buffalo Chicken Boxed Mac and Cheese 5.jpg

Buffalo Chicken Boxed Mac + Cheese

makes: 3 cups

Ingredients:

  • One 7.25-ounce boxed mac + cheese with cheese powder (such as Kraft Macaroni + Cheese Dinner Original)
  • 4 tablespoons unsalted butter
  • 2 tablespoons whole milk
  • 2 tablespoons Frank’s RedHot Original Cayenne Pepper Sauce
  • 1 cup lightly packed fresh baby spinach (about 1½ ounces)
  • 4 ounces cooked chicken, chopped (about 1 cup)
  • ¾ cup finely chopped celery (about 3 stalks)
  • Pinch of blue cheese (optional)

Directions:

  1. Place a medium pot of salted water over high heat for cooking the macaroni. When the water boils, add the macaroni and cook according to the package directions; drain when finished.
  2. Return the pasta to the same pot over medium heat, adding the butter, milk, hot sauce, and cheese powder packet, then stir all ingredients to combine.
  3. Add the spinach, chicken, and ½ cup of the celery, then stir to incorporate all ingredients and wilt the spinach.
  4. To serve, top with the remaining celery and a sprinkle of blue cheese (if desired).
: @NikkiDinki

: @NikkiDinkiCooking
Buffalo Chicken Boxed Mac and Cheese 6.jpg
 

Find more recipes like this in Meat on the Side!


You might also like these recipes:

Sundried Tomato + Pesto Mac and Cheese Cups

Baked Boxed Mac and Cheese Cups 2_SMALL(1).jpg

Why make your mac and cheese into a cup?

Baked Boxed Mac and Cheese Cups 1.jpg

Why not?!

It’s cute, your kids will be more likely to eat it no matter what is inside, and you can serve it at parties!

And did I mention how cute it is?!

Baked Boxed Mac and Cheese Cups 2.jpg

For this hacked version of mac and cheese, I'm adding sundried tomatoes and pesto.

Two easy-to-find, jarred ingredients that suddenly make mac and cheese feel elegant!

Baked Boxed Mac and Cheese Cups 3.jpg

All you need to do is make the mac, add the sundried tomatoes, top it with pesto and parm, bake and serve!

Baked Boxed Mac and Cheese Cups 4.jpg

The tomatoes deepen the flavor, while the zingy pesto adds a fresh note!

Baked Boxed Mac and Cheese Cups 5.jpg

It’s mac and cheese that you can suddenly serve to guests!

Or just devour standing in the kitchen on a Tuesday night.

Either way, you win.

Baked Boxed Mac and Cheese Cups 6.jpg

Sundried Tomato + Pesto Mac and Cheese Cups

makes: 10 cups

Ingredients:

  • One 14-ounce box of macaroni and cheese (with liquid cheese packet)
  • ½ cup coarsely chopped sundried tomatoes
  • ¼ cup basil pesto
  • 2 tablespoons grated parmesan cheese

Directions:

  1. Preheat the oven to 350°F and prepare a non-stick muffin tin with cooking spray. Place a medium pot of salted water over high heat for cooking the macaroni. When the water boils, add the macaroni and cook until al dente—about 9 minutes; drain when finished. Return the cooked pasta to the pot and turn the heat down to medium, then stir in the cheese packet and tomatoes.
  2. Scoop ½ cup of the macaroni mixture into each of the prepared muffin cups, then top each cup with about 1 tablespoon of the pesto and about ½ teaspoon of the parmesan.
  3. Bake the cheese cups until the pasta on the top of each is lightly browned but not crunchy—about 12 to 15 minutes. Allow the cups to sit in the pan to cool for at least 10 minutes before unmolding them.
: @NikkiDinki

: @NikkiDinkiCooking
Baked Boxed Mac and Cheese Cups 1_SMALL.jpg
 

Find more recipes like this in Meat on the Side!


You might also like these recipes:

Cucumber Zucchini Salad

Cucumber Zucchini Salad_BIG.jpg

A friend of mine wrote an article about having a ton of zucchini in her family's garden when she was growing up.

So much, in fact, that her family resorted to dressing their excess of squashes in "outfits" and leaving them on a "lucky" neighbor's doorstep (read more).

Cucumber Zucchini Salad 2.jpg

I suppose that is one (uh...ahem) effective way to deal with an excess of zucchini in your garden.

However, may I gently suggest another?

Cucumber Zucchini Salad 3.jpg

To bring another vegetable into the conversation, cucumbers are similar to zucchini.

For instance, both vegetables are delicious raw as well as cooked.

With this in mind, I'd like to point out that anything cucumbers can do, zucchinis can do also!

Cucumber Zucchini Salad 4.jpg

So instead of making the same old cucumber salad (don't get me wrong, those cucumber salads can be delicious!), I decided to bring our mutual friend, Mr. Zucchini, to the pickling party.

Cucumber Zucchini Salad 5.jpg

The best think about this Cucumber Zucchini Salad is that it takes only a few minutes to make and only a few more to marinate.

Cucumber Zucchini Salad 6.jpg

In the end, you have a light, refreshing salad with crunchy cucumbers and zucchini that are seriously a match made in heaven.

And as a bonus, it’s like -20 calories (okay, not really, but I'm sure it's close)!

Cucumber Zucchini Salad 7.jpg

Cucumber Zucchini Salad

servings: 4 cups

Ingredients:

  • 1 English cucumber (about 12 ounces)
  • 1 medium zucchini (about 8 ounces)
  • ½ small red onion (about 2 ounces), very thinly sliced
  • 1 teaspoon kosher salt
  • ½ cup apple cider vinegar
  • 2 tablespoons granulated sugar
  • ½ teaspoon red pepper flakes

Directions:

  1. Using a mandoline or a sharp knife, cut the cucumber and zucchini into very thinly sliced rounds. When you are finished slicing, you should have about 2 cups of cucumber and 1½ cups of zucchini.
  2. In a medium size bowl, toss the cucumber and zucchini slices with the onion and salt, allow this mixture to sit for 30 minutes, then transfer it to a colander to drain off the excess liquid. Return the veggie mixture to the bowl and set aside.
  3. Next, combine the vinegar, sugar, and red pepper flakes, whisking or stirring until the sugar has dissolved. Then pour this mixture over the veggie mixture, tossing the veggies to coat them evenly.
  4. Chill the salad for at least 30 minutes in the refrigerator. Be sure to drain off any excess liquid once again, before serving.
: @NikkiDinki

: @NikkiDinkiCooking
 

FIND more recipes like this in MEAT ON THE SIDE!


You might also like these recipes:

Spicy Shrimp Tacos on Jicama Shells + Pineapple Avocado Salsa

shrimp taco on jicama shell small.jpg

There are a lot of cool things going on in this recipe.

First, the shrimp get tossed in cumin, paprika, and garlic powder, which gets them nice and spicy and gives them TONS of flavor.

shrimp taco on jicama shell 4.jpg

Next, you're making a spread of creamy sour cream, spicy chipotle, and cool lime.

Not to mention that you're also whipping up a pineapple avocado salsa—that you should just go ahead and make extra of, because you will want to put it on EVERYTHING.

shrimp taco on jicama shell 5.jpg

And last, all of this goodness goes on a piece of jicama that is sturdy yet flexible, and adds another layer of freshness and crunch to the dish.

shrimp taco on jicama shell 7.jpg

And because it’s really just a slice of jicama, it takes almost no extra time.

shrimp taco on jicama shell 8.jpg

You could use these components separately in lots of dishes this summer, or you could combine them all and make the most outrageous tacos—that are actually crazy healthy for you.

shrimp taco on jicama shell 3.jpg

Whatever you do, you are eating good tonight!

shrimp taco on jicama shell 6.jpg

Spicy Shrimp Tacos on Jicama Shells + Pineapple Avocado Salsa

servings: 4; makes 8 small tacos

Pineapple Avocado Salsa:

  • 1½ cup finely chopped pineapple
  • 1 avocado, finely chopped (about 1 cup)
  • 1 red pepper, finely chopped (about ½ cup)
  • Juice of half a lime
  • 2 teaspoons finely chopped cilantro
  • 1 teaspoon kosher salt

Shrimp Tacos with Jicama Taco Shells:

  • ½ cup sour cream
  • Zest of 1 lime
  • 1 tablespoon chipotle puree *see note
  • 2 teaspoons kosher salt
  • One-1½ pound jicama, about 4-5 inches wide
  • 3 tablespoons olive oil
  • ½ teaspoon cumin
  • ½ teaspoon paprika
  • ½ teaspoon garlic powder
  • 16-20 large/extra large shrimp (about ¾ to 1 pound)
  • Pineapple Avocado Salsa
  • Cilantro, for a garnish

Pineapple Avocado Salsa:

  1. In a large bowl, combine the pineapple, avocado, red pepper, lime juice, cilantro, and salt. Mix together and set aside.

Shrimp Tacos with Jicama Taco Shells:

  1. In a small bowl, combine the sour cream, lime zest, chipotle puree, and 1½ teaspoons of the salt. Mix together and set aside.
  2. Peel the jicama and cut it in half widthwise, creating two circular pieces. Place one of the halves on a mandolin cut-side down and set the mandolin for about 1/12 inch-thick slices (You should set the dial between ⅛ and 1/16, but closer to the 1/16 mark.). Your slices should be thin enough to bend without breaking, but thick enough to hold the filling. Also, if the jicama is too big for your mandoline, trim one of the sides until it fits. After slicing the jicama, you should have about 20 “taco shells” (the extras can be saved for up to a week in the fridge). Discard the ends or use for another purpose.
  3. Heat a large skillet over medium heat and add the oil, cumin, paprika, garlic powder, and the remaining ½ teaspoon of the salt. Cook the spices for 1 minute, then add the shrimp and cook it until it is pink and cooked through—about 2-3 minutes. Note: You can cut the shrimp in half prior to cooking if you prefer; the smaller the shrimp, the better they fit into the jicama taco shell, which also makes the taco a little easier to eat.
  4. Place the jicama shells on plates and sprinkle each with a touch of salt. Next top with the sour cream mixture, then the shrimp, and finally the Pineapple Avocado Salsa. Garnish with extra cilantro if desired.

Notes:

  • You’ll find chipotles in adobo in a small can next to your taco fixings in the supermarket. A whole chipotle pepper is generally too spicy for a recipe, so I take the whole can and puree it in the food processor or blender. Then you can measure out what you need. Store the remaining puree by placing in the bottom of a Ziploc bag and allowing it to freeze like that so you get a log shape. Then just slices off as much of the frozen puree as you need in the future.
: @NikkiDinki

: @NikkiDinkiCooking
shrimp taco on jicama shell 2 small.jpg
 

Find more recipes like this in Meat on the Side!


You might also like these recipes:

Lentil + Carrot Chicken Nuggets

Lentil Carrot Chicken Nuggets_SMALL(1).jpg

The classics are the classics for a reason—they're delicious!

Lentil Carrot Chicken Nuggets 1.jpg

Chicken nuggets are simple and simply tasty, and with so many options out there—from the grocery store to McDonalds—you may ask yourself, why make them myself?

Lentil Carrot Chicken Nuggets 2.jpg

Well, I'll tell you why!

These nuggets are worth making because they're unlike anything you can buy.

They're actually half lentils and carrots, and yet they taste like the good-old fashioned chicken nuggets you (and your kids!) are used to! 

Lentil Carrot Chicken Nuggets 3.jpg

The lentils get slightly pureed, which allows them to pretty much melt into the meat.

As for the carrots, you will see some small specks of them in the mix—so if your kids are super weary, you can always skip them.

Or if you’re feeling crazy, you could use parsnips instead!

Lentil Carrot Chicken Nuggets 4.jpg

Like many of my toddler recipes, these are the kinds of things that I make huge batches of and freeze.

Lentil Carrot Chicken Nuggets 6.jpg

And a freezer full of chicken nuggets is a happy freezer indeed!!

Lentil Carrot Chicken Nuggets 8.jpg

Lentil + Carrot Chicken Nuggets

makes: 50 nuggets

Ingredients:

  • 1¾ cups chicken stock
  • 1 cup dry split red lentils
  • 2 cubes chicken bouillon
  • 2 cups grated carrots (about 6 ounces)
  • 1 pound ground chicken
  • ½ cup grated parmesan cheese
  • 1 teaspoon garlic powder
  • 1 teaspoon onion powder
  • 1 teaspoon kosher salt
  • ½ cup Italian breadcrumbs
  • 1 tablespoon olive oil

Directions:

  1. Place the chicken stock, lentils and bouillon in a small saucepan. Bring the stock to a boil, then reduce it to a simmer and cook the lentils until the broth is fully absorbed and the lentils are very soft—about 15 minutes.
  2. Add the carrots to the bowl of a food processor and pulse until they are crumb-like in texture—ground, but not pureed. Then transfer the cooked lentils to the food processor with the carrots and pulse to combine the ingredients.
  3. Next add the chicken, parmesan, garlic powder, onion powder, and salt to the food processor and pulse again until all ingredients are just combined; avoid overmixing.
  4. Scoop the mixture by tablespoons and shape it by hand into nuggets (the easiest way to do this is to form the mixture into a ball, then smash it flat and add dents and curves by hand). Then coat each nugget well in the breadcrumbs.
  5. Heat the oil in a large skillet over medium-high heat; add 10 to 12 nuggets and cook them until all sides of the nuggets are golden brown—4 to 6 minutes per side. Repeat this process until all of the nuggets have been cooked.

Notes:

  • If you prefer to bake the nuggets rather than frying them, preheat the oven to 425°F. Place the prepared nuggets on a parchment-lined or nonstick baking sheet. Spray the nuggets with olive oil cooking spray and bake them until they are light golden and cooked through—about 15 to 20 minutes. Note that the nuggets will be paler in color—not as brown—than if you were to cook them as in Step 5. The air fryer is also a great option!
  • Freeze It: Once nuggets are totally cooked, throw them into a plastic storage bag, and freeze. From frozen reheat the nuggets in an oven preheated to 375°F for 8 to10minutes.
  • Hack It: Don’t think your kids are going to go for a handmade chicken nugget? Try to sneak some veggies in by dipping store-bought nuggets in my homemade BBQ sauce or Ketchup.
: @NikkiDinki

: @NikkiDinkiCooking
Lentil Carrot Chicken Nuggets 9.jpg
 

Find more recipes like this in Meat on the Side!


You might also like these recipes:

Creamy + Spicy Corn Dip

>


I didn't just get the nickname “Picky Nikki” for no reason at all, no, I gave my mother so many reasons to call me “Picky” that I'm almost surprised that she ever called me anything else.


When I talk about my childhood I sometimes generalize and say that I ate no vegetables.


Read More

Eggplant Zucchini Meatballs

Eggplant Zucchini Meatballs_SMALL.jpg

My stash of freezer foods for my daughter, Ivy, is one of my greatest sources of pride.

Forget a big bank account—if I have a freezer full of Banana Carrot Oat Muffins, Acorn Squash Pancakes, Cauliflower Tater Tots, and Broccoli Tater Tots, I am truly a rich woman.

Eggplant Zucchini Meatballs 1.jpg

My daughter eats like me—she’s definitely a "Meat On The Side" kiddo.

And she wears her bib proudly.

Eggplant Zucchini Meatballs 2.jpg

She eats every veggie under the sun (even if she doesn’t always know it!), which is incredible!

But I do want to get a little meat into her diet.

And since I know meatballs freeze really well, I went to work perfecting one for the whole family.

Eggplant Zucchini Meatballs 3.jpg

And even though the goal is to add meat here, let's be real—I knew right away I wanted to bring veggies to the party.

I also wanted to make a meatball that was a little on the moist side, so it would be perfect for new eaters who don't have all their teeth yet.  

Eggplant Zucchini Meatballs 4.jpg

Pureed roasted eggplant and zucchini add moisture and a depth of flavor that don't just make these meatballs more nutritious—they elevate them to a ridiculously flavorful level.

Eggplant Zucchini Meatballs 5.jpg

The not-so-secret secret?

You're using vegetable puree instead of milk or any other wet element you might normally add to your favorite meatballs.

Eggplant Zucchini Meatballs 6.jpg

And you end up with an awesome meatball.

Or maybe we should call it a vegemeatball.

Or a meateggieball.

Or maybe not 😉 .

Eggplant Zucchini Meatballs 7.jpg

Eggplant Zucchini Meatballs

servings: 30 to 34 meatballs

Ingredients:

  • 1 small eggplant (about ¾ pound)
  • 1 teaspoon olive oil
  • 1 teaspoon kosher salt
  • ½ teaspoon ground black pepper
  • 1 large zucchini (about ¾ pound)
  • 8 ounces ground beef
  • 1 cup Italian breadcrumbs
  • ½ cup grated parmesan (about 2 ounces)
  • 1 large egg
  • 1 teaspoon finely chopped fresh rosemary leaves
  • ½ teaspoon onion powder
  • ½ teaspoon garlic powder

Directions:

  1. Preheat the oven to 400°F. Cut the eggplant in half lengthwise and place the halves cut-side-up on a rimmed baking sheet. Drizzle them lightly with ½ teaspoon of the oil and then sprinkle ¼ teaspoon of the salt and ¼ teaspoon of the pepper over them. Bake the eggplants until they are very soft—about 15 minutes.
  2. While the eggplant is baking, cut the zucchinis in half lengthwise and drizzle them lightly with the remaining ½ teaspoon of oil and then sprinkle them with ¼ teaspoon of the salt and ¼ teaspoon of the pepper.
  3. Remove the eggplant from the oven and add the zucchini cut-side-up to the same baking sheet. Continue to cook the eggplant and zucchini until the zucchini can be easily pierced with a fork and the eggplant is very soft—25 to 30 minutes more. Then remove the baking sheet from the oven, but leave the oven on.
  4. When the vegetables are cool enough to handle, use a spoon to scrape the flesh of the eggplant into a food processor or blender; discard the skin. Then place the entire zucchini (including the skin) into the food processor as well. Process until pureed; this should give you about 1¾ cups of puree.
  5. Transfer the puree to a large bowl, then add the beef, breadcrumbs, parmesan, egg, rosemary, onion powder, garlic powder, and the remaining ½ teaspoon of salt. Mix to combine well and then form the mixture into tablespoon-sized balls by hand and space them evenly on a prepared baking sheet. Bake the meatballs until they are golden brown—about 30 minutes.

Notes:

  • If you wish, you can sauté the meatballs instead of baking them (if your meatballs are on the moist side, this may be a little harder to do). After forming the mixture into balls, heat 1 tablespoon of olive oil in a large pan over medium heat and cook the meatballs, turning occasionally, until they are golden brown on all sides—8 to 10 minutes.
  • To reheat the meatballs, bake them in an oven preheated to 400°F for 10 to 12 minutes.
: @NikkiDinki

: @NikkiDinkiCooking
Eggplant Zucchini Meatballs 8.jpg
 

Find more recipes like this in Meat on the Side!


You might also like these recipes:

Irish Soda Bread

QUESTIONNAIRE:

Have you ever chosen a particular restaurant just because they serve great bread?

Have you ever ordered mussels just to be able to dip large amounts of bread into the broth?

Do you have a loaf of bread on your counter right now that costs more than you would like to admit?

Have you ever chosen a sandwich at a deli based solely on what bread it came on?

If you answered yes to these questions you may be...a BREAD-A-HOLIC.

And you maaaaaaaay love bread as much as I do. Though loving bread as much as I do is a hard and possibly unobtainable goal.

I know, I know, you're disappointed, but only one of us can be the bread queen. And considering I’m pretty sure 80% of my body is made of bread, I have to say I win that title.

As much as I love bread, and as simple as some recipes will tell you it is to make, making your own bread can easily go terribly, terribly wrong (BELIEVE ME!).

This is exactly why when I have a hankering for some fresh bread, I love QUICK BREADS!

You see, they are...well...QUICK! No rising, no kneading, just great bread...QUICK! And the quicker I am eating this bread, the better it is for not only me, but everyone around me. ;)

Irish Soda Bread with Buttermilk Wash

servings: Makes 1 loaf of bread

Buttermilk Wash:

  • ¼ cup butter, melted
  • ¼ cup buttermilk

Irish Soda Bread:

  • 4 cups all-purpose flour
  • ½ cup margarine, softened
  • 4 tablespoons granulated sugar
  • 1 tablespoon baking powder
  • 1 teaspoon baking soda
  • ½ teaspoon kosher salt
  • 1 cup buttermilk
  • 1 large egg

Buttermilk Wash:

  1. In a small bowl, combine the butter and the buttermilk, then set aside.

Irish Soda Bread:

  1. Preheat oven to 375° F. Then lightly grease a large baking sheet.
  2. In a large bowl, mix together the flour, margarine, sugar, baking powder, baking soda, and salt. Stir in the buttermilk and egg and mix until just combined.
  3. Turn the dough out onto a lightly floured surface and knead slightly. Then form the dough into a round and place it on the prepared baking sheet. Then brush the dough with the Buttermilk Wash.
  4. Use a sharp knife to cut an 'X' into the top of the loaf, then bake until a toothpick inserted into the center of the loaf comes out clean--40 to 50 minutes. During the baking process, brush the loaf with the Buttermilk Wash at least once.

Notes:

  • The buttermilk wash will burn if it gets on your pan, so try to not let it drip too much over the sides of the bread.
  • You can brush with the buttermilk as often as you wish, but just be sure you give it at least 10 minutes with no extra brushing of the wash at the end of the baking time to allow the top to brown completely.
  • It is supposed to be a little chunky and not overly smooth, so don’t over knead it.
: @NikkiDinki

: @NikkiDinkiCooking
 

Find more recipes like this in Meat on the Side!


You might also like these recipes:

Silent Recipe!: Creamed Spinach Garlic Bread


Sure, you could have regular old garlic bread.


Yes, it is warm, garlicky, and of course, buttery.


But why not throw some creamed spinach into the mix, creating a garlic bread with a creamy, spicy base that also gives you a Popeye’s dose of spinach?!


Read More

Kraft-Style Mac + Cheese with Cauliflower + Sweet Potato

As a kid--and still, as an adult--I was (am!) obsessed with mac and cheese.

But my kid-self wanted nothing to do with any kind of homemade mac and cheese sporting a bubbling crust.

Gross!

No, if it didn’t come out of a box, I wouldn’t go near it.

It’s been a couple of years, but there are still a lot of kids out there just like me (and maybe some adults, too).

So how do you get your kids to eat a homemade mac and cheese that’s also packed with veggies?

You make it look and taste as much like the original as possible!

The base of this sauce is pureed veggies.

There's no butter and no milk.

But there are so many hidden veggies inside, it will make your head spin.

It’s time to lose the box (...at least, sometimes)!

Kraft-Style Mac + Cheese with Cauliflower + Sweet Potato

servings: 6

Ingredients:

  • ½ tablespoon extra-virgin olive oil
  • 1 small yellow onion, coarsely chopped (about ¾ cups)
  • 2 garlic cloves, sliced
  • ½ medium head cauliflower, cut into large chunks, (about 1 pound or 3 cups)
  • 1 large sweet potato, peeled + cut into 1-inch chunks (about ½ pound or 1¼ cups)
  • 1 cup vegetable stock
  • 1¼ + ½ teaspoon kosher salt, more to taste
  • 8 ounces shredded cheddar cheese (about 2 cups)
  • 8 ounces American cheese (12 slices)
  • 1½ pounds macaroni pasta

Directions:

  1. Place a large pot of salted water over high heat for cooking the macaroni. Heat the oil in a large saucepan set over medium heat. Add the onion and garlic, and sauté until tender—5 to 7 minutes. Stir in the cauliflower, sweet potato, vegetable stock, and the 1¼ teaspoon salt. Bring this mixture to a boil, and then reduce the heat to a simmer. Cook covered, stirring occasionally, until the vegetables are tender—about 20 minutes. This should give you about ¼ cup liquid along with the veggies.
  2. Place the veggie mixture in a blender and process it until it is completely smooth. Add more stock or water if there is not enough liquid to blend easily.
  3. Then transfer the mixture back to the saucepan over low heat. Add the cheddar cheese, American cheese, and remaining ½ teaspoon salt; stir until the cheese melts (depending on the saltiness of your stock and cheese you may not need this extra ½ teaspoon of salt). Add more stock if your mixture is too thick or if it thickens over time.
  4. When the water boils, add the macaroni and cook according to the package directions. When done, drain and transfer the macaroni to the saucepan with the veggie and cheese mixture. Toss to combine and serve.

Notes:

  • You can use any combination of cheese that you like—cheddar, parmesan, fontina or provolone— though I do like to include a little American or Velveeta in my mix, as it gives the cheese sauce the right consistency.
  • This version is on the simple side; for a flavor that makes a bigger impact, I suggest stirring in some salsa or adding sautéed peppers to the mix.
: @NikkiDinki

: @NikkiDinkiCooking
 

Find more recipes like this in Meat on the Side!


You might also like these recipes:

Garlic + Parmesan Mashed Cauliflower

Mashed potatoes are wonderful, am I right?!

But when you’re looking for a healthier, more nutritious option—let’s talk about mashed cauliflower!

These days, it's not uncommon to have a Thanksgiving Day guest who steers clear of gluten.

And even if you don't, we all want to cook up something that will have everyone at the Thanksgiving table seriously wanting—maybe even needing—to go back for seconds.

It just so happens that you can serve your gluten-free friends and get everyone and their brother excited about the same fabulous food. I’m talking about a mouth-watering, velvety, cheesy side dish…

mashed cauliflower!

And not only is this dish healthy and incredibly delicious, but super simple!

Start by steaming up a little cauliflower and garlic…

Puree it with some cream cheese, Parmesan, and chives… 

And you'll find your result is the creamiest, most flavorful side dish.

It’s definitely worthy of a place next to (or in place of!) your traditional mashed potatoes.

Garlic + Parmesan Mashed Cauliflower

makes: 3 cups

Ingredients:

  • 1 medium head cauliflower (2 pounds), broken or cut into bite-size florets
  • 3 garlic cloves, minced
  • 4 ounces cream cheese, at room temperature
  • ⅓ cup grated Parmesan cheese
  • 1½ teaspoons kosher salt
  • ¼ teaspoon ground black pepper
  • 1 tablespoon finely chopped chives

Directions:

  1. Add the cauliflower and garlic to a large pot and fill it with just enough water so that the vegetables are covered. Simmer until the veggies are tender—about 10 minutes, then drain.
  2. Next, place the cauliflower and garlic mixture in the bowl of a food processor. Add the cream cheese, parmesan, salt, and pepper, and pulse until the mixture is smooth, but with some small lumps. When you are finished, it should look similar to mashed potatoes.
  3. Add the chives to the mixture in the food processor and pulse only a few times—just to combine. Then remove the cauliflower mash from the food processor, place in your favorite serving dish, and enjoy!
: @NikkiDinki

: @NikkiDinkiCooking
 

Find more recipes like this in Meat on the Side!


You might also like these recipes:

Buffalo Cauliflower Wings

In my book, Meat On The Side, I have a Cauliflower Wing recipe...

Cauliflower 2.jpg

I roast cauliflower and toss it with my famous (and famously simple!) Buffalo sauce.

Then I douse it with blue cheese and shaved celery, for a “salad” worthy of an Oscar (Or whatever type of award is appropriate for a salad. Probably not an Oscar, huh?).

It’s an easy and light way to get your Buffalo fix.

However, I've been playing with the whole cauliflower + Buffalo sauce thing for awhile now, and I've recently come up with a new version.

This one has just a few more calories and takes just a little more time, but in the end you are left with something that will really, truly satisfy your craving for wings.

The batter is simple—a combination of flour and milk...

You whisk it up, add some cauliflower, and suddenly start to see the magical way a piece of cauliflower can become a wing.

Once baked, you simply toss these "wings" with Buffalo sauce and, most importantly, prepare yourself to eat them all!

It’s a plate of wings that are baked—not fried! And it's cauliflower—not chicken!

Really, what more could you ask for?!

No need to send a thank you gift, just remember you owe me. ;)

Buffalo Cauliflower Wings

servings: Makes 40-50 cauliflower “wings”

Ingredients:

  • 1½ cups all-purpose flour
  • 1¼ cups whole milk
  • ¾ cup + 2 tablespoons Frank’s RedHot Original Cayenne Pepper Sauce
  • 4 teaspoons Worcestershire sauce
  • 2 teaspoons kosher salt
  • 1 teaspoon garlic powder
  • ¼ teaspoon ground black pepper
  • 1 medium head cauliflower, broken or cut into bite-size florets
  • 8 tablespoons unsalted butter (1 stick)
  • 2 tablespoon distilled white vinegar
  • 2 tablespoon light brown sugar

Directions:

  1. Preheat the oven to 475°F. Line two rimmed baking sheets with foil. Spray the foil generously with nonstick cooking spray.
  2. In a large bowl, whisk together the flour, milk, 2 tablespoons of the hot sauce, 3 teaspoons of the Worcestershire sauce, the salt, garlic powder, and black pepper.
  3. Toss the cauliflower in the batter, then spread it on the baking sheets. Bake the cauliflower until it is slightly browned in spots—about 20 minutes.
  4. While the cauliflower bakes, in a small pot, whisk together the remaining ¾ cup hot sauce, the butter, vinegar, brown sugar, and remaining 1 teaspoon Worcestershire sauce.
  5. Once the cauliflower is browned, remove it from the oven and toss it well in the Buffalo sauce. Turn on the broiler, to high if you have that option. Then return the cauliflower to the baking sheets and cook it under the broiler until it is crispy and browned in spots—2-3 minutes more. Remove the cauliflower from the oven and toss or brush it with the remaining sauce. Enjoy by serving with blue cheese.

Notes:

  • Freezing Instructions: To enjoy later, freeze the completed Buffalo Cauliflower Wings in a single layer (not touching) on a baking sheet lined with foil. Once they are frozen, remove the wings from the baking sheet, place them in a food storage bag, and put them back in the freezer until you are ready to eat them. To reheat, begin by preheating the oven to 375°F and lightly spraying a baking sheet with cooking spray. Cook the wings until they are warmed through, 10-15 minutes, depending on their size.
: @NikkiDinki

: @NikkiDinkiCooking
 

Find more recipes like this in Meat on the Side!


You might also like these recipes:

Balsamic Roasted Onions

Balsamic Roasted Onions 1(1).jpg

I love taking underrated vegetables, shining them up, and showing people just how much delicious-potential they have!

Balsamic Roasted Onions 2(1).jpg

Onions don’t generally get their own place on your dinner table...

Instead, they usually play the supporting role in dishes.

Balsamic Roasted Onions 3(1).jpg

The tick to getting them to take center stage is infusing them with flavor—in this case, balsamic, Dijon, and rosemary.

Balsamic Roasted Onions 4(1).jpg

Then add some sweetness to the mix, and let them roast up to sticky perfection in the oven.

Balsamic Roasted Onions 5(1).jpg

When you treat them right, they become a show-stopping side dish that will be gone before the main meal!

Balsamic Roasted Onions 6(1).jpg

Okay, Mr. Onion, it’s your time to shine!

Balsamic Roasted Onions 7(1).jpg

Balsamic Roasted Onions

servings: 6 to 8

Ingredients:

  • 4 medium Vidalia onions, cut into ½-inch slices (skins left on)
  • ½ cup balsamic vinegar
  • ¼ cup olive oil
  • 3 tablespoons honey, more for drizzling
  • 3 tablespoons Dijon mustard
  • 1 tablespoon finely chopped fresh rosemary leaves
  • 1 teaspoon kosher salt, more for sprinkling
  • 1 teaspoon ground black pepper
  • 1 teaspoon red pepper flakes

Directions:

  1. Place the onions in a large plastic food storage bag or shallow dish. In a small bowl, combine the balsamic, olive oil, honey, mustard, rosemary, salt, pepper, and pepper flakes. Pour this mixture over the onion slices and close the bag or cover the dish. Marinate the onions in the refrigerator for at least 4 hours, or overnight; be sure to occasionally shake the onions around in the bag or stir them in the dish ensure that the marinade gets into all parts of the onions.
  2. Preheat the oven to 400°F. Lay the onion slices in a single layer on a baking sheet, then bake them until the onions are very tender and dark in color—about 55 to 60 minutes, removing them from the oven to lightly baste the tops with more of the vinegar mixture every 15 minutes.
  3. After removing them from the oven, drizzle each of the onions with about ¼ teaspoon of honey and sprinkle each with a pinch of salt.
: @NikkiDinki

: @NikkiDinkiCooking
Balsamic Roasted Onions_SMALL(2).jpg
 

Find more recipes like this in Meat on the Side!


You might also like these recipes:

Salsa Boxed Mac + Cheese

Salsa Boxed Mac and Cheese_SMALL.jpg

This might be my favorite souped-up mac and cheese recipe.

And it’s also the simplest!

Win-win!

Salsa Boxed Mac and Cheese 1.jpg

All you need to do is add some chili powder and scallions!

Salsa Boxed Mac and Cheese 2.jpg

Then top it with some tangy salsa!

It’s so easy, but mac and cheese and salsa just really love each other.

And my belly can't help getting in on this Lovefest, too!

Salsa Boxed Mac and Cheese 3.jpg

Salsa Boxed Mac + Cheese

servings: 2

Ingredients:

  • One 6-ounce box macaroni + cheese with powdered cheese mix
  • ½ cup coarsely chopped scallions, more for a garnish
  • 3 tablespoons whole milk
  • 1½ tablespoons unsalted butter or margarine
  • ¾ teaspoon chili powder
  • ½ cup chunky salsa or pico de gallo

Directions:

  1. Place a medium pot of salted water over high heat for cooking the macaroni. When the water boils, add the macaroni and cook according to the package directions; drain when finished.
  2. Return the pasta to the same pot over medium heat, adding the scallions, milk, butter, cheese powder packet, and chili powder, then stir all ingredients to combine.
  3. To serve, top with the salsa and reserved scallions.
: @NikkiDinki

: @NikkiDinkiCooking
Salsa Boxed Mac and Cheese 4.jpg
 

Find more recipes like this in Meat on the Side!


You might also like these recipes:

Sausage + Pepper Boxed Mac + Cheese

Sausage and Pepper Boxed Mac and Cheese_SMALL(1).jpg

I love this recipe because it makes boxed mac and cheese into a complete meal.

Sausage and Pepper Boxed Mac and Cheese 1.jpg

A complete meal complete with the mouth-watering flavor combination of sausage, peppers, and cheese.

Sausage and Pepper Boxed Mac and Cheese 2.jpg

You sauté up the peppers and sausage while the pasta cooks up, so there's minimal extra time involved in hacking this mac!

Sausage and Pepper Boxed Mac and Cheese 3.jpg

Then it all gets mixed together into one cheesy, porky mess.

Vegetables, protein, cheese, and carbs—not bad for something that (mostly) came out of a box!

Sausage and Pepper Boxed Mac and Cheese 4.jpg

Sausage + Pepper Boxed Mac + Cheese

servings: 4

Ingredients:

  • 4 cups beef stock
  • One 14-ounce box macaroni + cheese with liquid sauce packet
  • 1 teaspoon olive oil
  • 1 medium bell pepper, coarsely chopped
  • 1 link sweet Italian sausage (about 4 ounces), coarsely chopped
  • ½ teaspoon smoked paprika
  • ½ teaspoon kosher salt

Directions:

  1. Add the stock to a large pot over high heat for cooking the macaroni. When the water boils, add the macaroni and cook until al dente—8 to 9 minutes, stirring occasionally; drain when finished, but do not rinse, then return to the pot.
  2. While the pasta cooks, heat the oil in a medium skillet over medium-high heat. Add the pepper, sausage, paprika, and salt and cook until the sausage is browned all over and cooked through—about 5 minutes, stirring to break it up.
  3. Return the pot with the cooked pasta to a burner set at medium heat. Add the cooked peppers and sausage along with the cheese sauce packet, then stir to combine.
  4. To serve, divide evenly among 4 bowls.
: @NikkiDinki

: @NikkiDinkiCooking
Sausage and Pepper Boxed Mac and Cheese 5.jpg
 

Find more recipes like this in Meat on the Side!


You might also like these recipes:

Cauliflower Chive Risotto

Cauliflower Chive Risotto_SMALL.jpg

My goal is a simple one—to always make veggies YUMMY!

Cauliflower Chive Risotto 1.jpg

I like to show people just how delicious and versatile veggies can be.

Cauliflower Chive Risotto 2.jpg

Sure you can roast them and add some seasonings, which will always make them tastier than if they were steamed.

But let’s take it a step further...

Cauliflower Chive Risotto 3.jpg

Let’s add cauliflower to a creamy risotto...

Cauliflower Chive Risotto 4.jpg

This gives the dish great texture, and makes you feel like a rock star after your second helping—because you’ve had a days worth of veggies!

Cauliflower Chive Risotto 5.jpg

Veggies don't just add nutrition to any dish; they also make the dish taste better!

Cauliflower Chive Risotto 6.jpg

And I don’t know about you, but this is the way I like to eat my veggies.

Cauliflower Chive Risotto 7.jpg

Cauliflower Chive Risotto

servings: 4; makes about 4 cups

Ingredients:

  • ½ small head cauliflower (about 8 ounces), or 2 cups prepared cauliflower rice
  • 32-ounce box vegetable stock (4 cups)
  • 2 tablespoons olive oil
  • 1 medium yellow onion, finely chopped
  • 3 garlic cloves, minced
  • 1 cup Arborio rice
  • ½ cup white wine
  • 1¼ cups grated parmesan cheese (4 ounces)
  • ¼ cup finely chopped fresh chives, more for a garnish
  • ½ teaspoon ground black pepper
  • ¼ teaspoon red pepper flakes (optional)
  • 1½ teaspoons kosher salt

Directions:

  1. Roughly chop the cauliflower, then add it to the bowl of a food processor and pulse until it has a coarse, rice-like texture (this should give you about 2 cups), then set it aside.
  2. Next add the vegetable stock to a small saucepan over low heat. While the vegetable stock warms, heat the olive oil in a large skillet over medium-high heat, then add the onion and garlic and cook until the vegetables are soft and translucent—3 to 5 minutes. Add the Arborio rice and continue cooking until it is just toasted—3 to 5 minutes. Then add the wine and stir continuously until it is fully absorbed.
  3. Gradually add the warmed stock to the vegetable and rice mixture, ½ to ¾ cup at a time, stirring very often and waiting until it is fully absorbed before adding more. The more you stir, the creamier your risotto will become. Continue until the rice is just tender and still al dente—20 to 25 minutes.
  4. Add the cauliflower along with ½ to ¾ cup more stock and cook, stirring, until the stock is fully absorbed—about 5 minutes. Then add another ½ cup of stock and repeat. Taste the cauliflower; if it is still a bit raw, add a little more stock and cook for a couple minutes more (note, you may not end up using all of the stock).
  5. Add the parmesan, chives, black pepper, and red pepper flakes if desired. Continue to cook, stirring, until the cheese is melted and the ingredients are well-combined. Add the salt in small amounts to taste (depending on the saltiness of your cheese and stock, you may need more or less than the 1½ teaspoons). Garnish with the additional chives and enjoy!
: @NikkiDinki

: @NikkiDinkiCooking
Cauliflower Chive Risotto 8.jpg
 

Find more recipes like this in Meat on the Side!


You might also like these recipes: